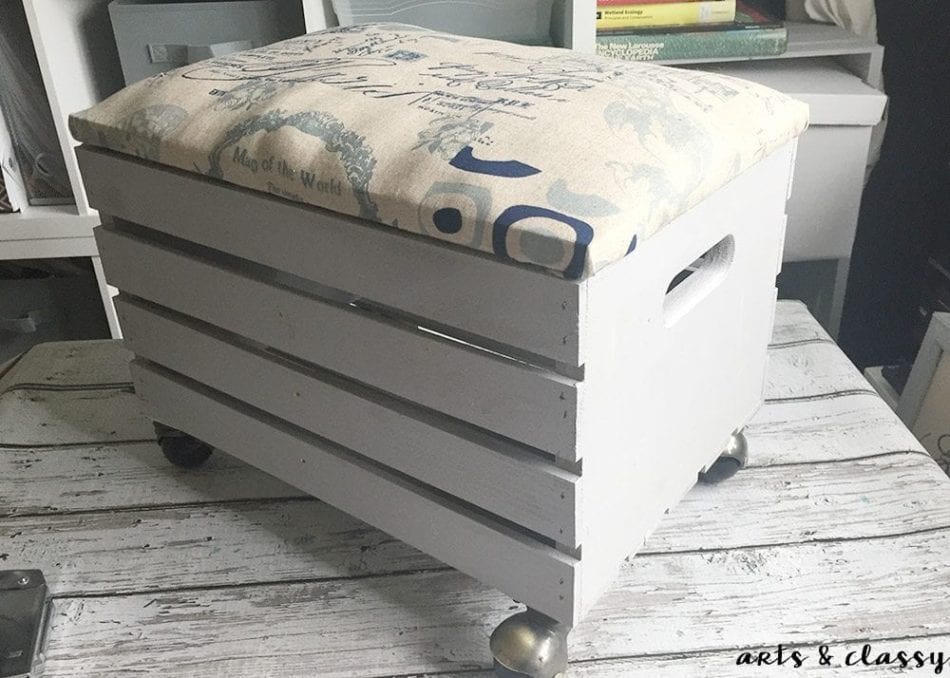
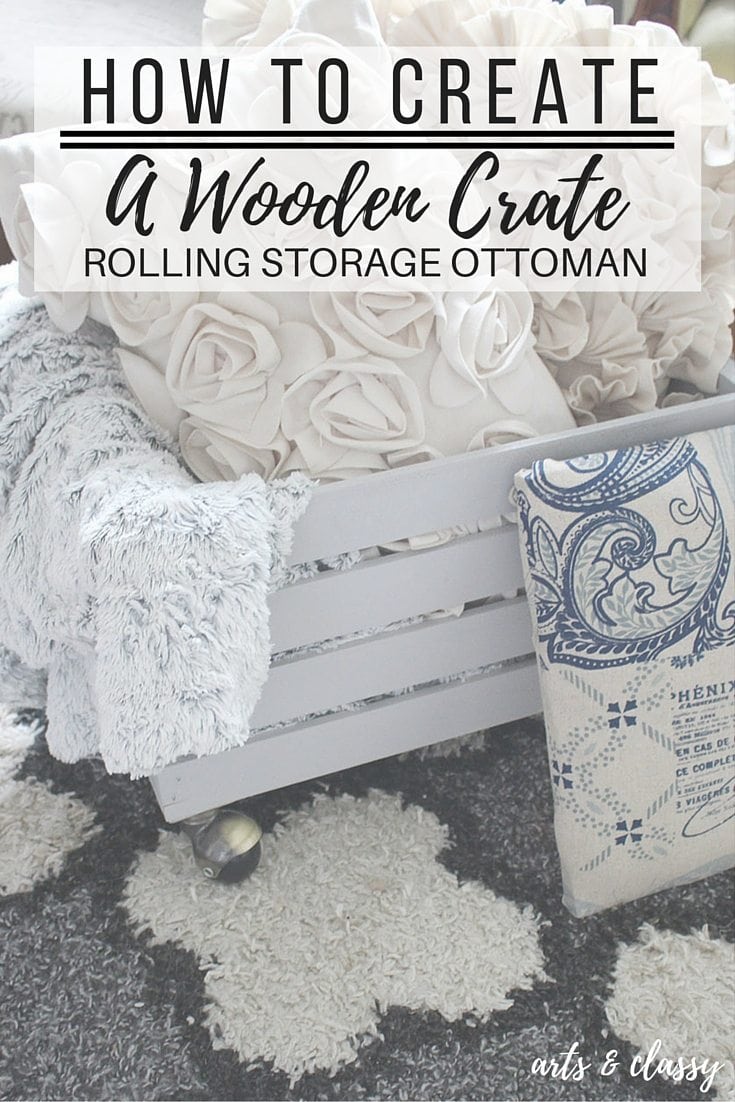
Build A Wood Crate Storage Ottoman For Cheap
I had a fun wood crate project idea come to me. It was inspired by Pinterest by these wooden crates that I had seen some other talented bloggers make into cute and great storage ottomans. I decided to do my own spin on this fun and easy project that could work in or outdoors!
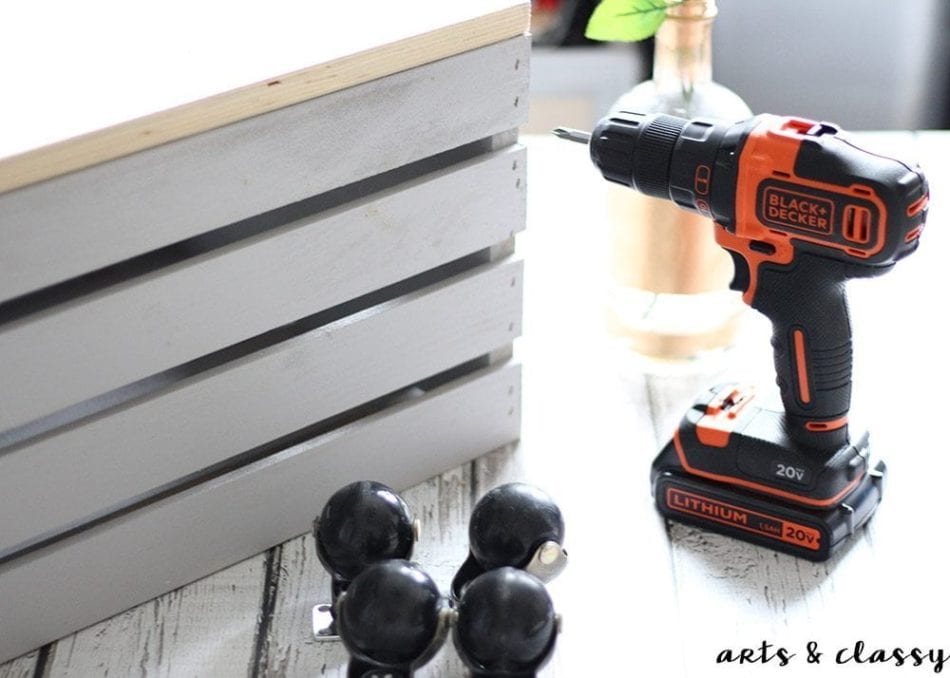
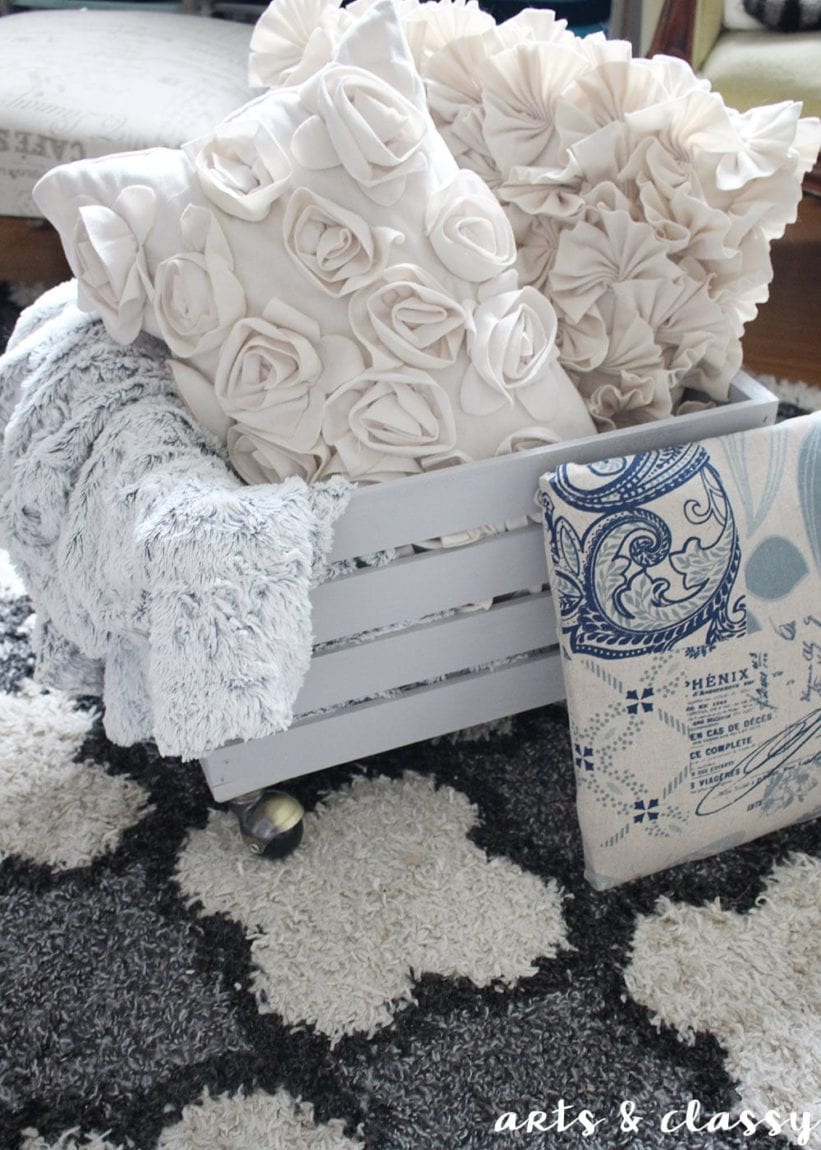
With the help of my NEW Black and Decker cordless drill, I was able to create a cute new wood crate ottoman addition to my home.
Craft supplies you will need for this project:
- Black and Decker Cordless Drill
- Wood Crate or wooden box (You can find them at your local larger craft stores like Michaels or Hobby Lobby). I decided to paint my crate with a light gray, but you can stain it or leave it all natural. You could also try using a fruit crate or vintage crates if a wood crate isn’t an option. These can be found at thrift stores or flea markets.
- Chalk paint or spray paint
- 4 Casters hardware (wheels for your ottoman)
- Plywood pieces 2 cut to the size of my wood crate top. Your crate may have different dimensions. Make sure to measure. I created a lip for my lid so that hinges were not required. I wanted the top to stay in place.
- Batting – I wanted to prove how thrifty you can be with DIY. I took batting from an accent pillow I no longer use and repurposed it as a cushion on the lid.
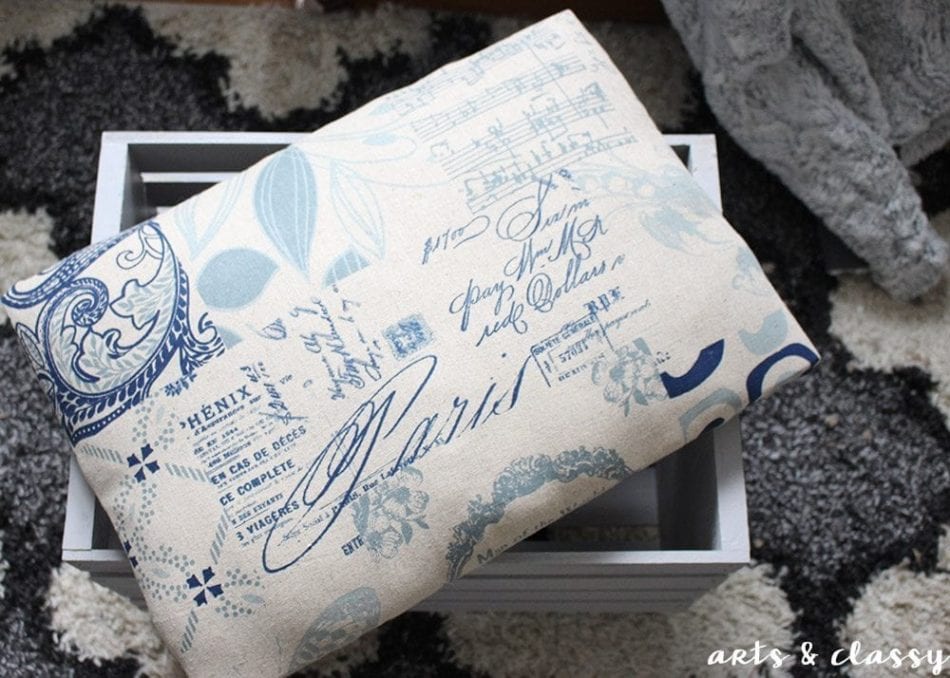
- Fabric of your choice. I used some I had in my own stock. Less than 1 yard was necessary for this project.
- Spray Adhesive
- Staple gun with staples
- Sandpaper
- Wood glue
- Wood screws 1″
- Measuring tape
- Pencil
- Metal 18″ ruler
- Scissors

Step 1 – Attach your wheels to the base of your wood crate.
My most important tool on this project is my new BLACK+DECKER 20V Cordless drill. I love that it is so compact and lightweight. It doesn’t make DIY taxing like heavier power tools can. You don’t need powerful tools for this project. This drill is perfect for smaller DIY projects.
Here is a quick video from my Instagram of how I attached them with my new drill. All you need is your 1″ wood screws to accomplish this step. It took less than 2 minutes.
Step 2 – Measure and cut wood for the top of wood crate
Measure out the top of the lid dimensions based on the exterior dimensions of the crate. My first piece of plywood needed to be cut to 16 5/8″ x 18 3/4.”
I did this at home because I have a circular saw, but you can have your plywood cut to size at most home supply stores like Home Depot.
I wanted my second piece of plywood for the lid to sit within the crate a little to make sure it was snug and secure. Using hinges on this project was not something I wanted to do. My second set of dimensions was 12 3/4″ x 16 3/4.”
Please measure your crate prior to having the plywood cut. Don’t forget to sand the edges of the pieces. No splinters!
Then you will want to use your pencil to place and trace the edges of the smaller wood piece in the right place. Take wood glue and screws to attach the two pieces.
Step 3 – Upholstering the ottoman lid
Attach the batting to the top of the plywood lid with spray adhesive. I had to feng shui mine since I upcycled my batting from an old pillow. You can purchase batting in rolls and upholstery foam would also work.

Cover your lid with fabric and secure it with a staple gun. Once you have properly secured it, trim the fabric so that there isn’t a lot of excess hanging. AND There you have it.
Step 4 – Enjoying the fruits of your labor
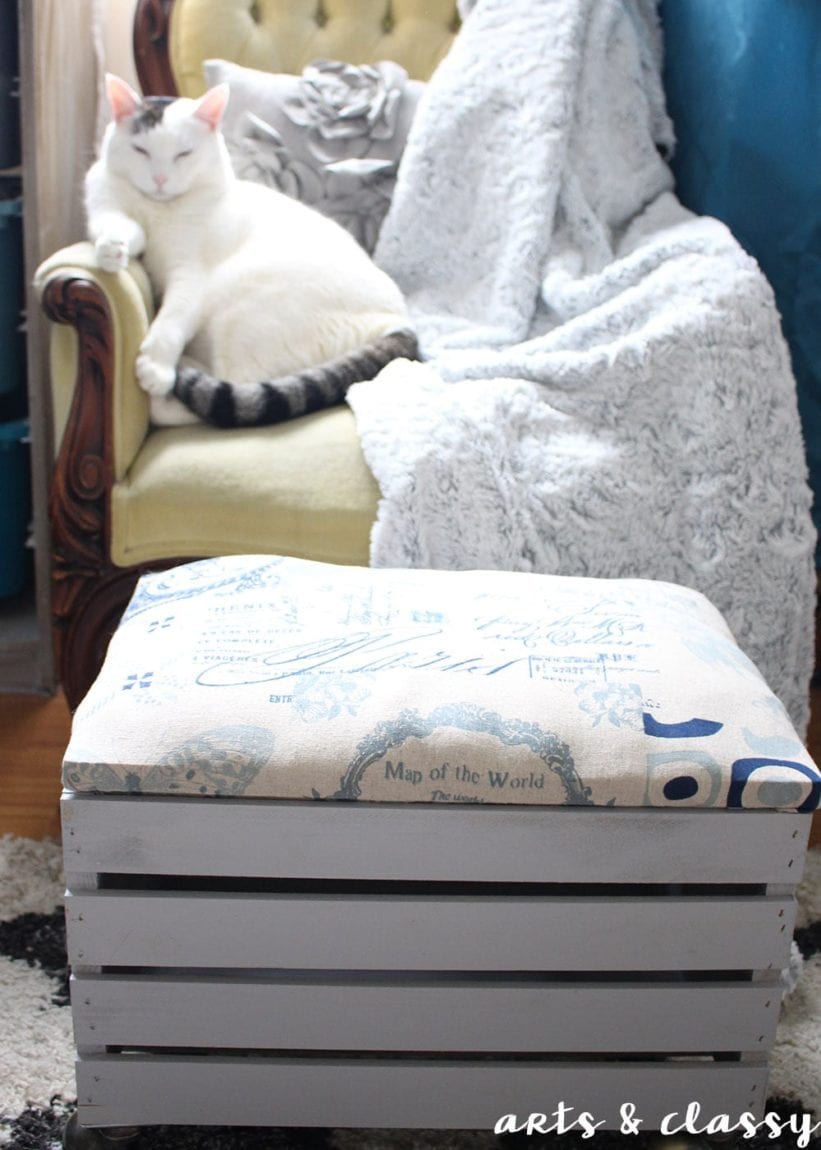
My favorite part. Enjoy your new cute piece of dual purpose furniture. I plan on using mine for additional seating and storage of my throw pillows and blankets in my office. My cats are already enjoying it for me.
RELATED: VINTAGE BEDROOM DRESSER MAKEOVER
I hope you enjoyed this wood crate turned storage ottoman project and fell inspired to try it yourself! Whether you are using a new craft store crate or old wooden crates, this will be a fun and easy DIY for you to make.


I have to build a walk-in closet soon. The use of the drill and saw is perfect for the project!
I would use the drill and saw to build a much needed walk-in closet for my husband and I.
We recently put my desk and computer into an otherwise ‘junk collecting’ closet. Now we just need to create some small storage pieces for either side of the desk to maximize the space. We also need to replace the Rubbermaid metal shelving system with wood shelves and brackets to hold the weight of all my teaching & art books (heavy!). The space is small, and light duty tools could definitely pull this off!
Since I move to Australia I have become a DYI enthusiastic, plenty space to have my crafty room!!! My next project is a toilet roll holder, made up with pallets and some pipes and a B&D cordless drill will be an amazing tool to attach all the bits together!!! Next project is the laundry room!! Plenty ideas on my head, only need a good drill 😉
Have a spare room I am turning into a playroom for my grandson..thinking a couple of these crate ottomans might work for extra storage and seating for the kids…so cute!!
I would like to build a bench for our entry. It would be a nice place for the kids to sit and put their shoes on and I could include storage baskets under it.
OK, you absolutely rocked this one!!! Your photography is PERFECT! My craft room is VERY separate from humanity, but also far away from our woodshop (garage) so having my own set of tools will be extremely nice. way to go, and thanks for hosting this awesome giveaway.
I want to build a Stuffed Animal storage bin for my granddaughter. She has so many stuffed animals that they are all over the place. I have seen many of these storage areas on Amazon that I know I can build it myself and these set of tools would help me complete the project. I could ask my husband to build this but I want to do this myself and his tools are heavy for me to use. Thanks for this blog and the giveaway.
This is awesome! I just moved so have been looking for new ways to decorate the space and get crafty.
OMG I love this! I need to build one to put my Beachbody programs and weights in! Thanks for sharing 🙂
Such a great little DIY! I would use this drill for all the little handy work my family ask me to do and to finally fix up my bar that needs some seriously TCL!
Girl, you are soooo crafty! I am super impressed with this, you need to come to NY and design my home’s interior!
I would use it every day for all of my projects. Currently, our 2 stall garage can not fit any cars in it. It is packed full of projects that I need to get crackin’ on soon! I am looking forward to next week when the kiddos don’t have any camps and I can focus on getting some projects done and getting ready for a sale in a few weeks!! SO MUCH TO DO!
I love this crate/ottoman idea. I would use the Black n Decker to create my own veraion but a bit larger for a toy chest for my littles one ever growing toy pile. And the roling wheels would be such an asset when roling from room to room to clean up. The top would also be a perfect seat or scootch mobile! 😉
Upcoming projects for our new little one includes building a tee-pee! With the back n Decker saw and drill it would be a breeze putting together an indoor tee-pee for many fun adventure/imagination days! Especialy in our hot wheather when we must play inside!!
My husband had a stroke and can no longer do those DIY projects that I always had him do. We have moved to Florida and I now do the maintenance around the house. I would love to add to my tool stash. Then I could start doing my own DIY!
I love this! I am going to see if my hubby will make me one or three! ?
I have 2 projects I would use it on: One is to replace the wooden top of my thrifted and gifted vanity and the chair to match it that was a gift from a good neighbor and fried who died last year from lung and liver cancer.
As a home owner and single mom, I have a long list of DIY projects that these tools would be perfect for! I would love to make the crate ottoman for my back porch, trim out my windows, and add some molding in my living room.
I have so many projects in mind! Right now, I’m planning some small tables for my front porch to go with my new rockers. After seeing this post, though, I’m thinking that the storage ottomans would be a great addition to the porch. I have plenty of outdoor fabric for the cushions that would be beautiful!
I need some tools to help my diy projects go smoother, and I would so make at least one of those crate storage ottomans. We have a small house and any stylish storage is always welvome.
I am dying to build a new desk for my office but don’t have the tools to do it! The saw and drill would be perfect for it.
That’s just my next project on the list I have so many other ideas I could do with these tools.
Meredith, first I’d like to say that this post will come in handy for me after our vacation. I plan on doing several of these storage ottoman’s because we are beginning to lack storage and your post will be very helpful. The black and decker would be great since my husband and I have decided to create lots of storage and built-in bookcases.
Super cute project! We need a circular saw and our drill battery is totally dead so this set would be amazing to win!
I love your website and have found a new way to spend my moments of insomnia! The ottoman is fantastic! I’m inspired to make one, as well as a small bookshelf, for my daughter who has just started college, but will be living at home. I have no doubt this will help transform her room into more of a college dorm feeling, despite having to share her room with her sister! Thanks so much for the inspiration and the wealth of ideas and DIYs on your site!
I’d like to stack together some old drawers I have to make a staggered planter. The saw would be awesome to cut down drawers so they stack well and the Drill would help me Screw the stack together so it’s sturdy. How fun and thank you!!!!
Love that! It looks great and has storage as well. I am definitely going to make one! I would use the drill to make a window seat for my bedroom. I’t would give me much needed storage and give the dog a perch to be able to see out the window. :). I’ve thought about adding wheels so it can be moved to the living room for extra seating, when needed bThanks for sharing this great project and hosting the giveaway!
i am hoping to make a bookcase out of crates and a matching coffee table.
This is so adorable!! And it looks so easy to make! I’d love to win the tools to try it and other diy projects out!!! ?