White & Gold Chevron Tray Makeover
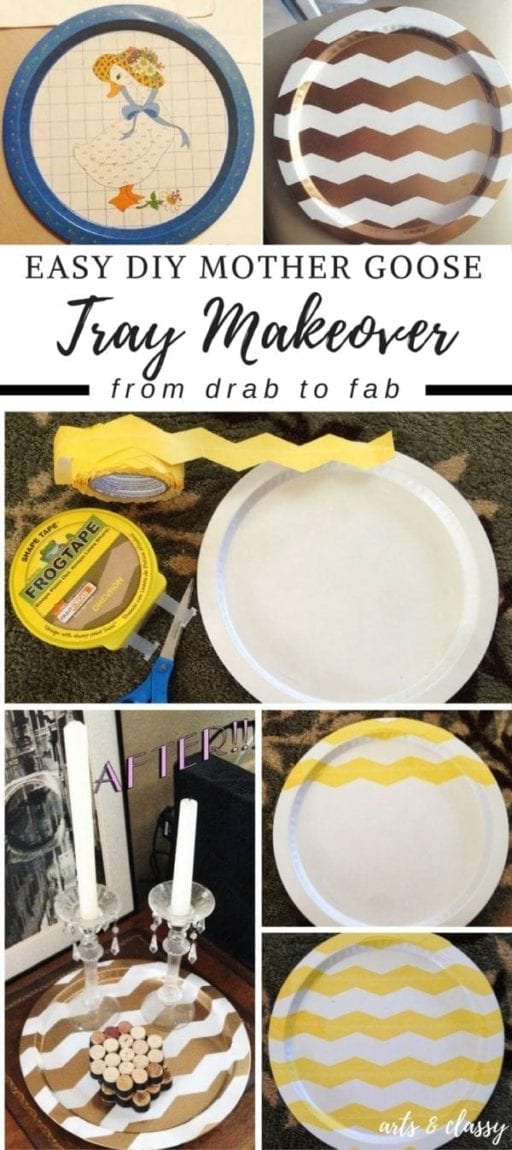
Hey there, lovely readers! Just a couple of weeks back, I shared with you a charming yet slightly dated goose round tray. In case you missed the reveal, no worries—I spilled all the exciting details on both my Facebook page and Instagram. Fast forward to today, and I’m bursting with joy to showcase the remarkable makeover this once-drab tray has undergone. It’s transformed into a chic, simple, and stylish piece that’s ready to grace your home.
Whether you’re eyeing your coffee table, or dresser, or hunting for the perfect centerpiece, this tray has got you covered. From coffee bars to ottomans, we’re exploring creative ideas to infuse charm into every corner of your space. So, buckle up for a journey filled with candles, bowls, and decorative items that’ll elevate your living space to a whole new level.
Didn’t this tray come out great!? Can I also tell you it took me less than a day to make?! All it cost me was a roll of chevron patterned tape and some spray paint! I will show you how I did this project in a step-by-step tutorial!
I spent a total of $22 on this makeover.
I currently have one of the colors from a previous DIY project.

First, you will need the following supplies!
- 2 cans of Spray Paint – You will need to first decide what colors you want to make. (I obviously chose white and gold but pick something to fit your color scheme) But here are links to the ones I used. {side note: I already had the white spray paint from another diy project} Semi-Gloss White Rust-Oleum Spray Paint
- Krylon Metallic Gold Spray Paint
- Frog Tape Shape Tape – Chevron Print
- Scissors
- Masking {i.e. newspapers, scrap paper, paint drop, or scrap rag} Whatever you have around at your disposal.
- A Tray (You choose what works best for you!)
Now on to the Tutorial:
Start by spray painting your tray with the base color of your choosing. I chose white. I also had to do a couple of coats of white to eliminate Mother Goose from sight. I let mine dry overnight, but a couple of hours of dry time should suffice.

Then, you will start measuring out your shape tape lengths and measuring out the spacing between each row.
After careful eyeballing and spacing out the tape, you will peel off the back of the tape and place it directly to the surface.
Hot tip – Start by pressing the center of each piece of tape and work your way out. Sometimes the tape would get wonky on me and I would have to start over. Take your time!
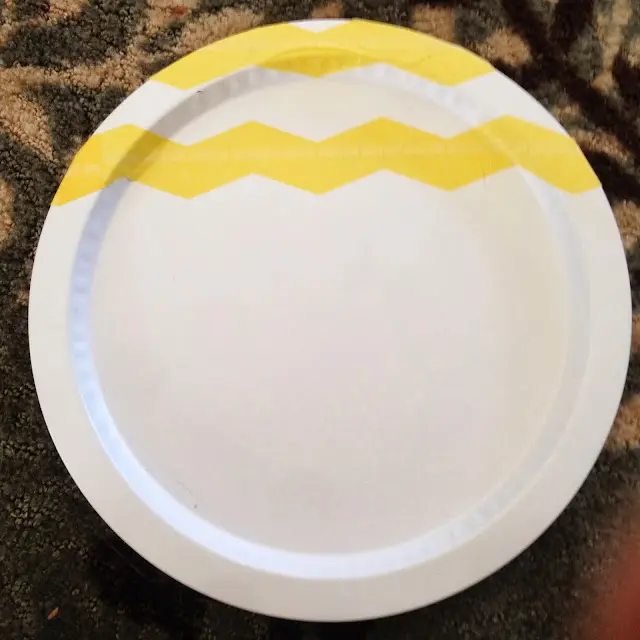
Now, you will paint your tray with your other color. I chose to paint the back of my tray in addition to the front because it had a weird rusted metal thing going on and was a bit of an eye sore. Let this sit and completely dry before touching the tape. I waited a good 6-7 hours.
AND TA DAHHH! It’s complete! How easy was that?

I am so loving this tray and I am so happy I didn’t throw it out! What an easy fun piece to add to my decor!
And there you have it, dear readers—the tale of our charming goose round tray’s transformation. From a lackluster piece to a stylish statement, this tray is now primed to steal the show.
As we wrap up, remember, whether you’re decorating your coffee table, revamping your dresser, or creating a stunning centerpiece, it’s all about infusing your unique style into every nook.
Dive into the world of tiered tray decor ideas, experiment with varying heights, and embrace the beauty of natural elements. Let’s turn your living space into a haven filled with personality and charm.
So, go ahead, explore, and make those smart purchases for small and large trays alike. Your journey to a more stylish and personalized home begins now!
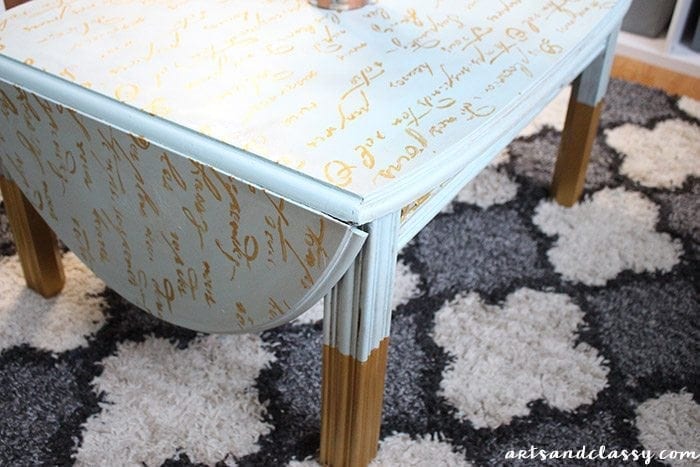
If you liked this decorative tray project, you might also like: