Step-by-Step Guide: Learn to Create Effortless DIY Paper Bag Snowflakes
Here’s a quick and simple tutorial for making paper bag snowflakes. These are quick to make and ideal for last-minute Christmas decorating ideas.
Winter is here, and that means it’s time to start crafting!
Today I want to show you how to make paper bag snowflakes. This craft is perfect for kids and adults of all ages, and it’s a great way to use paper bags instead of throwing them away.
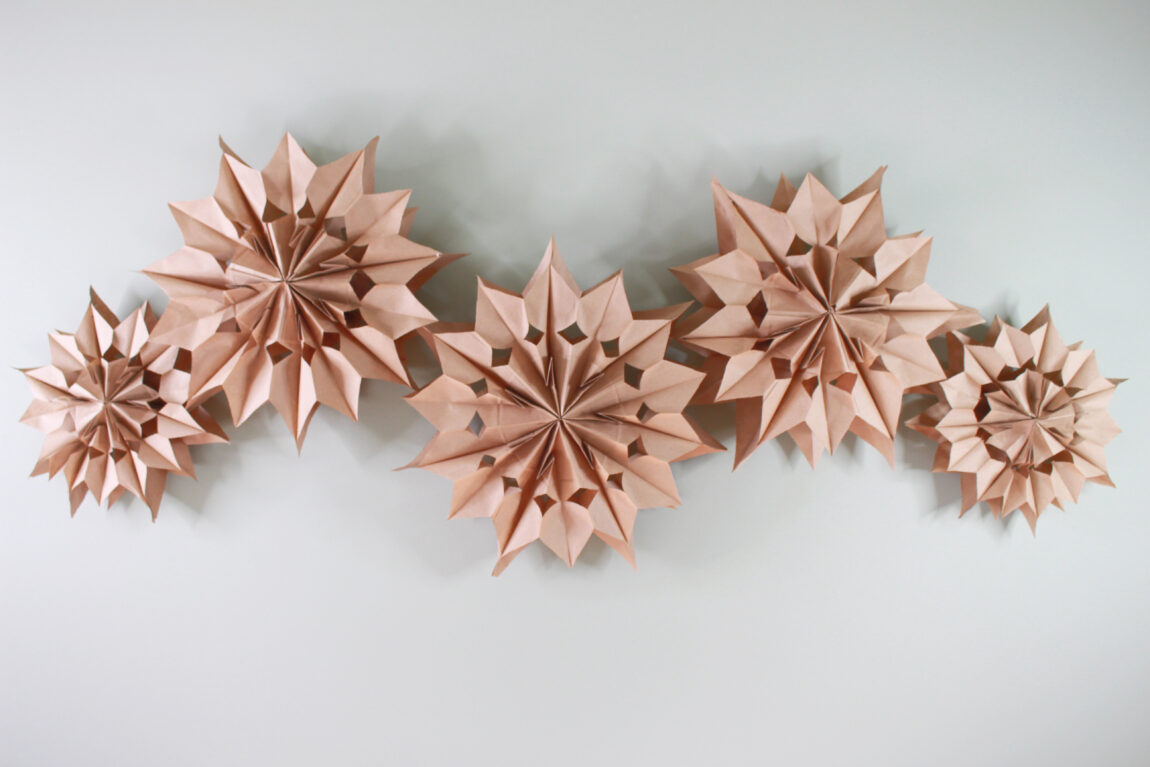
Paper Bag Snowflakes are a fun and easy craft for kids and adults of all ages! They’re perfect for decorating windows, tables, or even walls. Best of all, they’re very inexpensive to make.
All you need is a few paper bags, some scissors, a hot glue gun, and some imagination.
This post contains some affiliate links. I may earn a small commission if you make a purchase through one of these links. See more information in my disclosure policy.
Needed Supplies to make paper bag snowflakes:
- 7 Paper Lunch Bags – multiple sizes (I used 6lb and 4lb sizes)

Here is a video tutorial that I created for Hometalk TV. If you haven’t followed me over there, please do for even more inspiration.
Step 1 – Stack lunch bags
Line up 7 paper lunch bags in a stack facing the same way. You will want to make sure the bottom fold faces down and the bottoms of the bags are closest to you. Open side faces away from you.
Step 2 – Hot glue the bags together
Then, with my glue gun set to “hot” and a line of hot glue across the bottom edge in order not to damage any other parts on this carefully made bag, I added another thin zigzag up towards its opening.
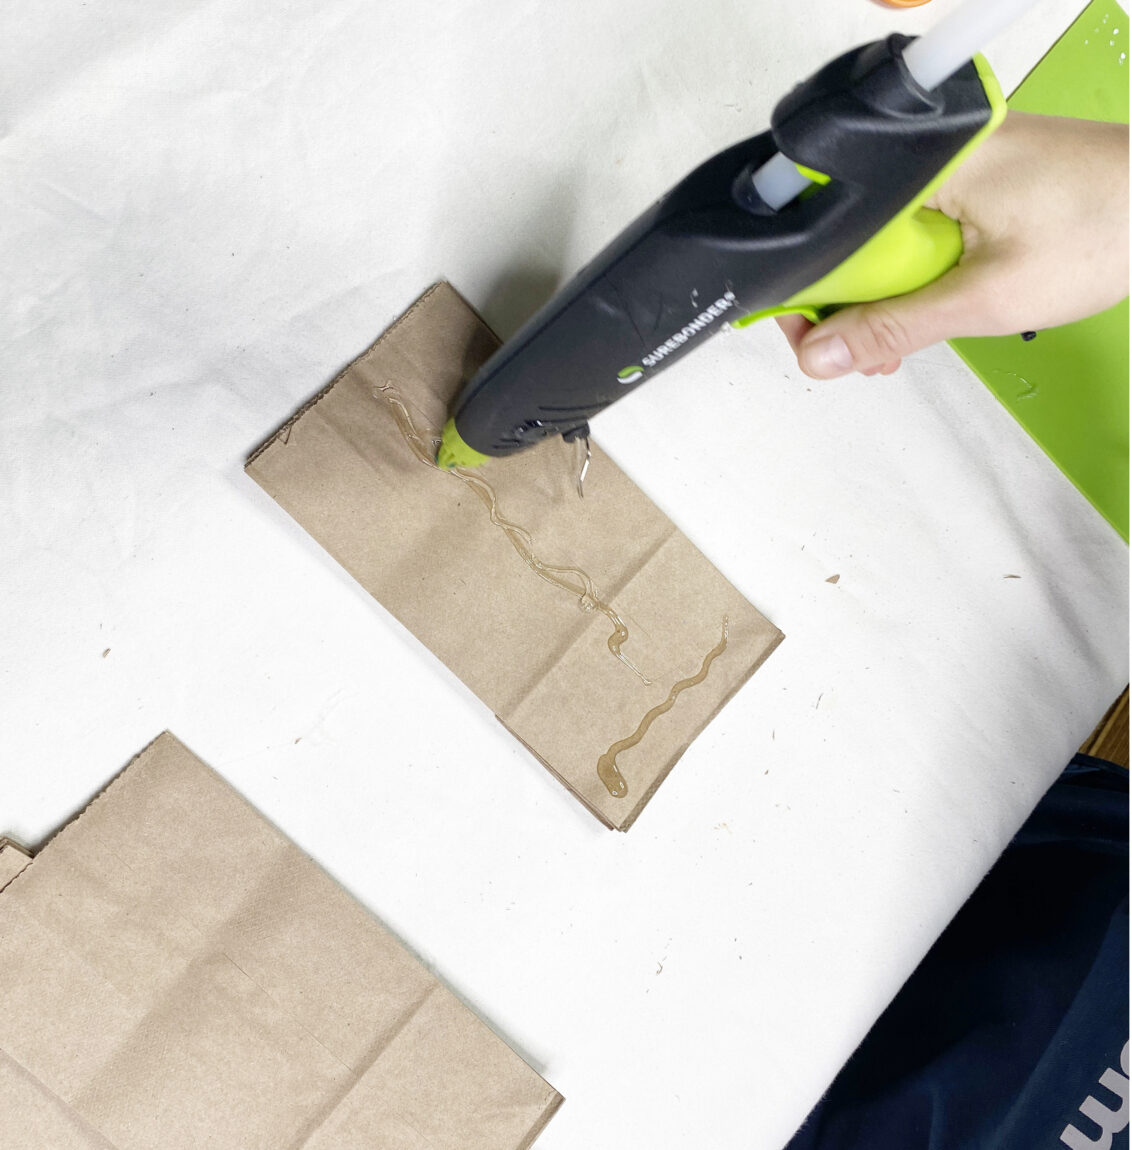
With each layer, I pressed down firmly and smoothed out any wrinkles. After the glue dried in between layers, I took another bag folded side down then laid it right on top of mine with just enough force so that they would stick together tightly without being too tight or loose but definitely firm enough for their purpose!
Step 3 – Use scissors to create triangle cutouts on each side of the paper bags
To make a paper bag snowflake, cut a V in the bag and then make small triangles on each side of the stack.
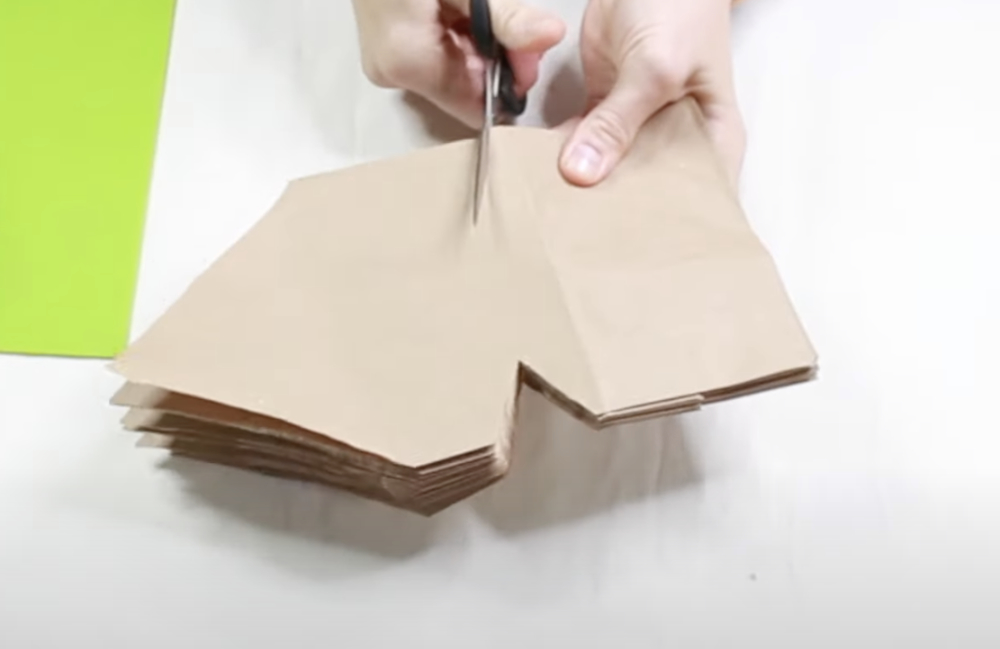
Step 4 – Use scissors to cut a point on of the open sides of the sacks
To make a V-shaped cut in a stack of paper bags, start in the center and go outward towards the sides.

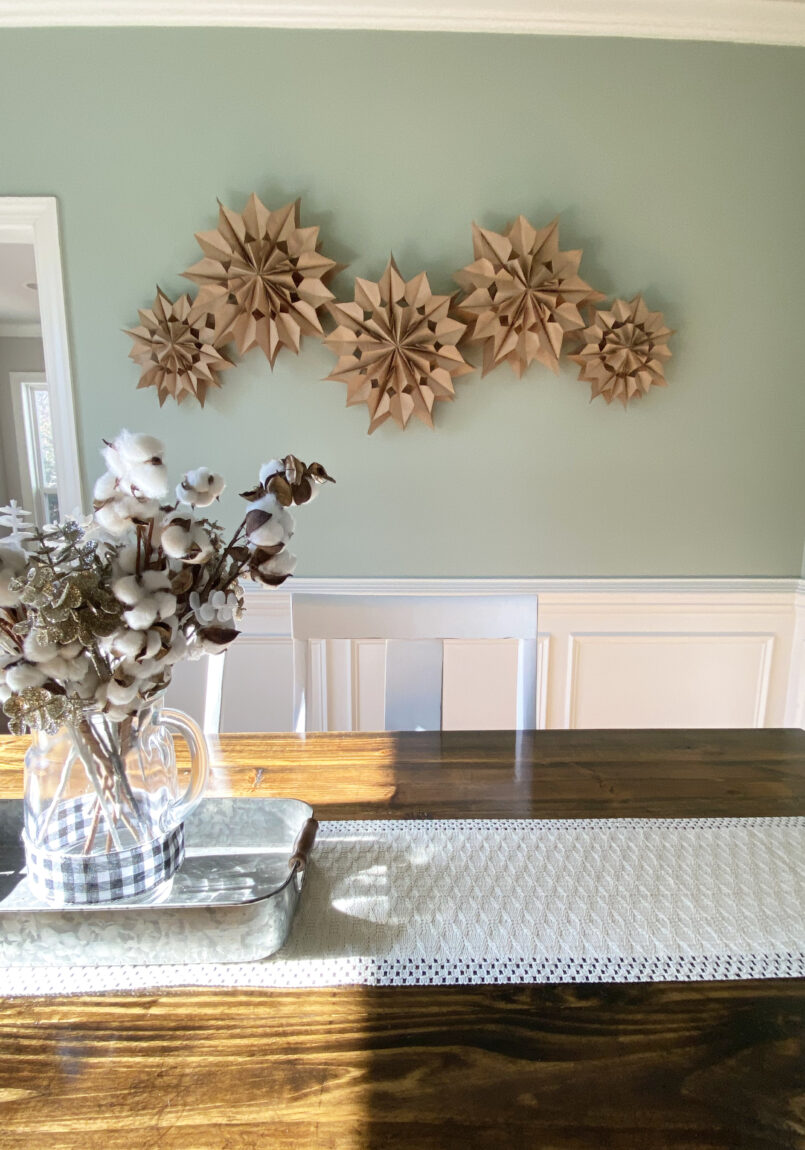
These paper-bag snowflakes are so easy and fun to make! They are perfect for kids of all ages and make a great winter activity. You can use any color paper you want to make them more personalized.
Shop the supplies to make this project (below)


I love paper snowflakes, reminds me of growing up and making them as a child. I needed a tutorial on how to make these again, and now you have shown the way. Thank you sharing!
What a cute and thrifty 3D wall art project! I’d forgotten how much fun it was to make snowflakes. Thank you so much for sharing!
These are absolutely adorable! I need to make some this season! Thanks for sharing your awesome tutorial!
Well you have inspired me to try my hand at some paper snowflakes – they are such an awesome touch for a rustic Christmas or winter wonderland!
Meredith these are so pretty! I’ve seen these and have never made them! I need to try your DIY you make it look so easy! I’d love to invite you to come link up over at my weekly link party that goes every Wednesday-Sunday for a chance to be featured! https://www.ourtinynest.com/2022/11/23/weekly-wednesday-link-party-323/
Thank you, Nicole! I missed my opportunity to link up this past week but I will definitely link up this Wednesday! Appreciate you stopping by and for the kind feedback!
What a great idea Meredith! They turned out so lovely and look so pretty on your wall. I love an easy and budget friendly DIY.
Thank you for stopping by and for your kind feedback! I love when a simple idea comes together easily! It makes DIY way more fun.
Thank you so much! I appreciate the lovely feedback. I love a good, cheap and easy DIY! Don’t you?
Hi Meredith! I’m excited to tell you that your DIY snowflakes will be featured on the Fabulous Friday Link Party tomorrow! Congrats!
Thank you for featuring my snowflakes project, Donna!