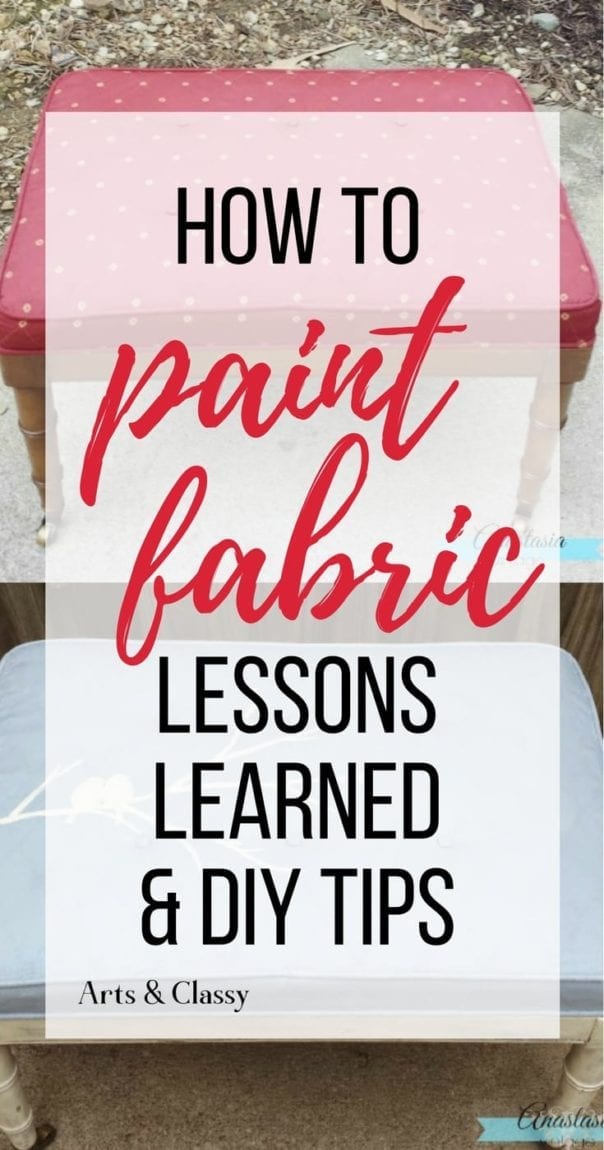
A Painted Upholstery Mistake & My Easy Tips to Fix It
Painted upholstery is not always an easy project. Learn about common mistakes, how to fix them, and best practices for painting upholstery with this before-and-after DIY ottoman tutorial.
Hi everyone! I’m so excited to be visiting you all today at Arts & Classy! I’m Stacy, and I blog at Anastasia Vintage, where my husband and I share furniture revival projects, vintage-inspired crafts, and free printables. Today, I’m sharing one of my recent near-disasters and how I salvaged it with a few easy tricks.
When it comes to upholstery, I’m a bit of a newbie.
I hardly ever cut or sew fabric correctly the first time, and to be honest, I’d much rather wield a paintbrush than a staple gun any day. The good news is, I’m learning fast 🙂 But in the meantime, the idea of painting upholstery to give my chairs a new look really appeals to me.
Related: Ottomans make for easy DIY transformation projects. Check out this DIY Metal Ottoman that I have a glam makeover.
A Painted Upholstery Project
I decided to try my hand at it with a cute little seat I got for free last summer. I was very excited about my vision: white cushion, black legs, and some sort of vintage chandelier image transferred onto the top. Simple and tres chic, right? I thought so. After reading a few tutorials, I got my supplies together.

This post contains some affiliate links for your convenience. Click here to read my full disclosure policy.
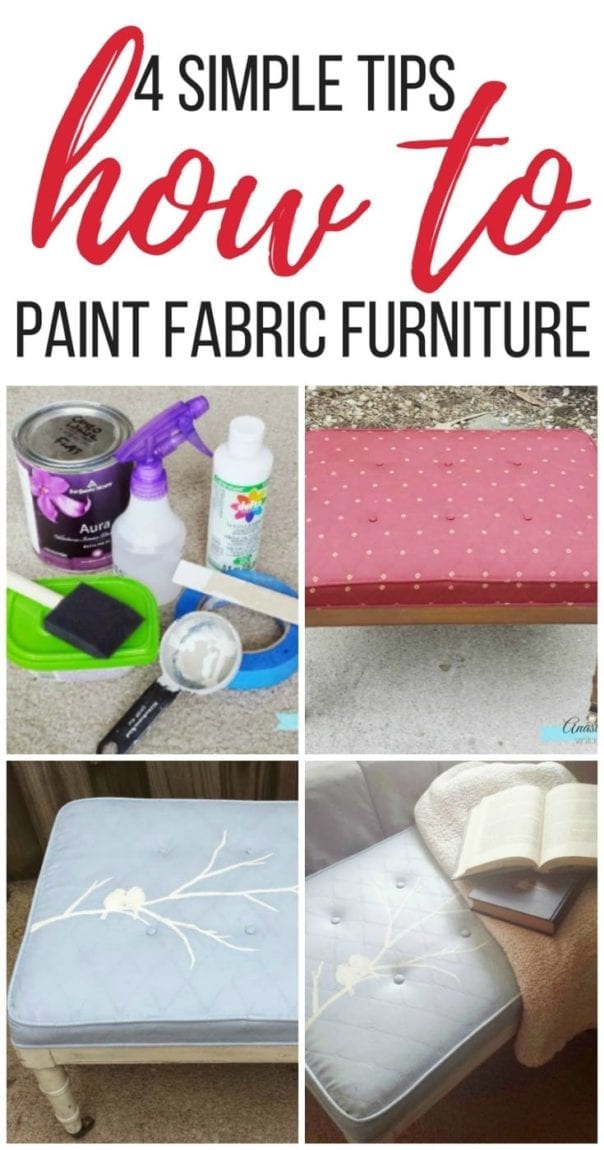
What you’ll need for this Painted Upholstery DIY:
- White paint (pictured), but read on to see why chalk paint is a better option!
- textile medium
- water and my brushes
- Many tutorials using latex paint will tell you to mix the paint with textile medium and water, lightly spray your fabric to dampen it, and apply your paint mixture in thin coats. So I did.

Five coats later, I was not in love. For one, despite the fact that I’d sanded between coats, the fabric had become very stiff and scratchy. I knew the red would be hard to cover with white, but it just didn’t seem to be getting any less splotchy as I added paint. Plus, the whole thing just looked so…mattress-y to me. I won’t lie, I was completely over it. I set it aside to work on other projects while plotting to haul it out to the dumpster ASAP.

Read on…I promise it gets better 🙂
Fortunately for this little lady, inspiration struck one day just as spring was just arriving. I was looking out of the window, waxing rhapsodic about the beautiful color of the sky, when I remembered something I had tucked away in my supplies stash.

I’d seen chalk-painted upholstery projects many times before and decided at that moment to go in a whole new direction. After two coats of chalk paint, I couldn’t believe how much better the coverage was! With my new, sky-blue backdrop, I wanted to keep going with the “nature” theme. I found this cute little silhouette of birds on a branch and enlarged it to create my own stencil.

To transfer the image, I went with good old-fashioned tracing. I cut out the image with my X-Acto knife and traced it very faintly onto the seat cushion. It wasn’t easy to get all of those tiny branches perfectly copied, so I took a bit of creative liberty, too.

Filling the image in was easy with my arsenal of brushes and of course, a toothpick 🙂

For the legs, I added some Paris Grey chalk paint over a base of Vintage White and distressed it a bit. The end result reminds me a bit of a birch tree, which was totally unintentional, but pretty serendipitous, considering my stencil choice.
I love the way my happy little accident turned out!


And here she is in her new home at the foot of our guest room bed.

A pretty nice change from the original, if I may say so myself 🙂
Here are some tips I learned for painted upholstery:
1. Use a chalky finish paint
These days, chalky finish paints are available almost everywhere, and it doesn’t really matter which brand you choose. They’re easy to apply for beginners and pros alike and give great coverage. That means fewer coats and less work for all of us! I don’t recommend using latex paint – it takes too many coats, and the fabric becomes very stiff and uncomfortable
2. Seal the paint with wax
Just as with chalk-painted furniture, painted upholstery also needs a protective topcoat. I was a bit worried about waxing fabric, but I’m so glad I did. It’s cool and smooth to the touch, almost like vinyl. No residue or stickiness at all. I applied the wax the same way I do for furniture, in a thin coat applied with a lint-free cloth and worked into the paint (you can find the exact technique here).
3. Use a foam brush
For me, painting upholstery involves a good amount of brush squishing to get the color into every crevice. And I’d much rather squish a cheap foam brush than ruin the bristles of my paintbrush. You can usually find them for under $1 at any home improvement, craft, or big box store.
4. Paint in natural light
The best way to make sure you’ve gotten full coverage with your paint is to look at it under natural light. Try painting next to a window, or taking your piece outdoors after you’ve applied a couple of coats to check that all traces of the old fabric are covered.
If you’ve been wanting to try painting upholstery but have been too nervous, I hope my mistakes & tips give you a bit more courage to tackle it!
If you enjoyed this post, I’d love to connect with you! Find Anastasia Vintage on:
Facebook | Twitter | Instagram | Bloglovin | Pinterest | Google+ | Newsletter


Absolutely beautiful!