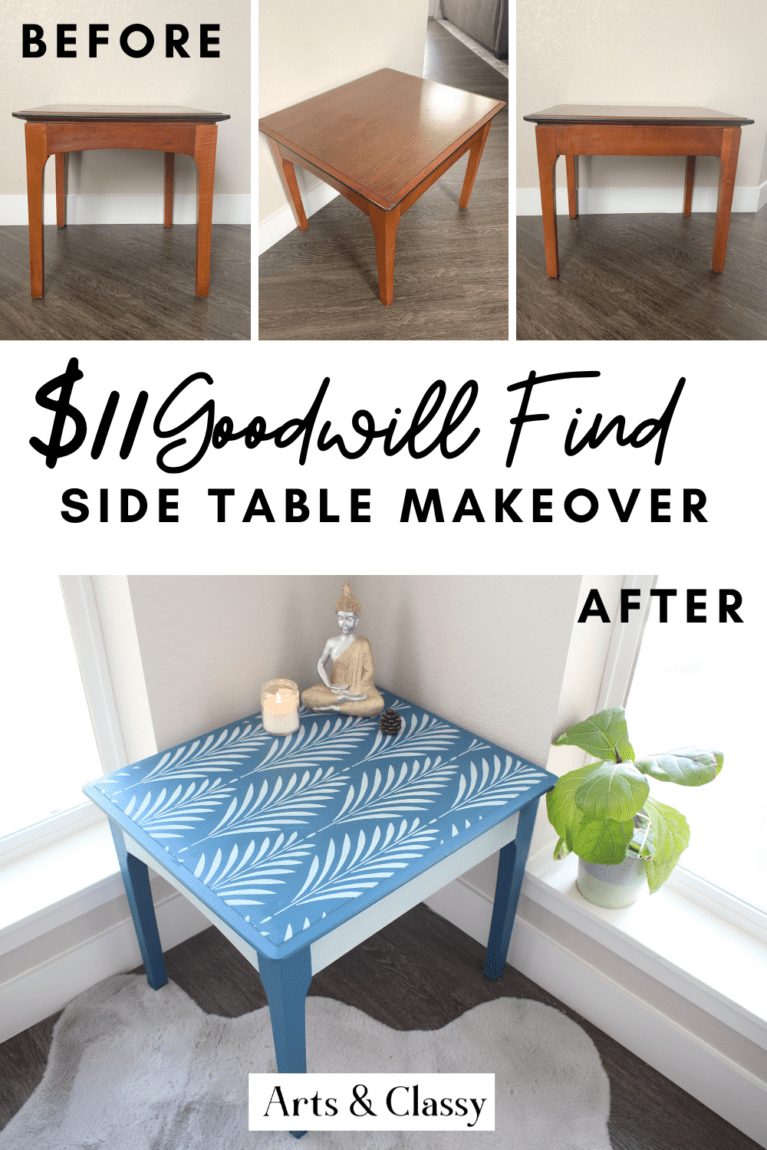
$11.99 Goodwill Find Side Table Stenciled Makeover
*This Goodwill find post has been sponsored by Stencil Revolution in partnership with Hometalk, however, all opinions expressed are entirely my own.
I am super excited to be sharing this Goodwill find a project with you all because I love any moment I have to be creative and I love furniture makeovers. I am grateful to be partnering with Stencil Revolution on this furniture flip.
Since I moved to Denver, I have been so busy getting settled and the new routine that I haven’t had as much time to be creative. I realize that having this type of outlet is super important and something I need to prioritize. When this thrift store finds project presented itself, I was so pleased to participate. Meredith is getting her groove back!
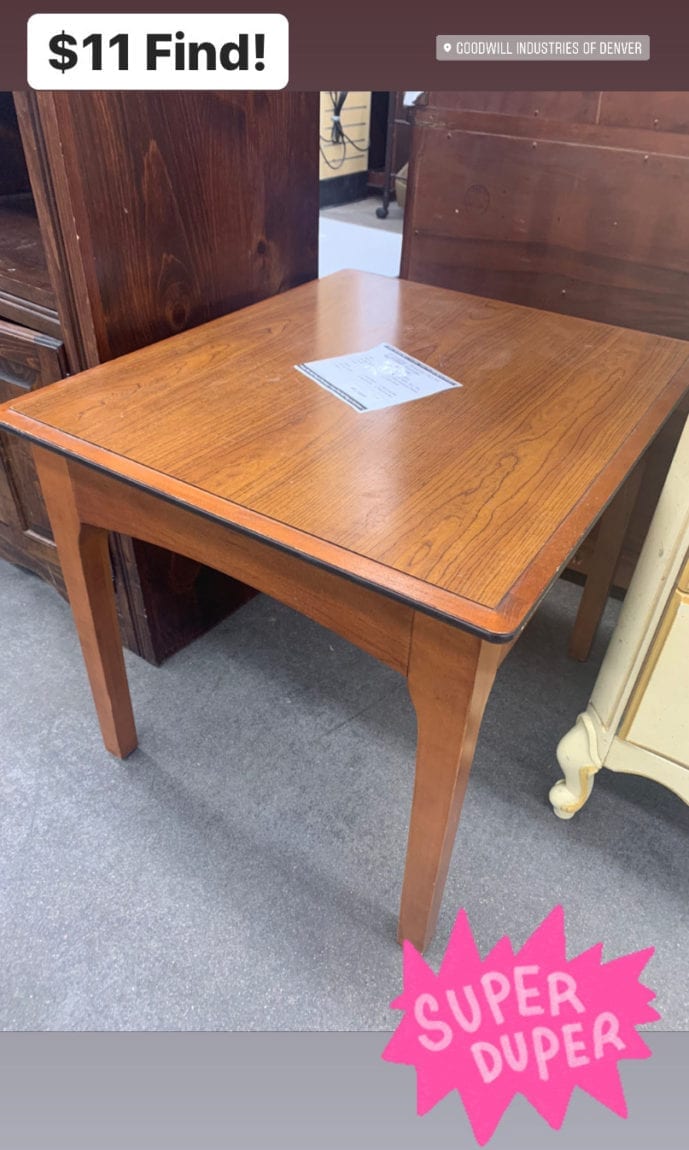
I am always blown away by the deals I find when I am sourcing furniture to flip. I scored this beautiful wood table at Goodwill find for $11.99! SCORE!
On to the tutorial! Here are the supplies I used for this project:
- Thrifted table
- Stencil Revolution Wall Stencil – Fern Pattern
- Chalk Paint (two colors)
- Spray Adhesive
- Stencil paintbrush
- Artist paint brushes
- Furniture wax and polish
- Furniture wax brush and cloth
- Painters tape
Step 1 – The Hunt Begins
I had to go on the hunt for my furniture piece! As I said above, this was a Goodwill find. But other thrift stores, yard sales, and other apps are great ways to find used furniture. Make sure to find pieces that don’t have any weird smells/stains, insects, and are well made.
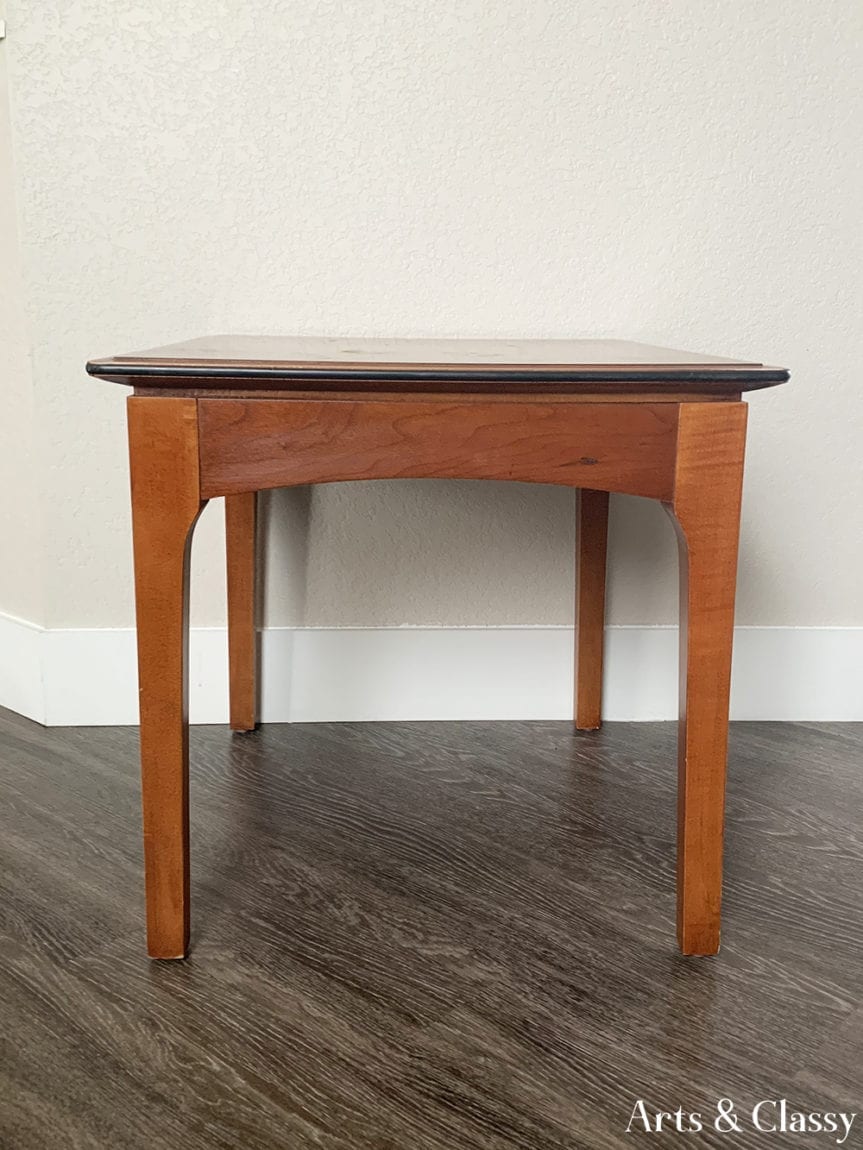
Step 2 – Clean and Dust
I cleaned this piece off. It wasn’t dirty, just dusty from sitting around Goodwill. Plus, I always wipe down pieces before I paint them. It helps the paint stick and just makes for a smoother surface to paint on. When stenciling, that is super important.
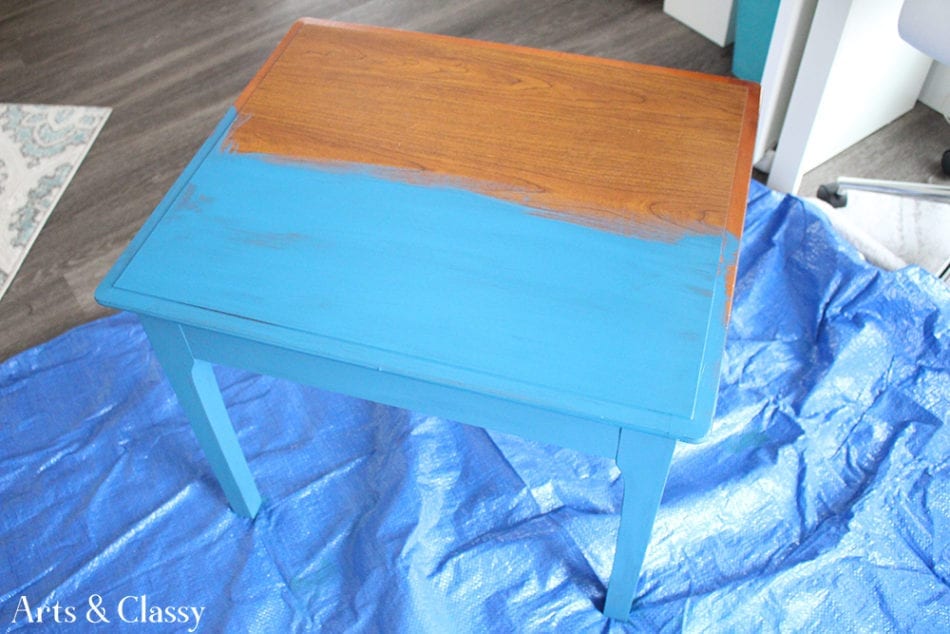
Step 3 – Painting
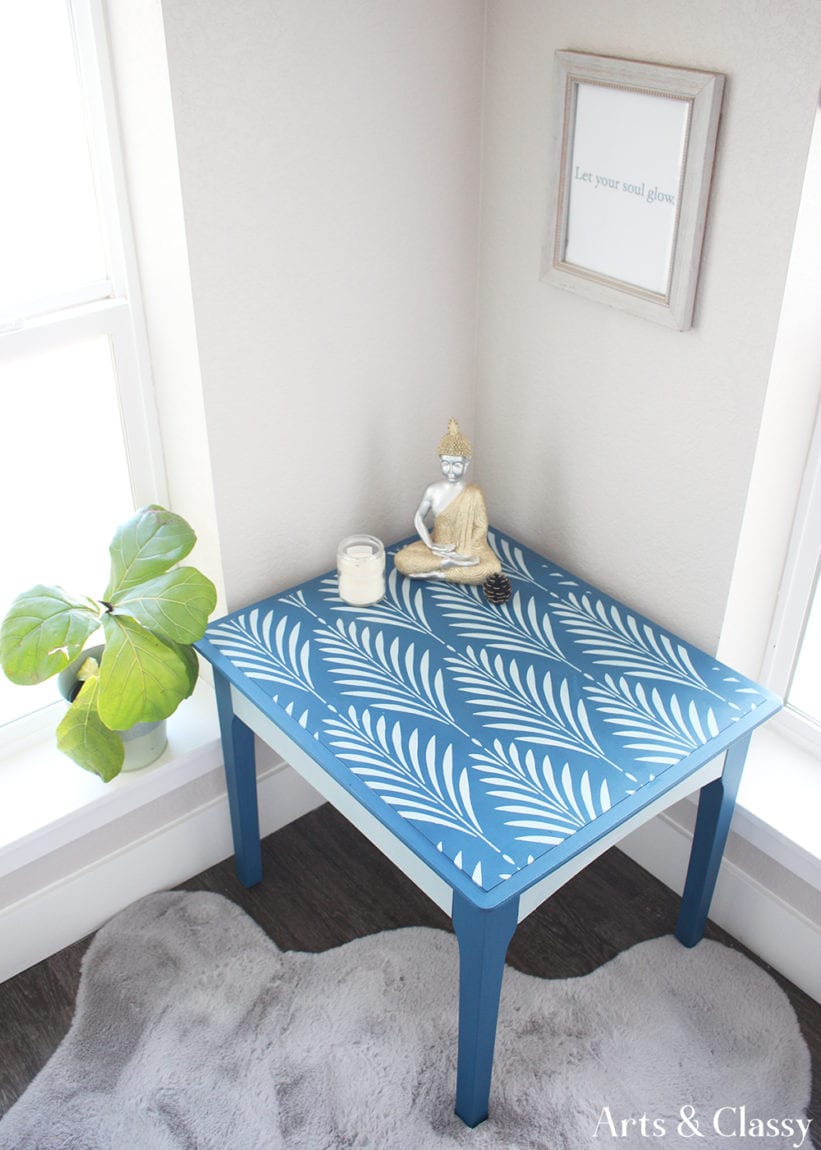
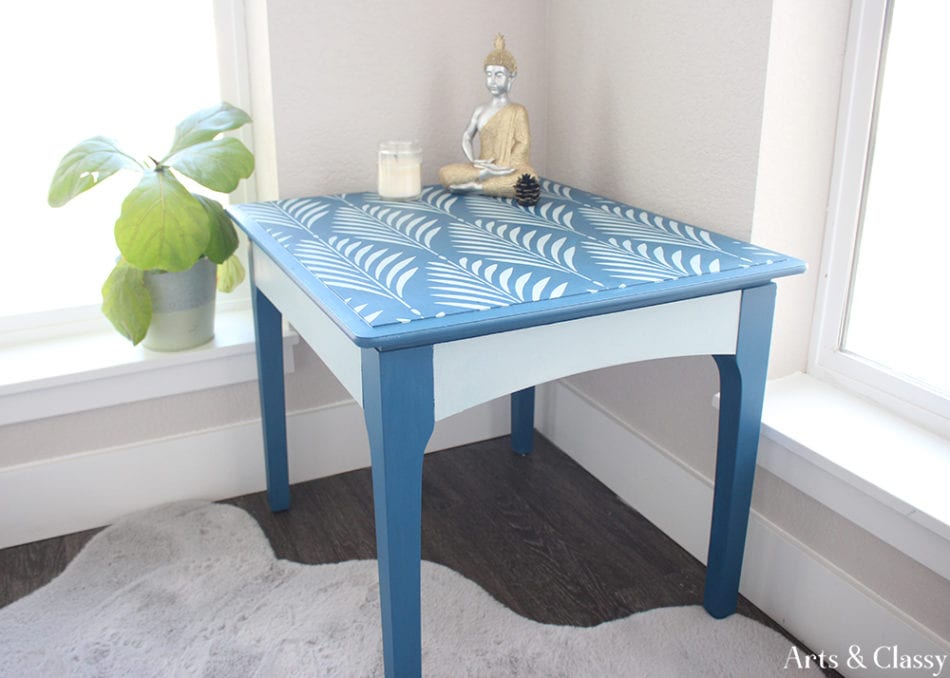
I started by painting the base color of the table. I chose a really pretty darker blue color that really popped. It took about 2-3 coats to really gain full coverage over the original wood stain. The beautiful thing about chalk paint is that it dries quickly, so painting multiple layers do not take long. I do recommend waiting for each layer to dry before applying the next.
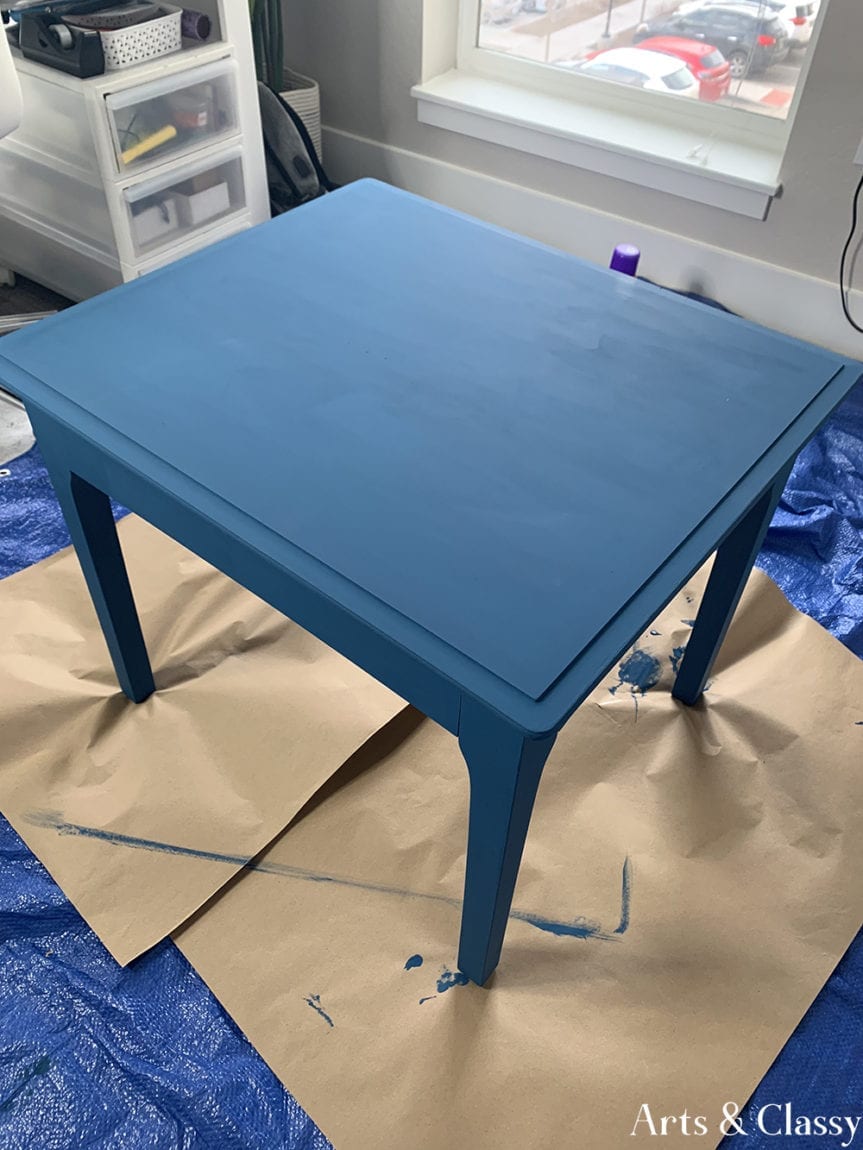
Step 4 – Paint the Second Coat
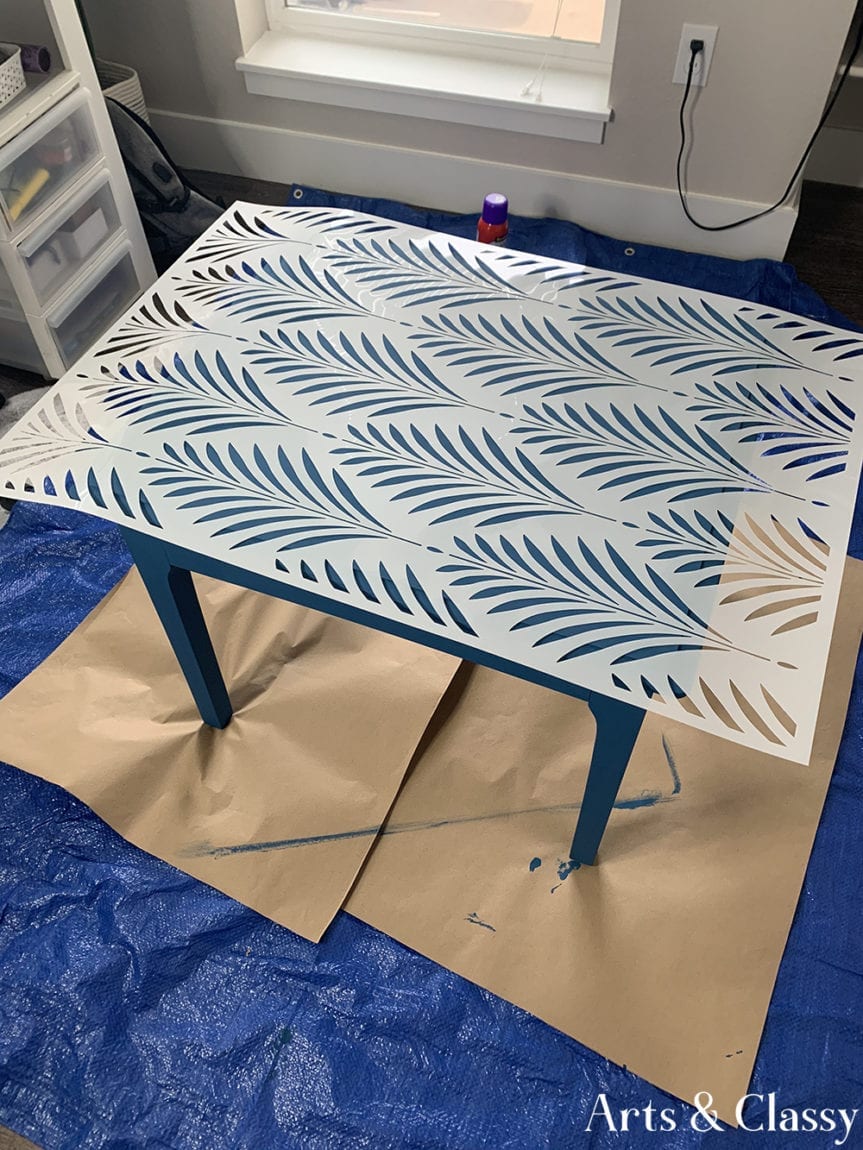
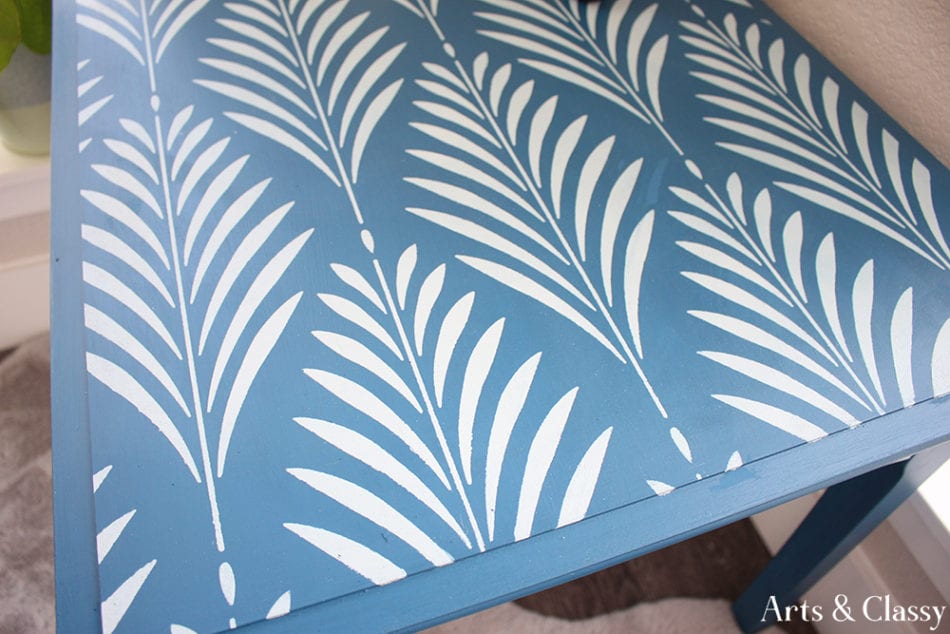
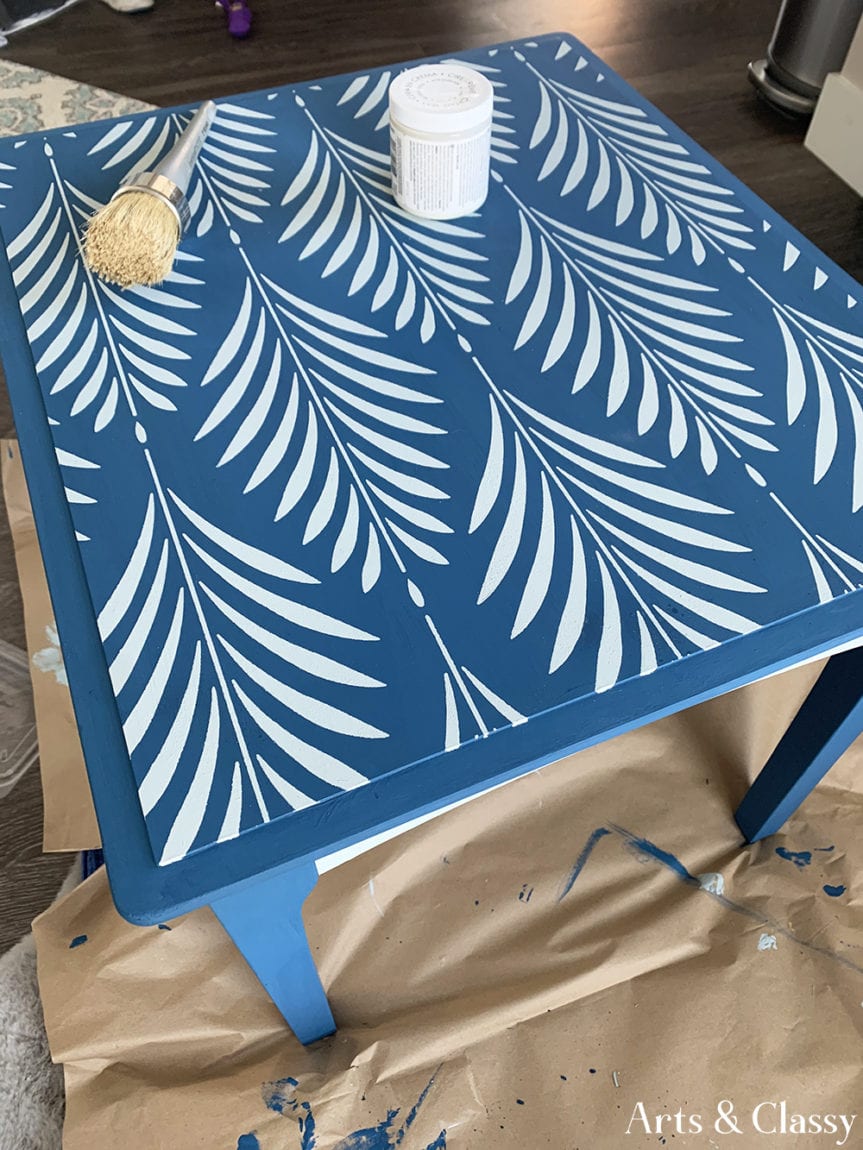
Once my table was completely blue and dry, I pulled out my beautiful fern stencil from Stencil Revolution and positioned it on the table the way I wanted. I used a light coat of spray adhesive on the stencil to hold it in one place to help prevent messing up and paint bleeding underneath. Stenciling can be a delicate process and if you don’t take the right steps to set yourself up correctly, it could get messy.
Step 5 – Apply the Stencil & Start Applying the Paint
I grabbed my stenciling brush and the lighter chalk paint I chose and began lightly dabbing the paint over the stencil. I never do big gobs of paint because there is more likelihood of paint bleeding underneath. Instead, I used a plastic tray to help dab some of the paint off of the brush before I applied it to the table surface. I completed about 2 coats of paint over my stencil and gave it plenty of time to dry. Letting the paint dry is important because it makes removing the stencil so much easier. It’s less likely to have any paint bleed from removing it too soon.
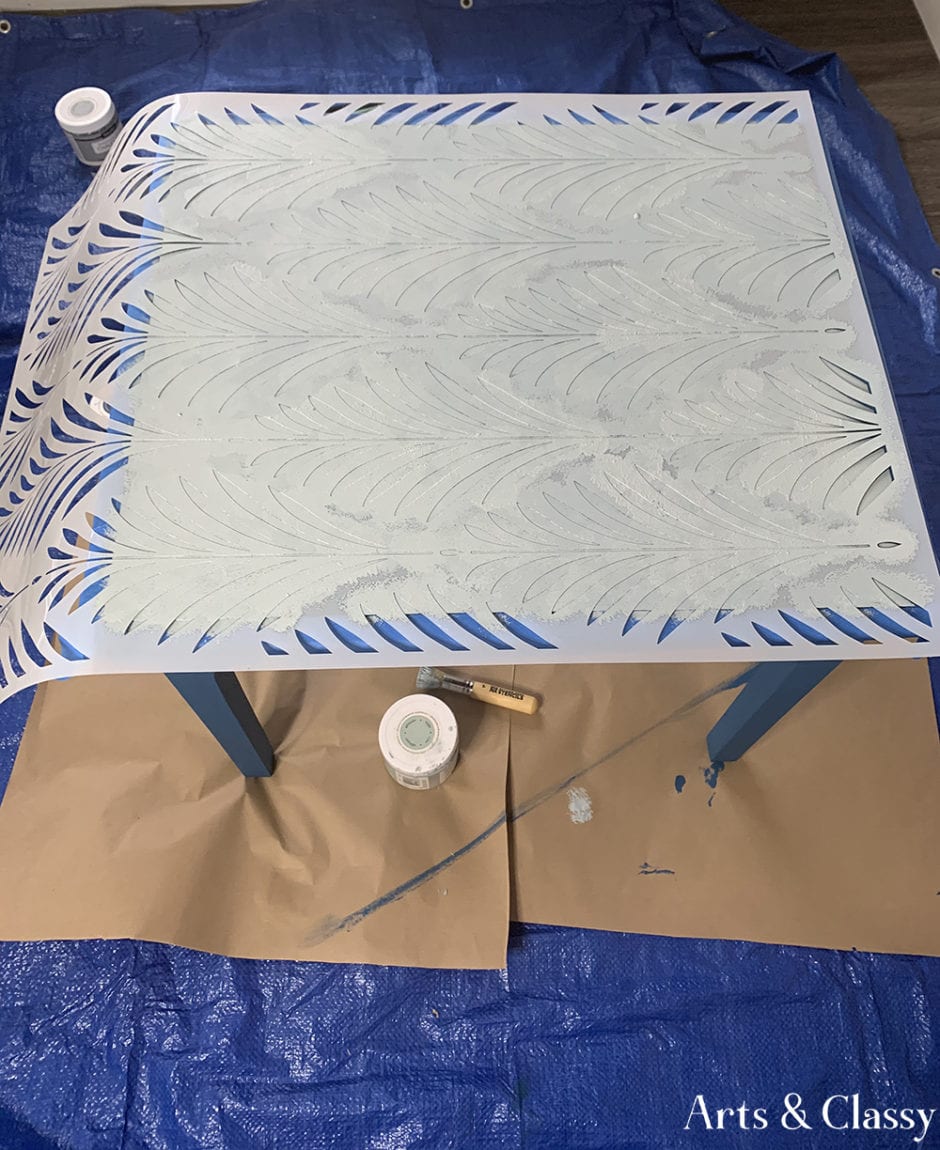
Step 6 – Let Paint Dry & Peel Away Stencil
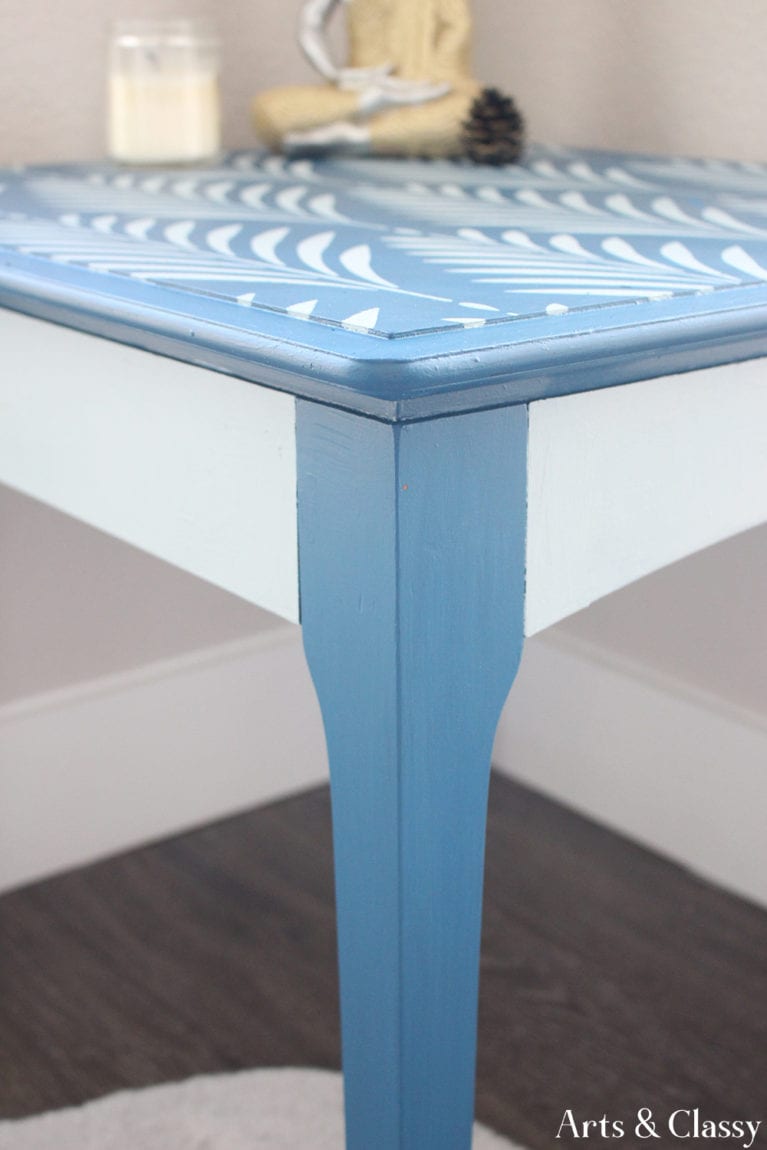
After the paint completely dried, I slowly peeled away the stencil from the tabletop. From there, I applied the stencil to the lower half of this goodwill find table to fill in part of the pattern to make it look continuous on the top and bottom. I hand-painted a little dip around the top of the table to continue the pattern from the side view. I made sure to give that plenty of time to dry.
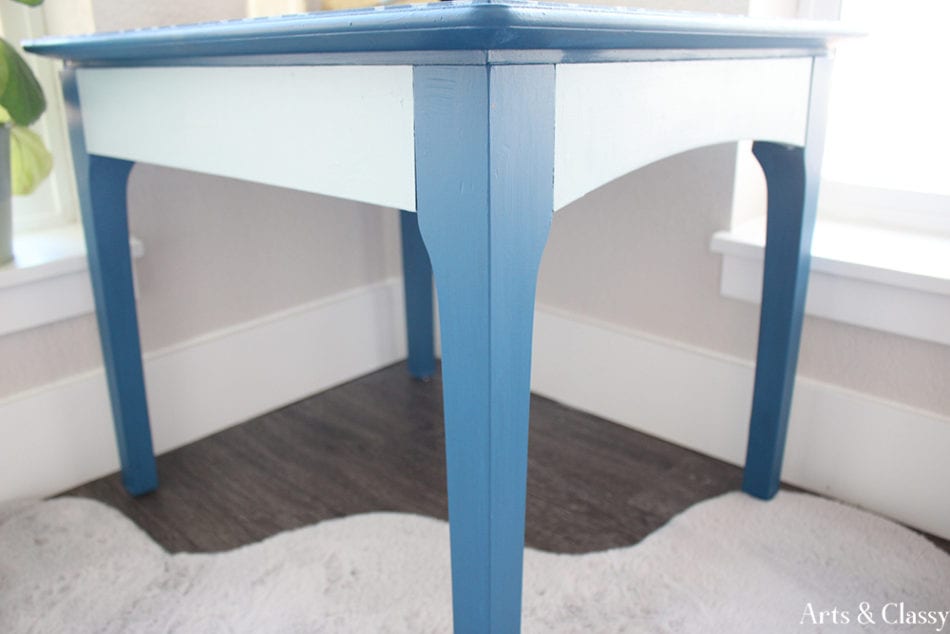
Step 7 – Paint Trim
I decided to paint the apron of the table between the legs the lighter paint color that I used for the stenciled portion. Once I saw how well the stenciled part came out, I wanted to continue that on the rest of the table design. I felt that it gave this table a more cohesive look.
Step 8 – Apply Furniture Wax
Once everything dried, I used furniture wax to seal and protect it. I applied the wax with a waxing brush and also a plain cloth rag. I started with the brush and then I buffed in the 2nd coat with the cloth. After the protective layer was applied, I gave it a day to dry and cure.
If pictures aren’t enough, I also created a video tutorial to go along with this Goodwill find project.
What do you think of the finished product? Doesn’t this Goodwill find look light years better than it did with the help of the stencil I used?
I am so grateful to work with Stencil Revolution to re-spark my creativity! Make sure to check out their site to see all the stencils they have to offer.
Also, make sure to check out this project on Hometalk along with thousands of other amazing DIY home projects for you to get inspired and try in your home.
If you like this post, you will definitely be inspired by these furniture makeover projects.