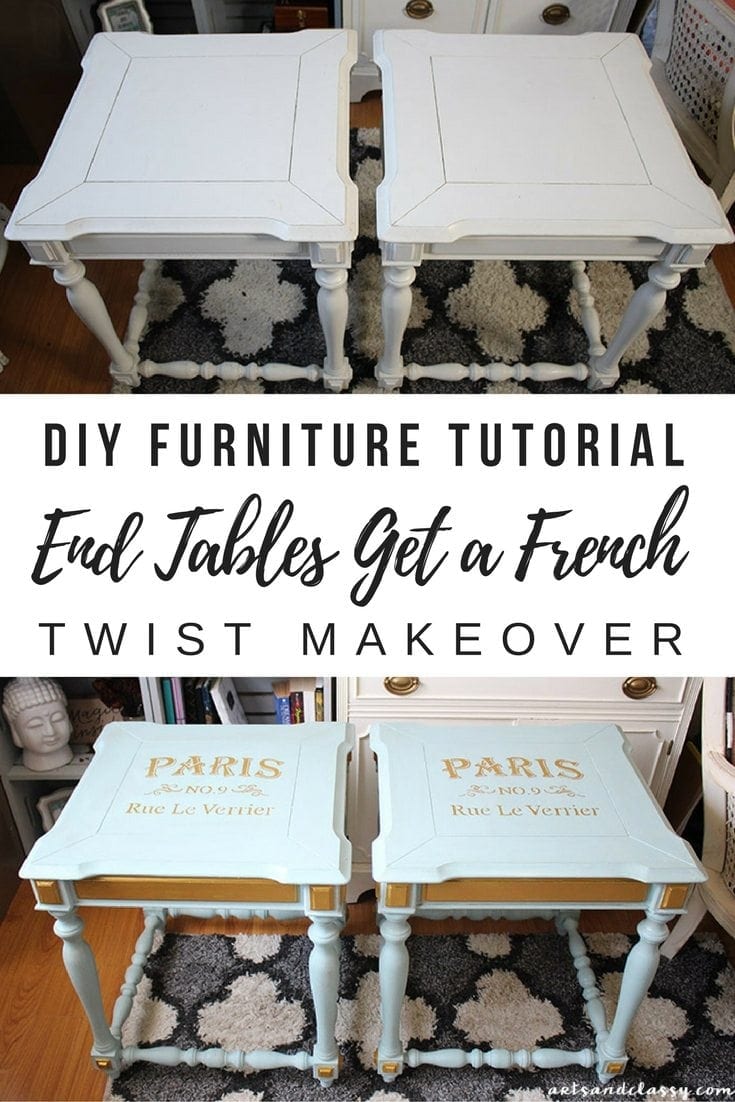
A Step-By-Step DIY Side Table Makeover Tutorial
Looking for a way to give your side table a new look? This step-by-step DIY side table makeover tutorial is just what you need! In just a few simple steps, you can transform an old, outdated table into something brand new and stylish. So don’t wait any longer – get started today!
I’m so glad to be back in the creative flow! And, it feels even better that I get a chance to work on smaller projects like traditional side tables and chairs. Sometimes when things are bigger than what’s expected of me or my skillset then you’ll find me tackling more extensive spaces with an eye for design as well – but this isn’t always necessary either because some people have different needs depending upon their home size/style, etc., which can make planning ahead easier
I typically enjoy working within limits:)
I just recently flipped a vintage drop leaf coffee table that I found kind of broken on the side of the road. It really turned out much better than I thought it would. I even sold this table to an adorable couple that just moved to Los Angeles from Wimbledon, United Kingdom!
They need to furnish their place and I am so happy my style is right up their alley. I have repeat customers! YAY!
This leads me to today’s project. Since I knew they were in pursuit of more furniture and I knew I needed more DIY projects, I went on a hunt to find nightstands. Win-win!! A quick and inexpensive step-by-step tutorial to take an ordinary table from boring to beautiful.
This post contains some affiliate links. I may earn a small commission if you make a purchase through one of these links. See more information in my disclosure policy.
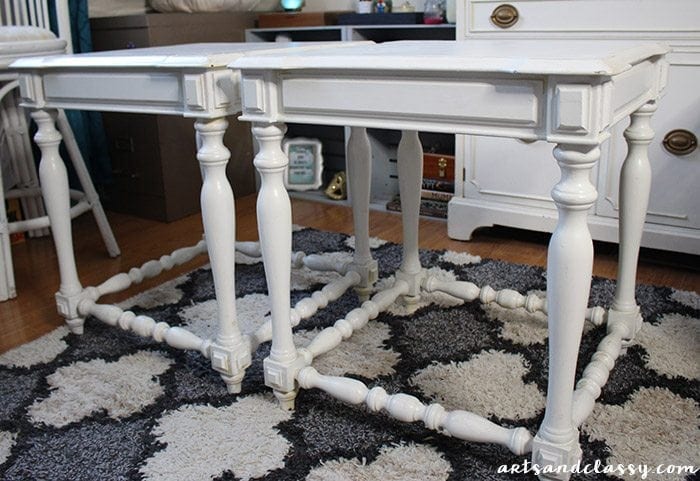
Lucky me… I found two amazing end tables via Craigslist for free in Marina Del Rey. A lady was moving and just needed to get rid of these beautiful “shabby chic” tables. I couldn’t believe the quality of these tables and how little she cared about them. All these needed was a little TLC!
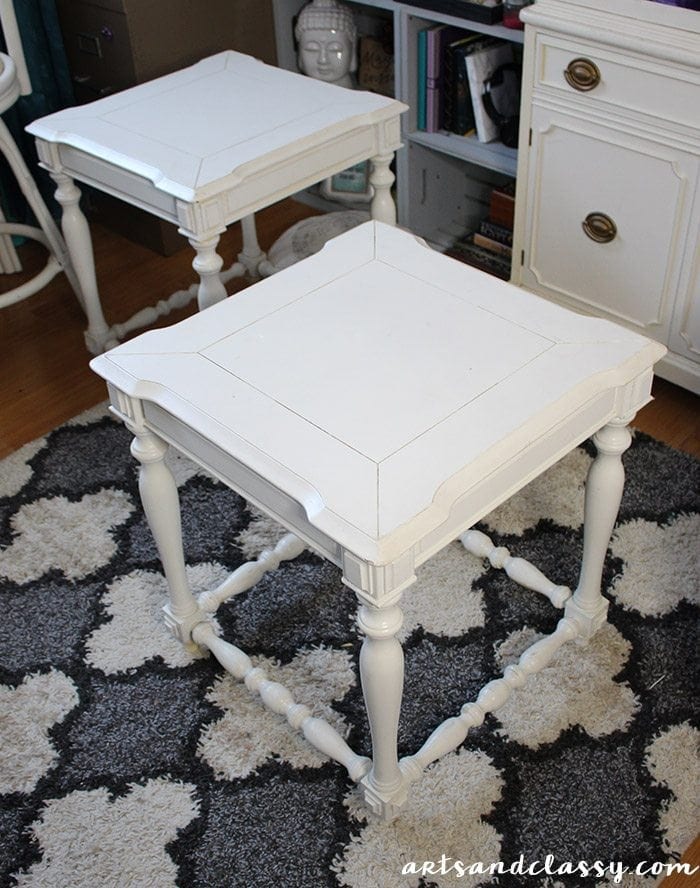
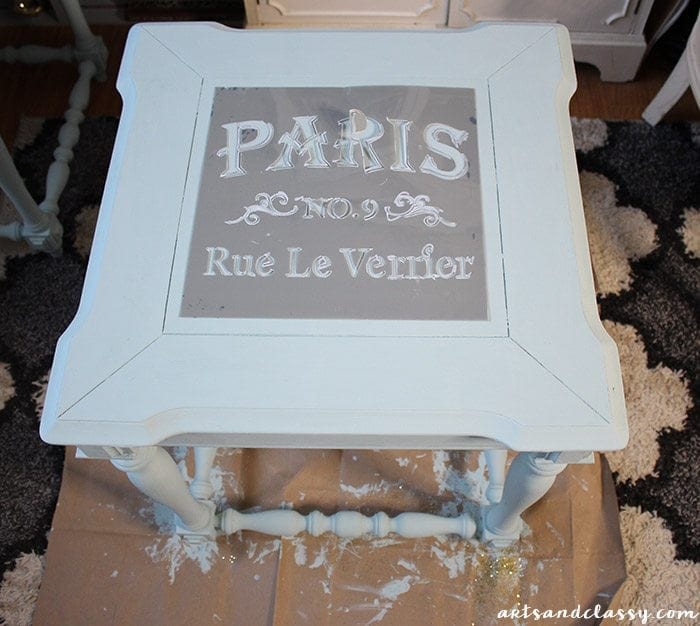
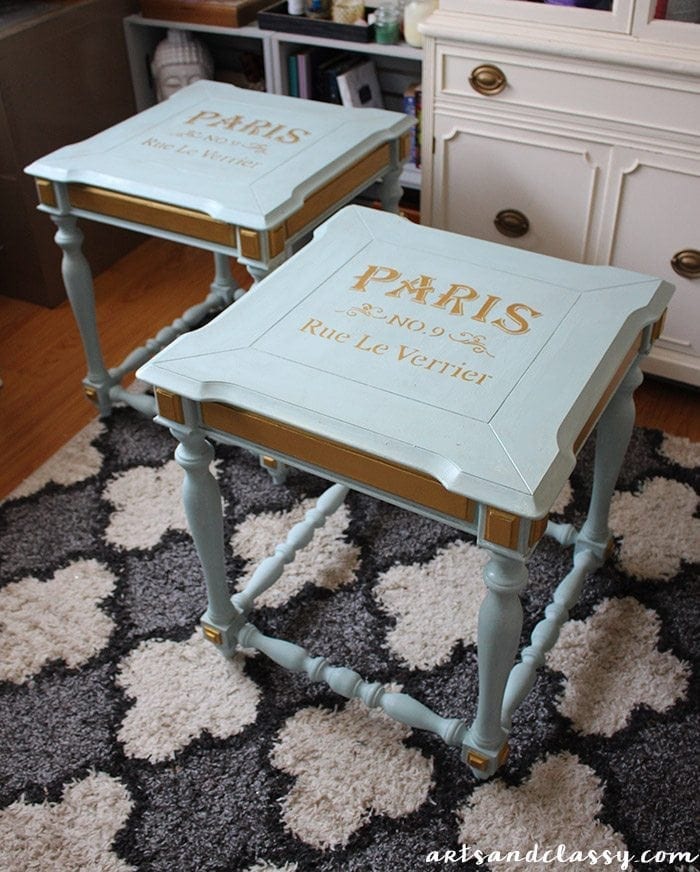
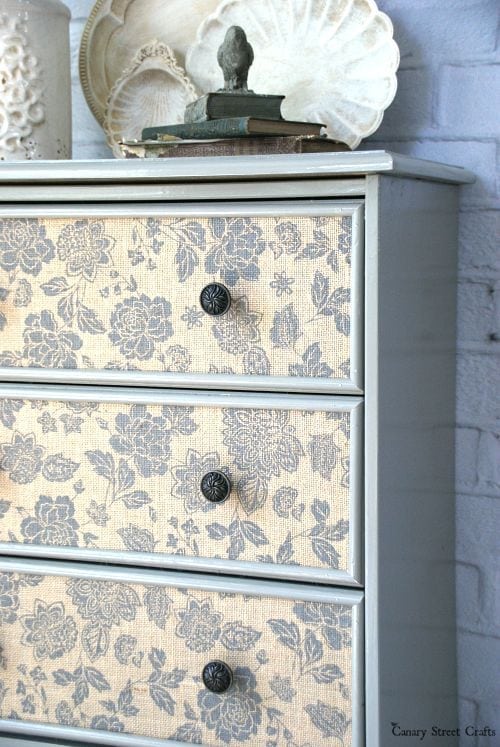
Gorgeous right? There was only one tiny imperfection on one corner, but it was hardly noticeable. Some may argue that leaving them as is would have been fine. I had other plans. Using a coat of paint and stencils on furniture gives it a new life.
The supplies you need for the DIY side table makeover project:
- Rust-oleum Chalked – Ultra matte Chalk Paint – Color “Serenity Blue”
- Modern Masters – “Olympic Gold” Metallic Collection Paint
- Deco Art Plastic Americana Stencil 12-inch x 12-inch-Parisian Street by Deco Art
- Paint Brushes – both large and small
- Daddy Van’s Lavender Furniture Wax
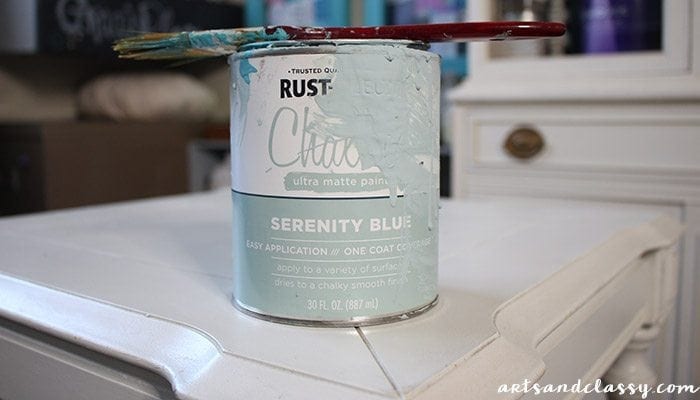
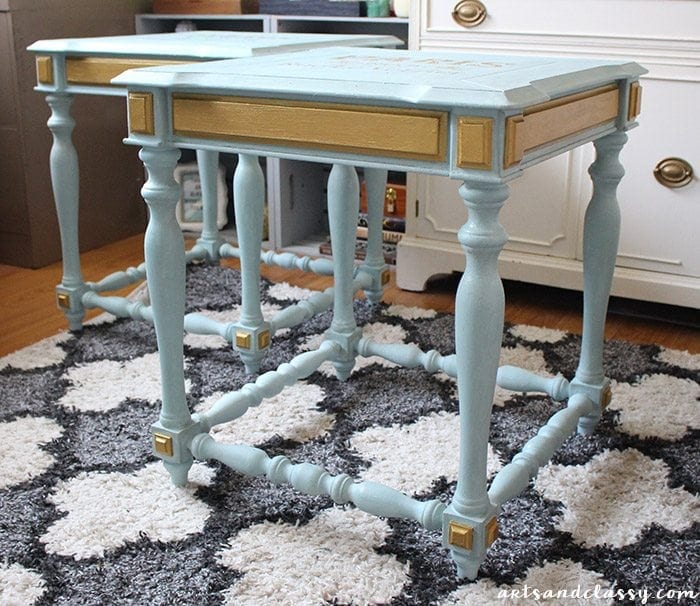
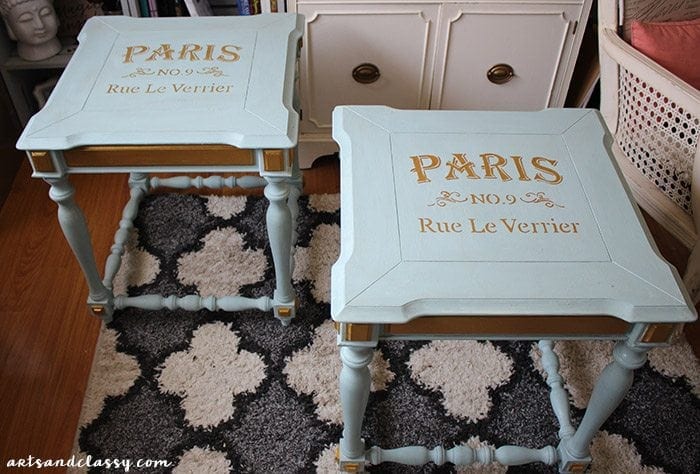
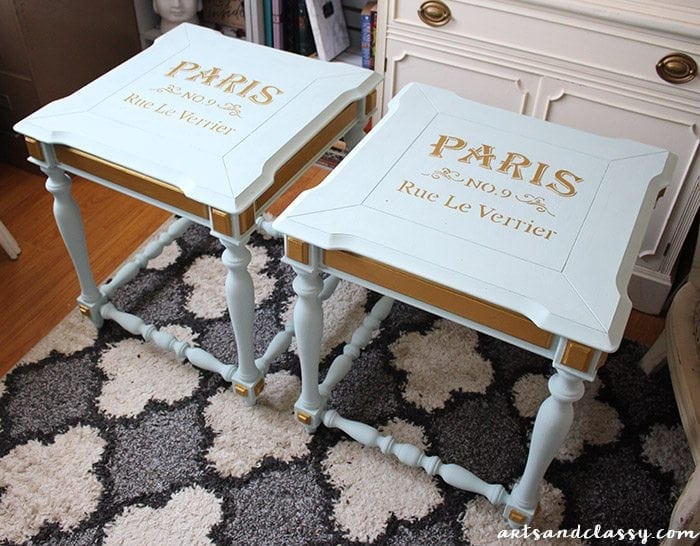
After coating the entire table with 2 coats of this beautiful “Serenity Blue” chalk paint, it was time to get to stenciling. I thought my Paris sign stencil would be a perfect compliment to the top of these tables. Don’t you agree?
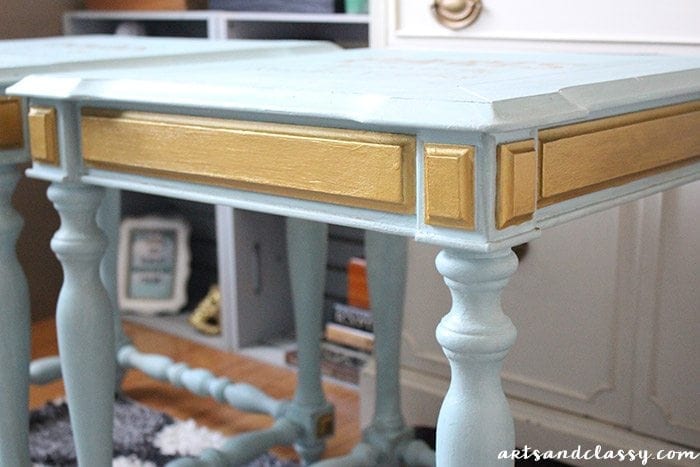
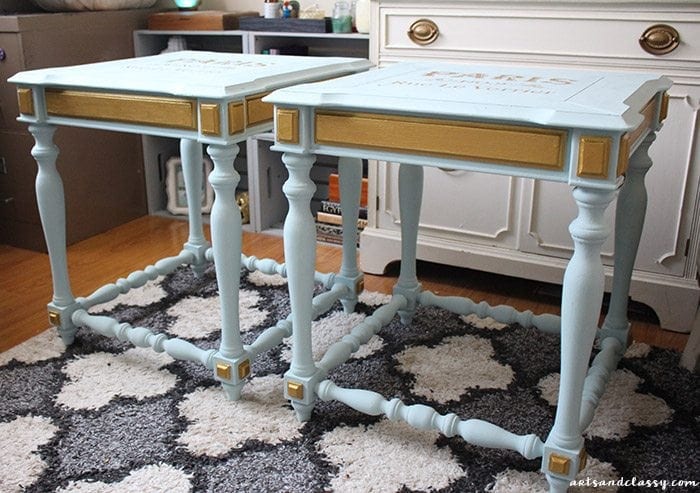
It took a decent amount of time stenciling the tops of both tables with my favorite gold paint by Modern Masters (both so worth it), I moved on to adding more gold to the pops of detail on the legs and sides of the tables. I personally think it is just what these tables needed to give them some more dimension.
I personally think it is just what this side table makeover needed to give them some more color and dimension.
Once, I completed all the decorative sides on the old tables, I let them all dry.
Then I went back in with my “Serenity Blue” chalk paint to clean up any imperfections I had left from the gold paint. I used a tiny artist brush for applying the gold paint to the sides and with the cleanup. They were the perfect size for those tiny spaces. All of this paint dried pretty quickly because it is water-based.
Then it was time for clear wax to seal these pieces and to protect the paint from wear and tear. I want these traditional side tables to last for a while!
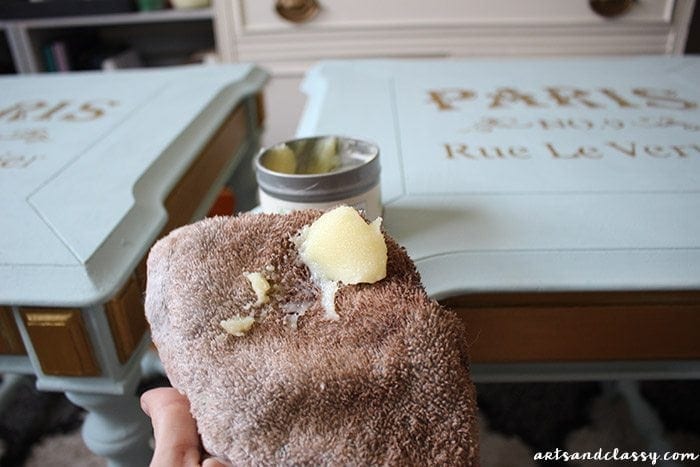
All I did to use the wax was to use a rag with a dollop and apply it in a circular motion. A little of this wax goes a long way. It didn’t take much to cover both tables.
Once I let both of these tables sit for about an hour or so, they were complete! I was so elated that the couple that bought my coffee table loved these at first site when I texted them photos. I delivered them within an hour of them giving me a big “HELL YES” to taking them. Score!
Here are a few AFTER side table makeover glamor shots I wanted to share with you!
What do you think of these side table makeovers? I hope this inspired you to take action and shop at a local thrift store, or on a buy/sell app to find a good deal. Here are more full tutorials of other DIY furniture flip projects that you will love. I would love to know. Let me know in the comments below!

Liked this project? Add to your pins on Pinterest to revisit later.

WOW! Beautiful make over, that’s really impressive! Specially loved the golden details <3
Thank you so much Anna! It was a fun project! 🙂
WOW! Beautiful make over, that’s really impressive! Specially loved the golden details <3
Thank you so much Anna! It was a fun project! 🙂