Retique It Side Table Set Flip
*This post on how to paint furniture was sponsored by Retique It via Hometalk, however, all opinions expressed are entirely my own.
I am so excited to be sharing this fun furniture flip with you today because I was able to do something I have never done before. I have flipped a lot of furniture in my time, and one of my least favorite types of projects are those that require heavy sanding to be able to stain and or refinish the piece.
If you are familiar with me and my work, then you know I love a good hack. I love finding ways to expedite the process of the projects I work on. This is one of the reasons I am so elated to be working with Retique it!
If you are not familiar with Retique it products, you are about to have your minds blown. They are known for their 3 step process… Paint it. Stain it. Seal it.
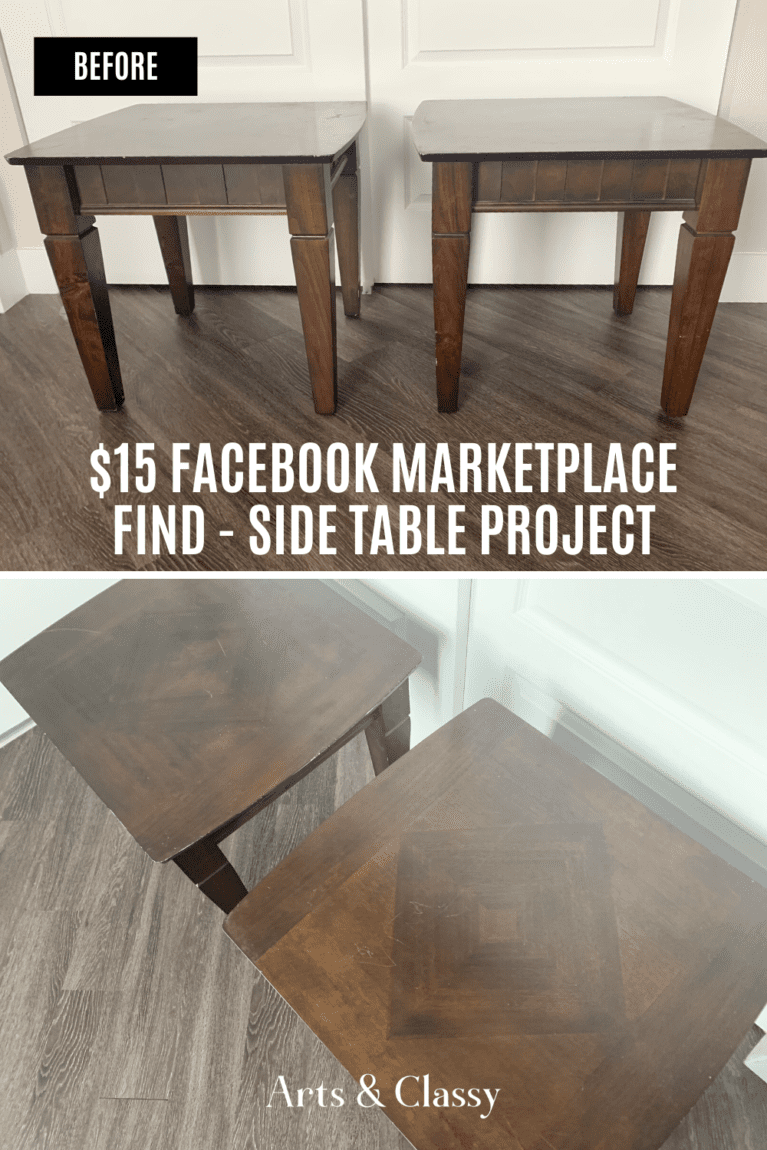
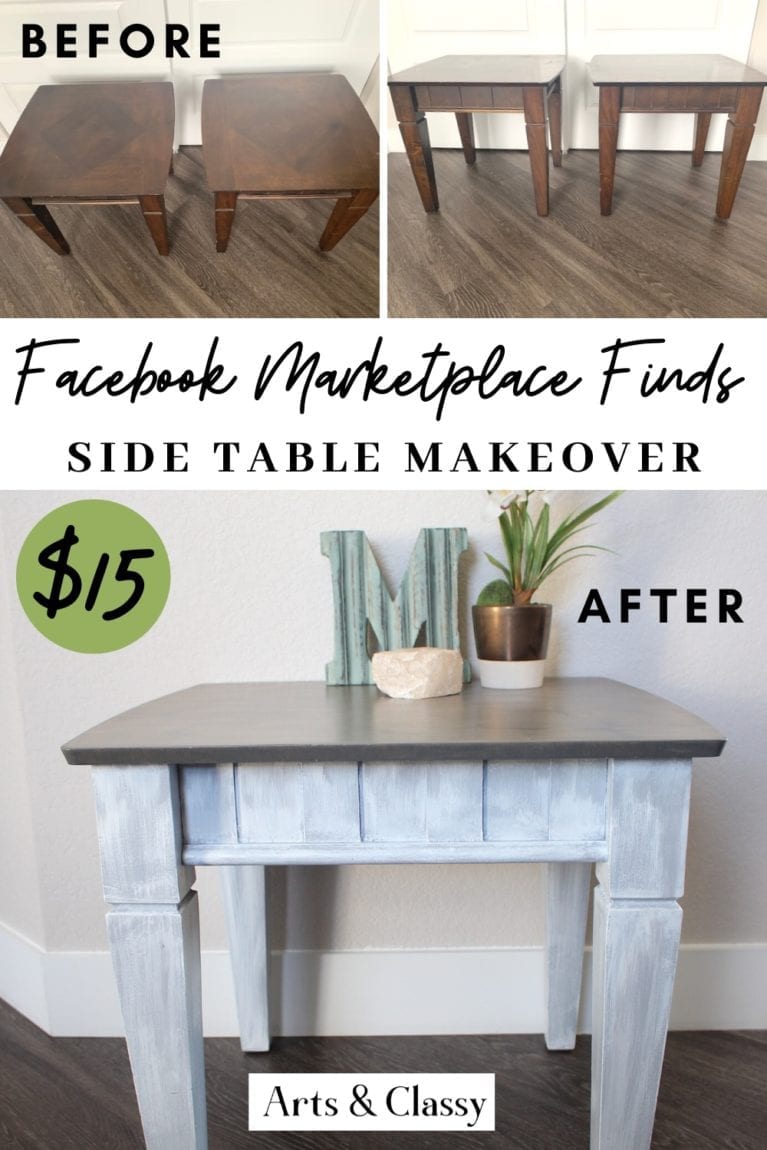
Now that you know a little more about the product I am working with today, I would love to tell you more about the tables I am working with. I found these two sad looking ugly side tables on Facebook Marketplace. I was able to negotiate these tables down to $15 as a set! Pick up went smooth, and I was happy to bring them home to begin my work.
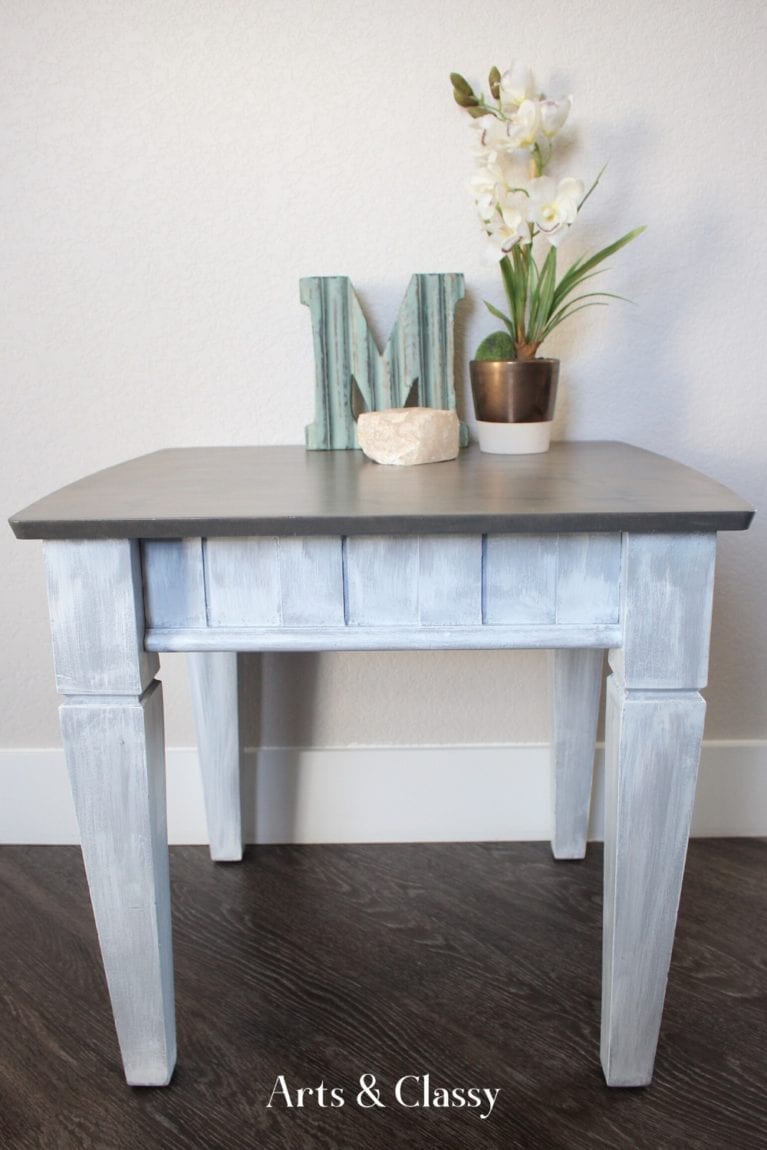
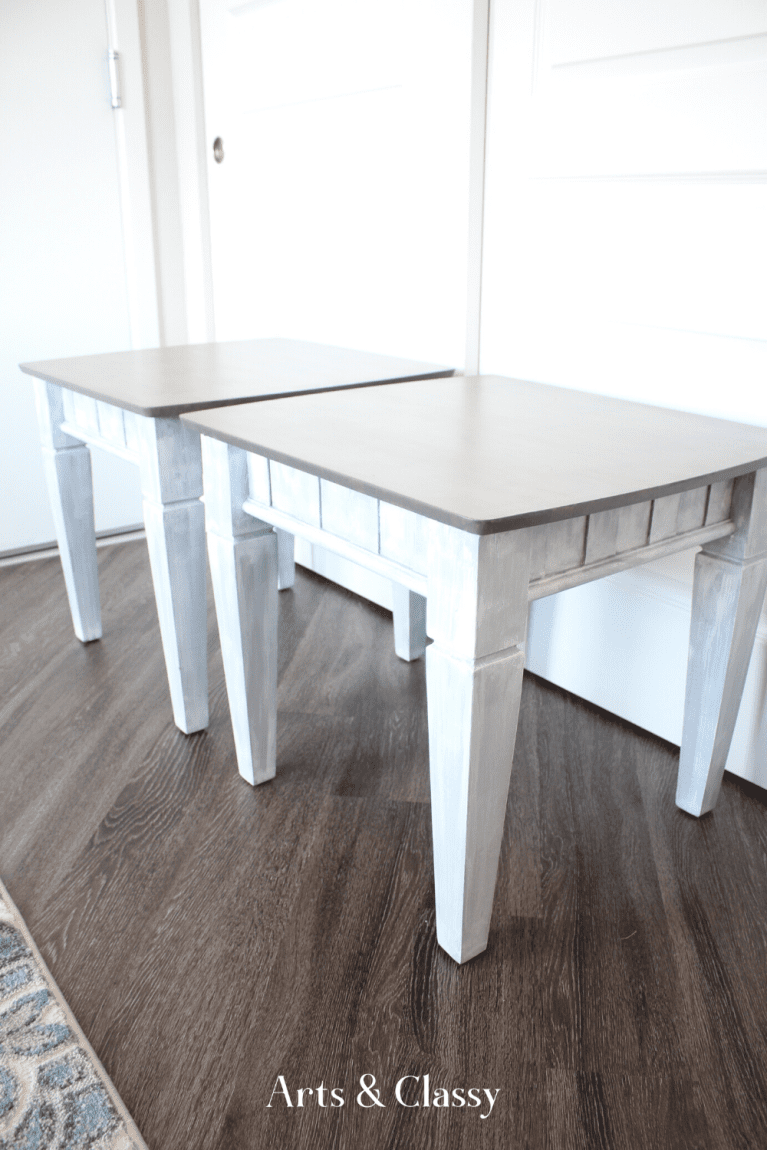
My vision for these tables was a farmhouse look. I transformed a table set that was similar to this table in the past and was able to achieve a farmhouse look (but it took a lot more time). I was anxious to see how I could make these two tables look beautiful to adorn anyone’s home.
Supplies I used for this project:
- Retique it light liquid wood paint
- Retique it weathered wood gel stain
- Woodgrain tool
- Chalk paint – Grey
- Acrylic (artist) paint – white
- Retique it paintbrush
- Retique it polyurethane satin-finish – clear
- Artist paint brushes (assorted sizes)
- Flathead screwdriver
- Hammer
- Allen wrench
- Crescent wrench
- Microfiber towel
- Cleaning surface spray
Let’s get to the project because I am really excited to share the process with you! For a more in-depth look at what I did to these tables, make sure to check out this full video tutorial for more information.
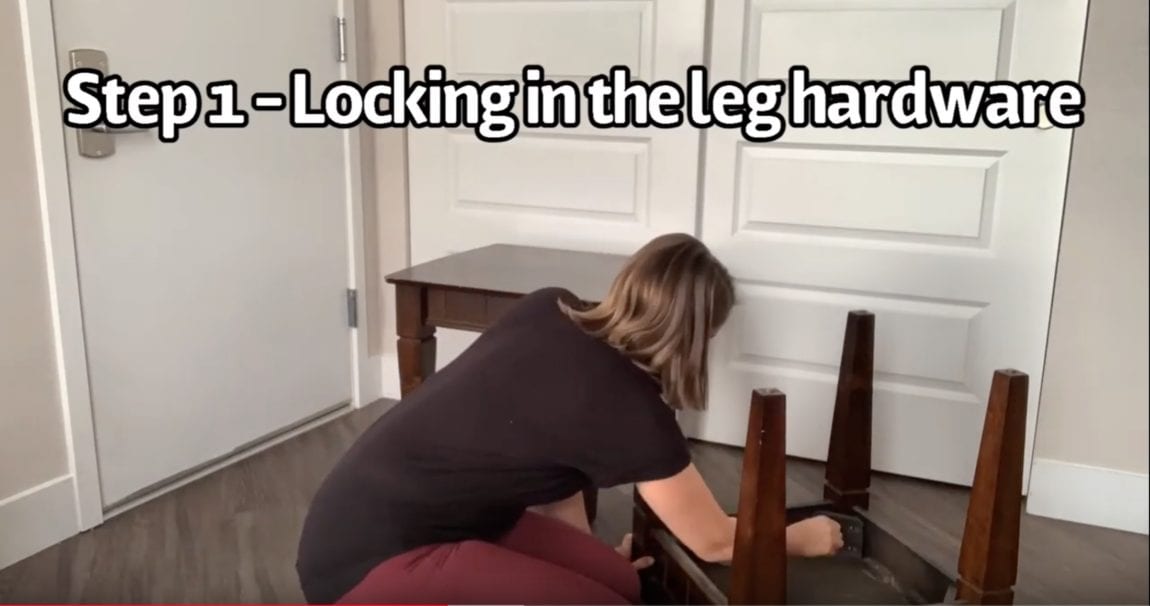
Step 1 – Tighten up hardware on table legs
When I picked these tables up, they were good quality but the hardware keeping the legs attached had become loose. Nothing an allen wrench couldn’t fix.
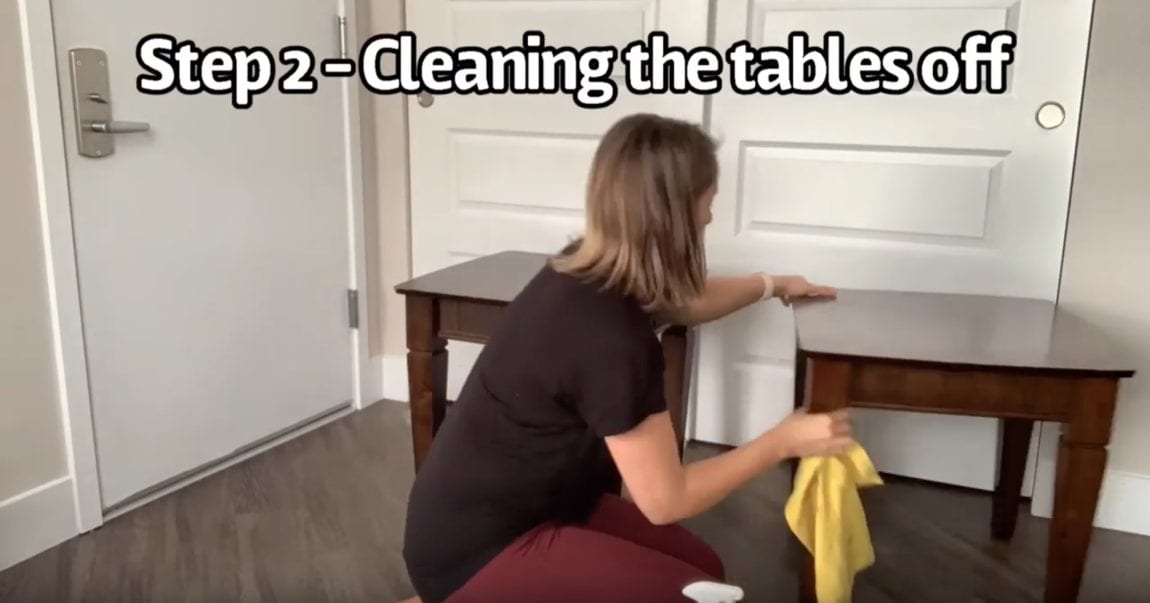
Step 2 – Clean and wipe down tables
I wiped both tables down with a microfiber towel and some multipurpose cleaning spray. It helped remove dust and anything stuck on the tables to give me a nice clean surface to work with.
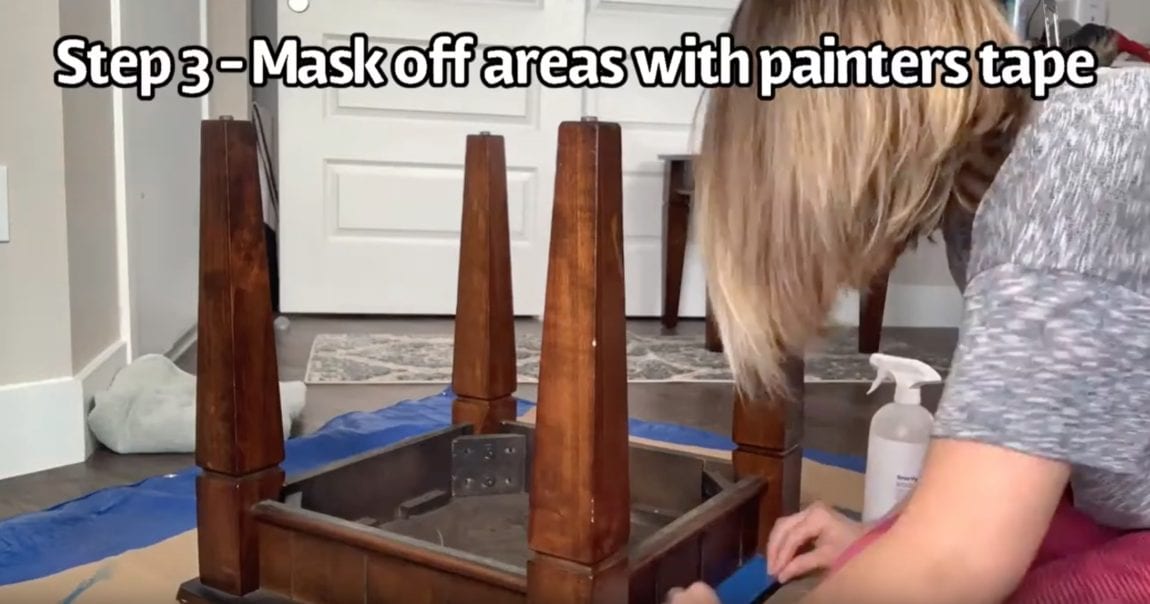
Step 3 – Mask off areas with painters tape
Painters tape is seriously one of the most valuable tools. It helps me protect the pieces I work with from being messed up by my creative process. I wanted to make sure I kept the underside of the tabletop covered so I didn’t get any chalk paint on it.
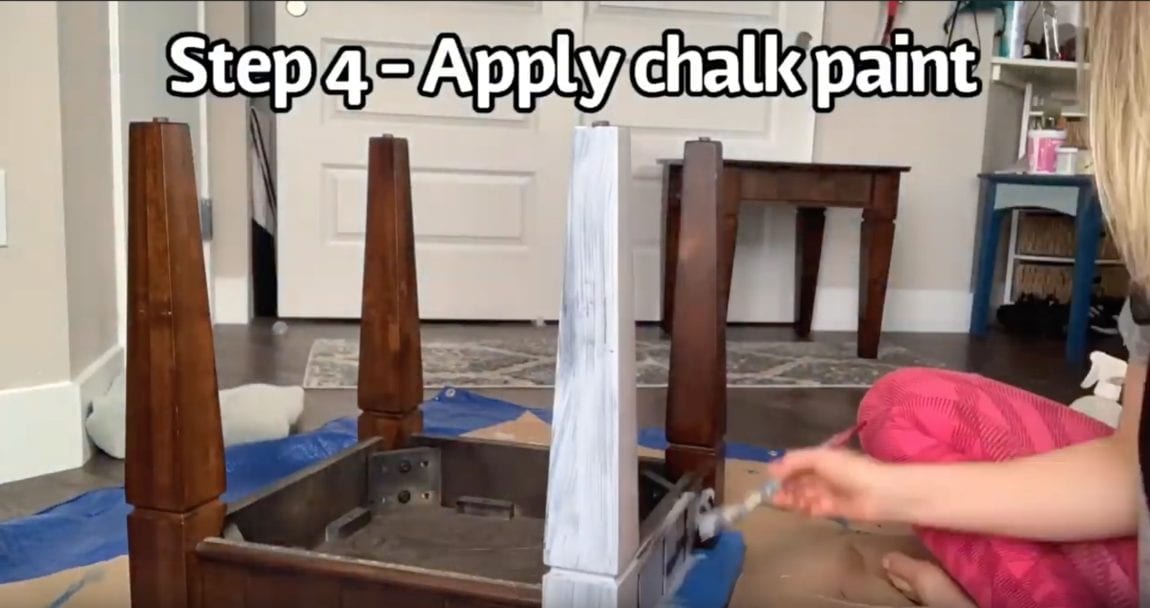
Step 4 – Apply chalk paint layers
Chalk paint is one of my favorite things to use with the furniture I flip. I feel like it really can make a big impact on a piece in a short amount of time. This table process took about 2 coats of chalk paint to achieve full coverage.
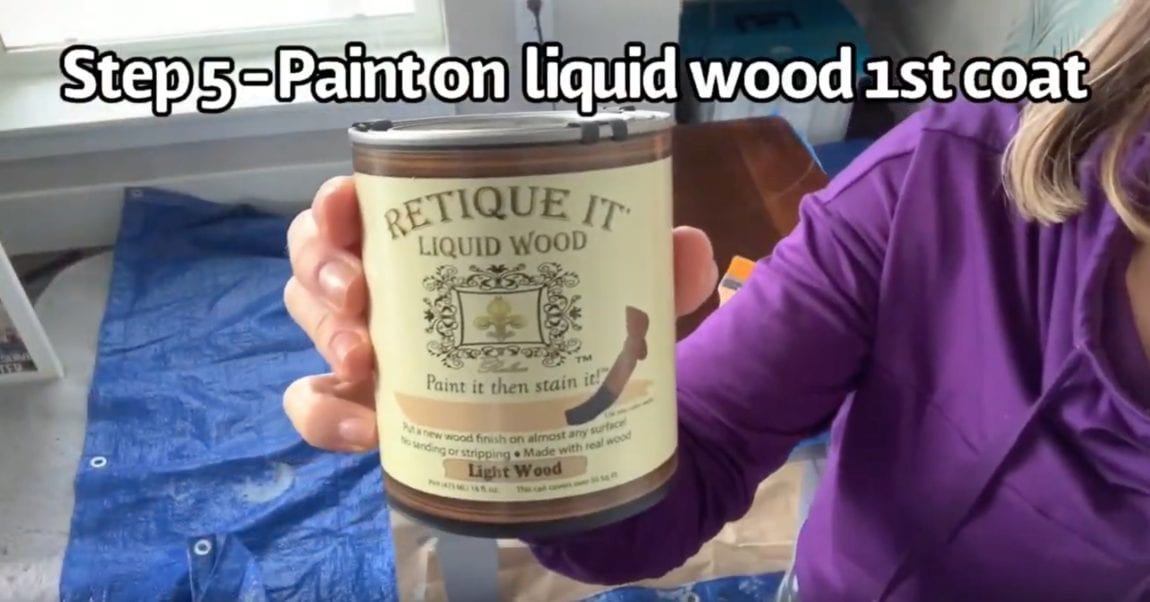
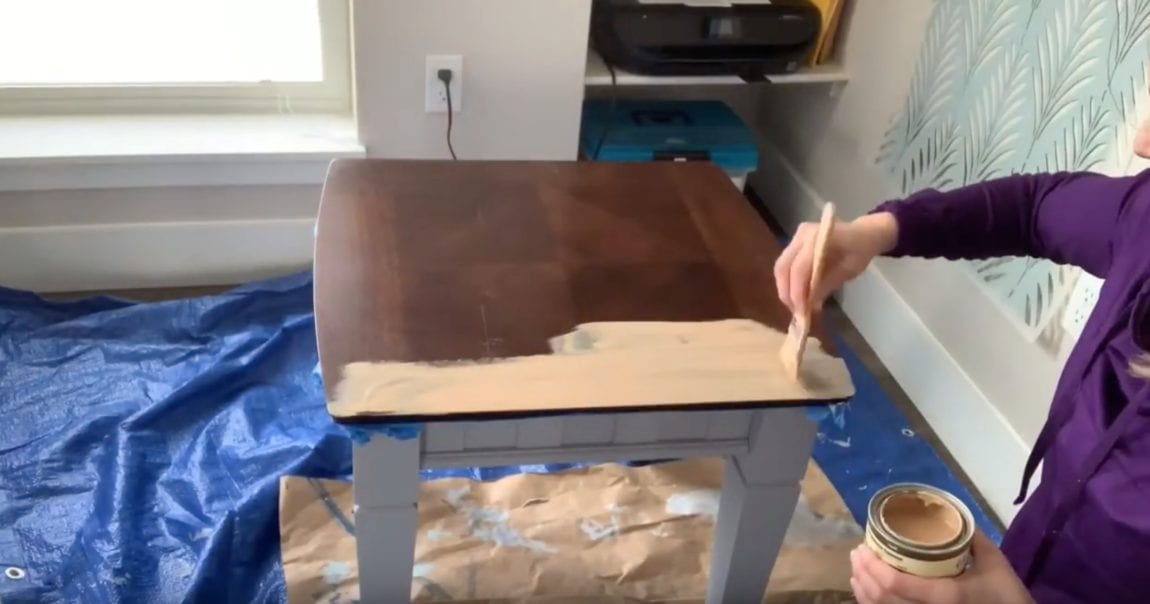
Step 5 – Paint Retique it liquid wood on table top
This was my first layer and I thought it would have gone on more opaque but it didn’t. I did a light first coat, let it dry completely before applying my second coat.
Step 6 – Apply the second Retique it liquid wood coat
I was much happier with how this layer was applied. It was the surface I was imagining before I stained it when I was doing my research prior to working with this product.

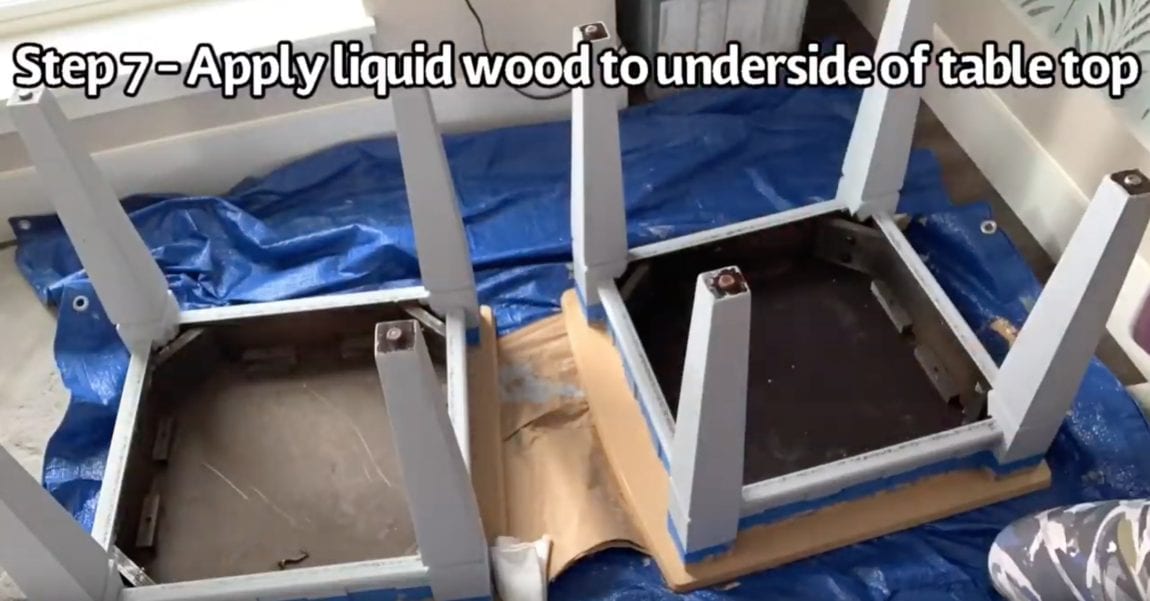
Step 7 – Apply Retique it liquid wood to underside of table tops
I had to flip the table on their tops to get the underside of the table top covered.
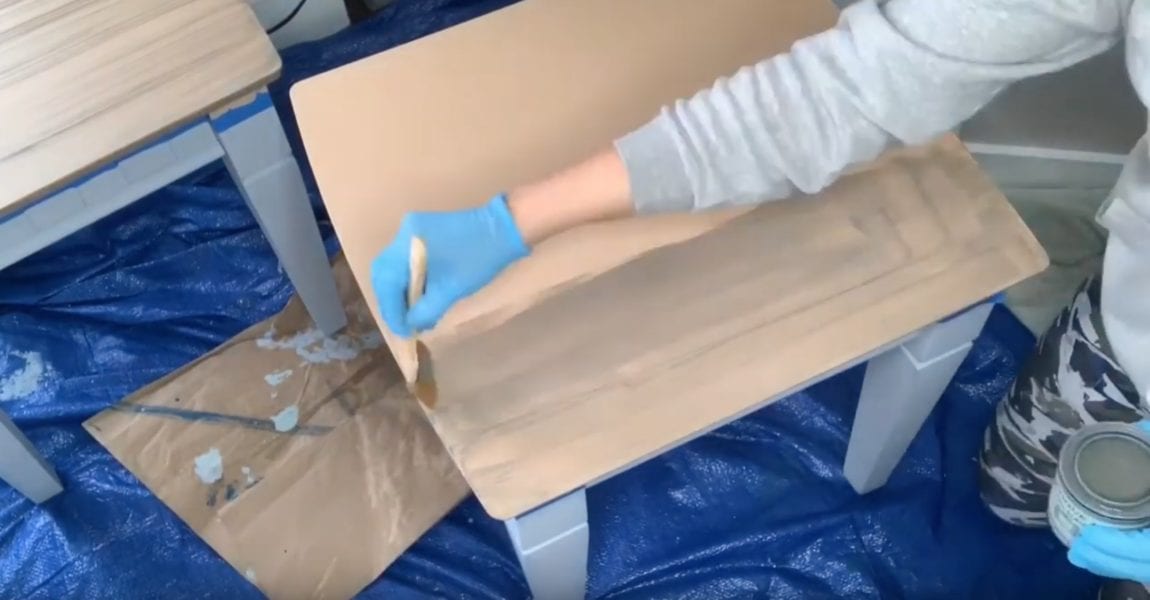
Step 8 – Apply the first layer of Retique it gel stain
I applied the stain with my paintbrush. I made sure to brush it in the direction I wanted my wood grain to appear. Long steady strokes. This was also a light first coat. I didn’t know how heavy this stain would apply so I figured adding more layers would be easier.

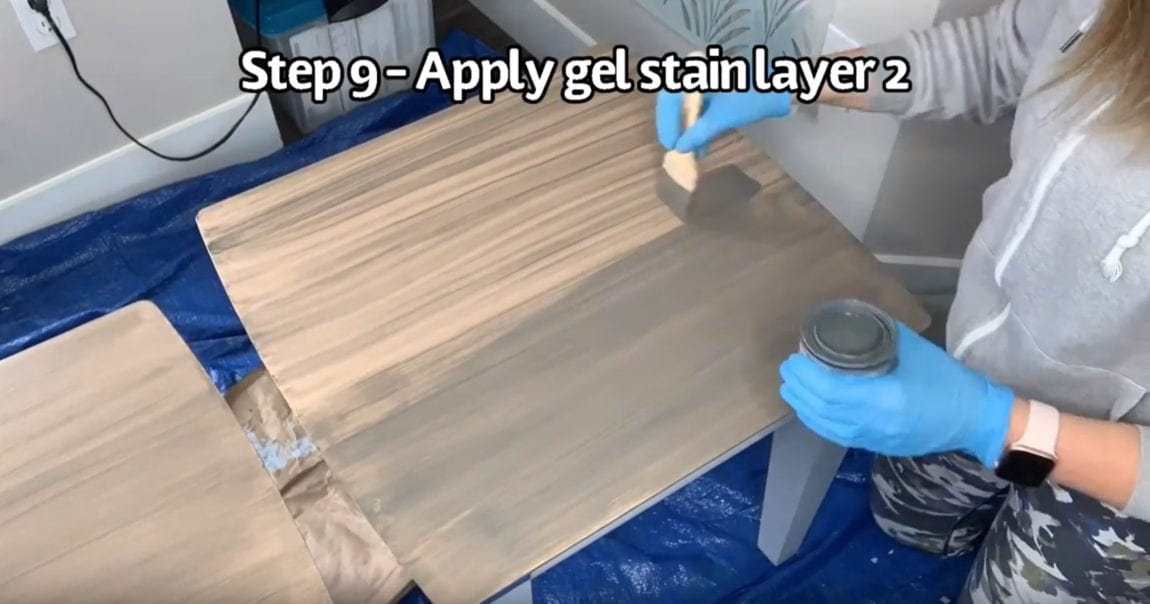
Step 9 – Apply the second layer of Retique it gel stain
The second layer added a lot more pigment to the table than the initial layer.
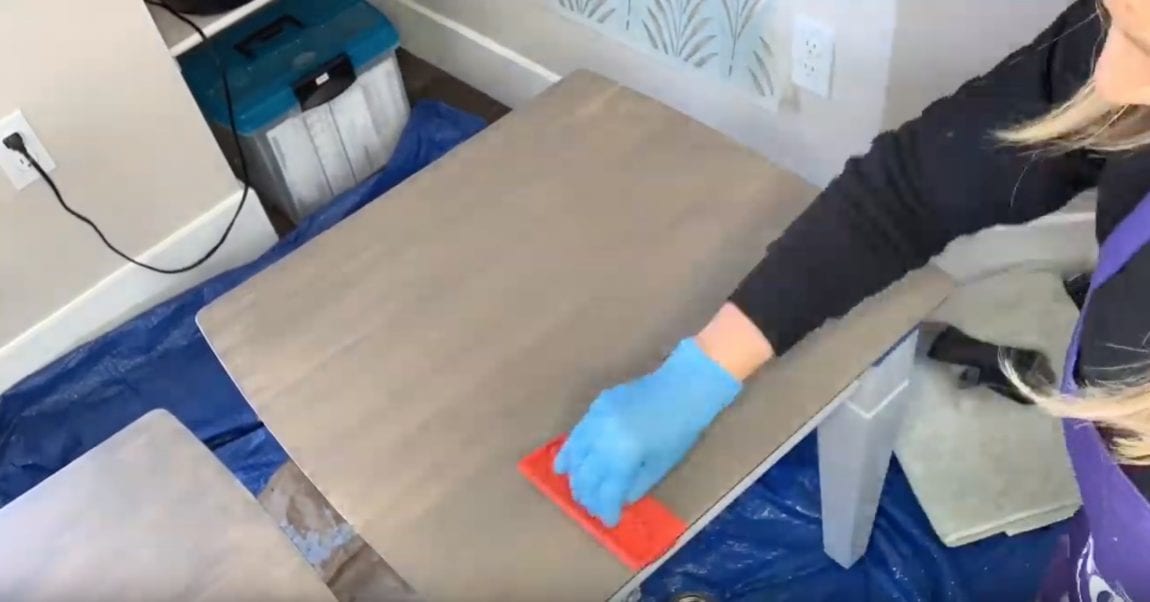
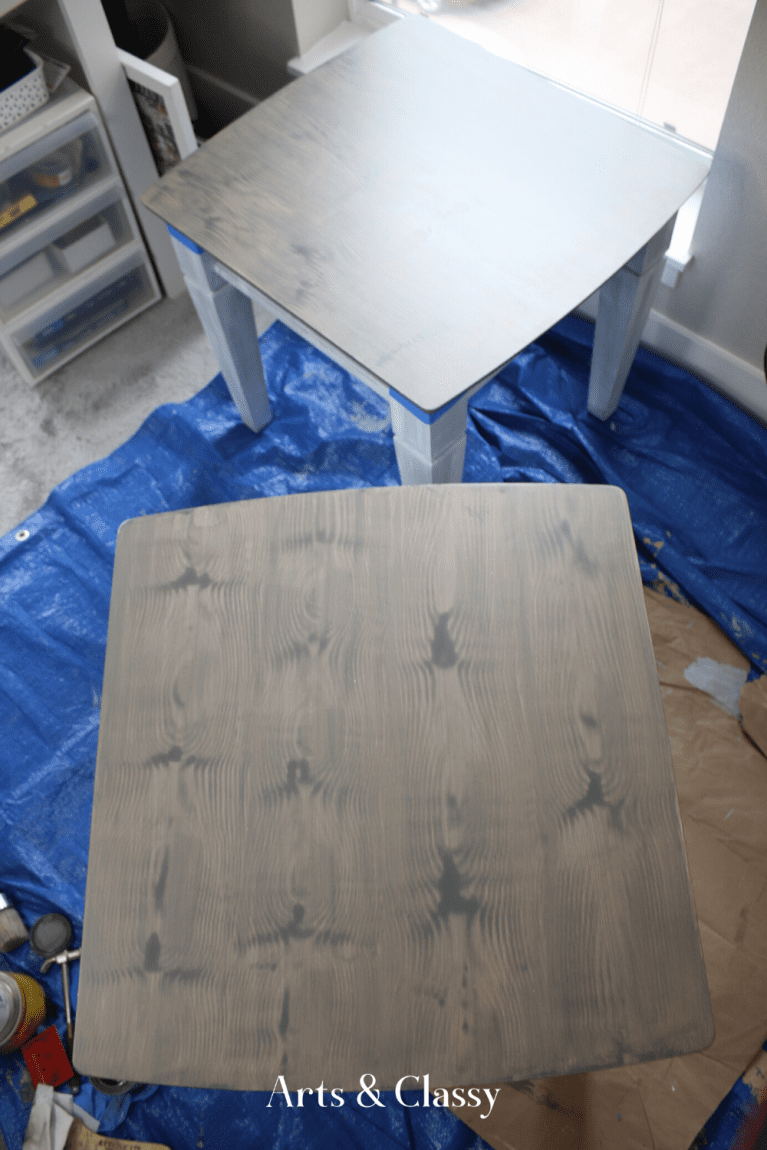
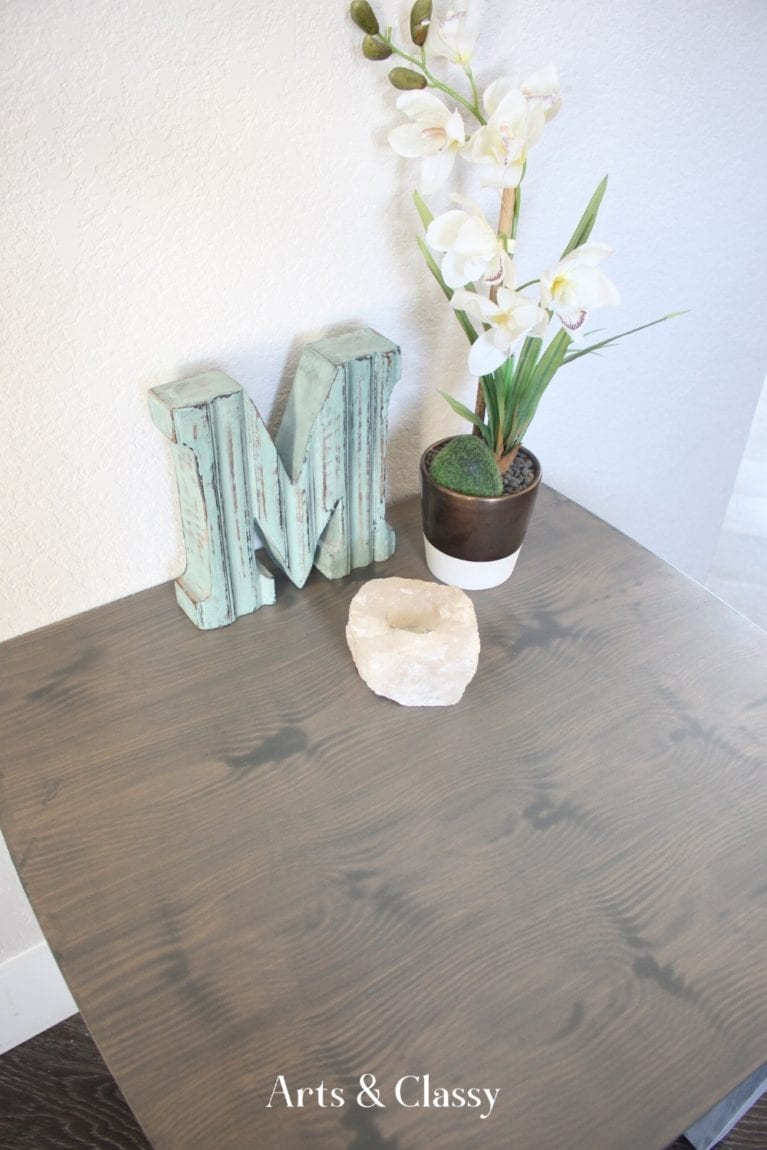
Step 10 – Apply the third layer of gel stain and use wood grain tool
This part was pretty fun for me because I haven’t used a wood graining tool before and I was surprised at how real it ended up looking. I am glad I did 2 coats of stain prior to completing this step because it added to the real look because it had more layers built up underneath.
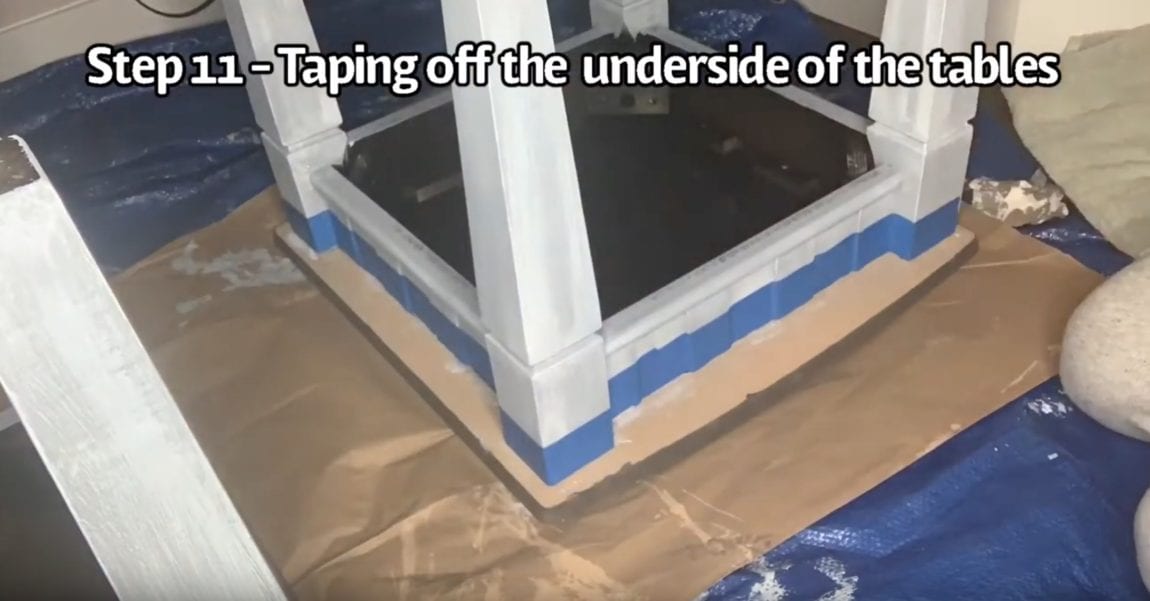
Step 11 – Taping the underside of the table for staining the bottom of the tabletop
Taping is always a time-consuming part of furniture flipping, but it is crucial to obtain clean lines and for protecting areas you don’t want to paint.
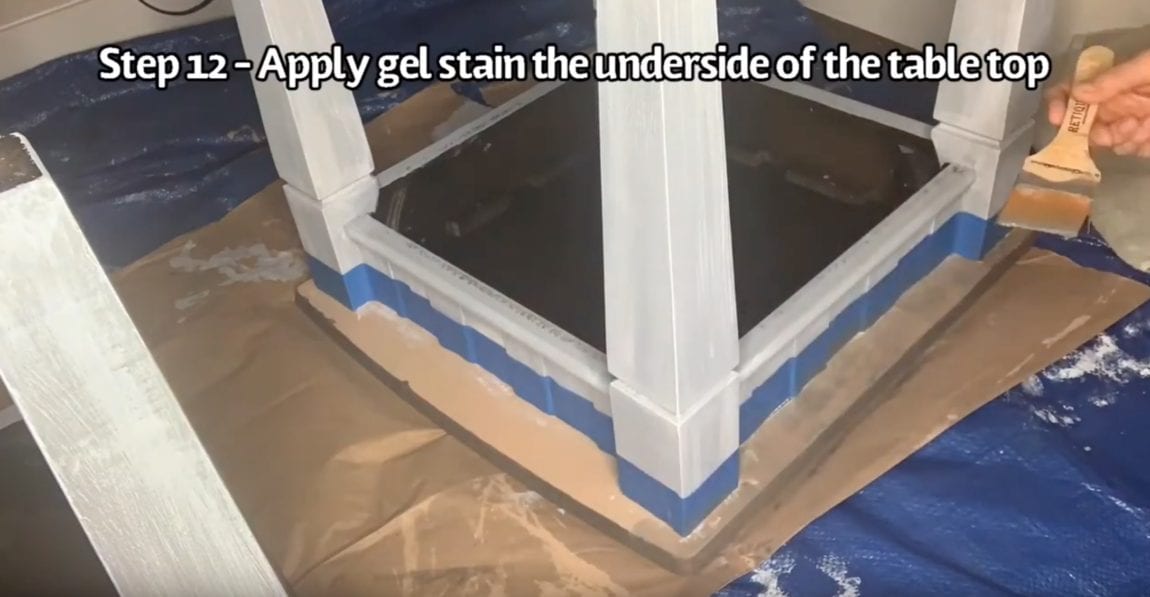
Step 12 – Apply gel stain to bottom of the tabletop
Same process as the table top staining, only I didn’t apply a third layer.
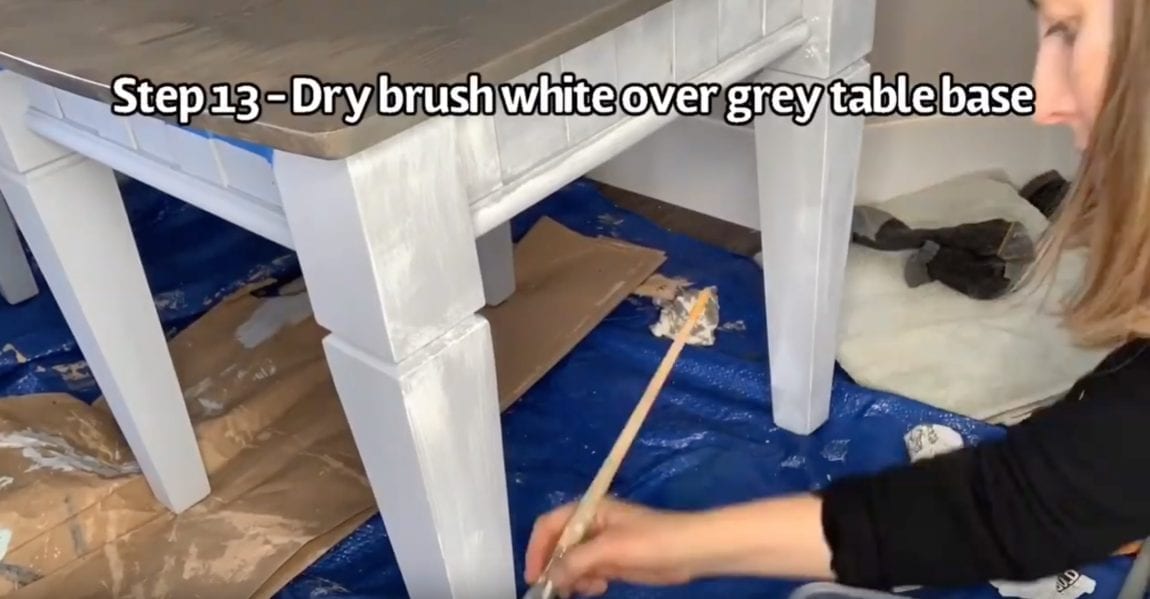
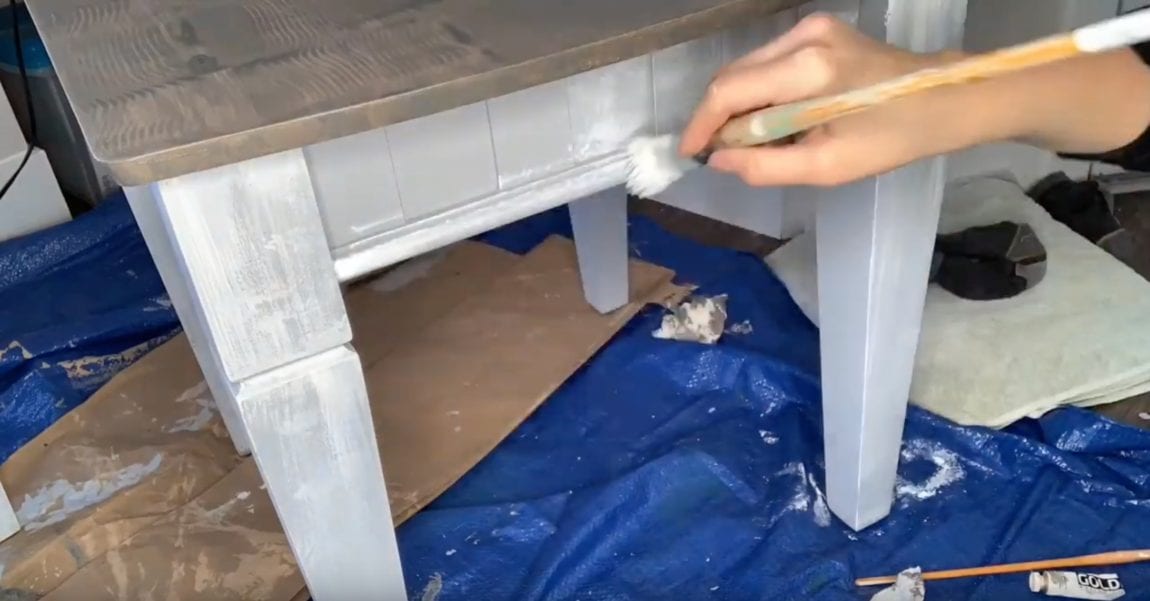
Step 13 – Dry brush white paint over grey base
I took one of my artist brushes and some white acrylic paint and dry brushed the base of the table over the grey part.
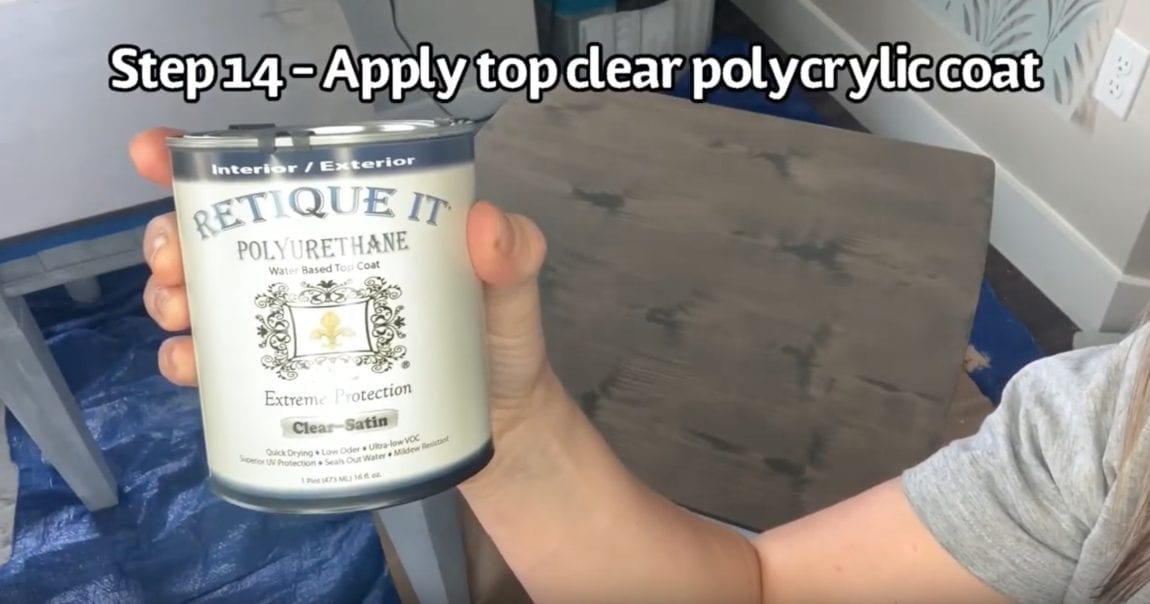
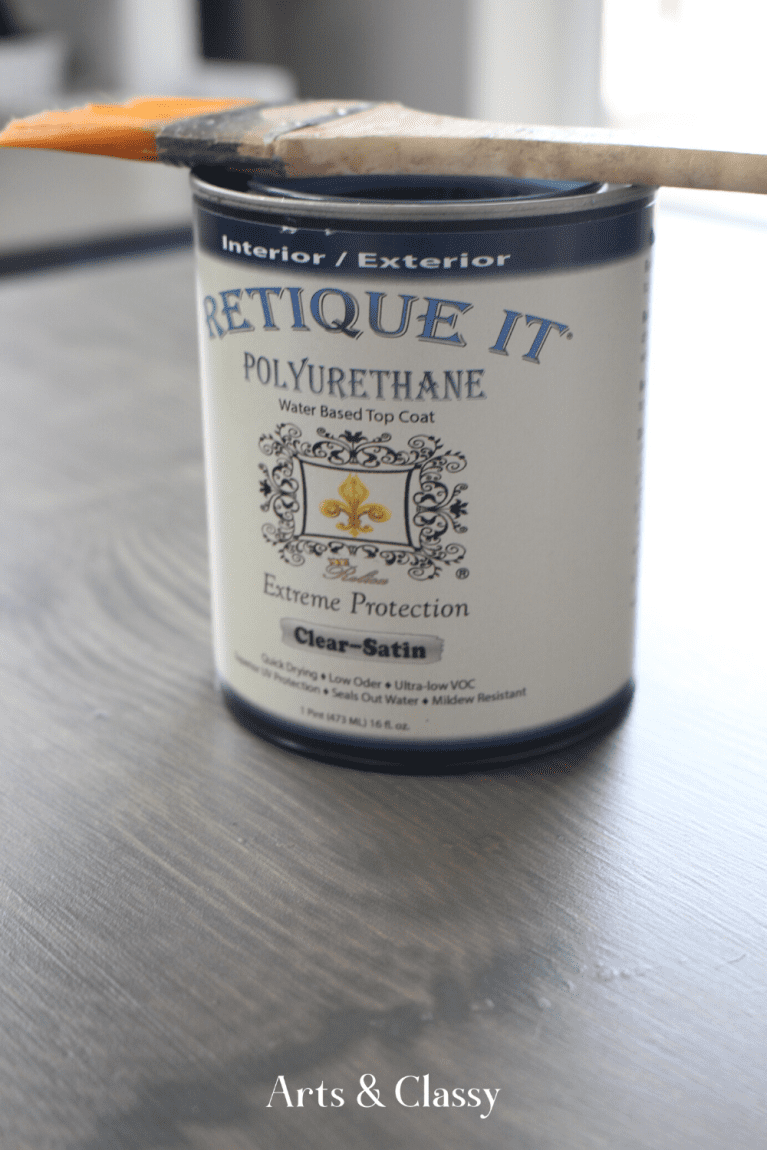
Step 14 – Apply a top clear coat
I applied my topcoat with a paintbrush and was very surprised at how well it was applied and how quickly it dried. I didn’t experience any lines once it dried. I had to make sure to inspect the tables after I painted them to make sure there were no drips to be found on the side of the tabletop.
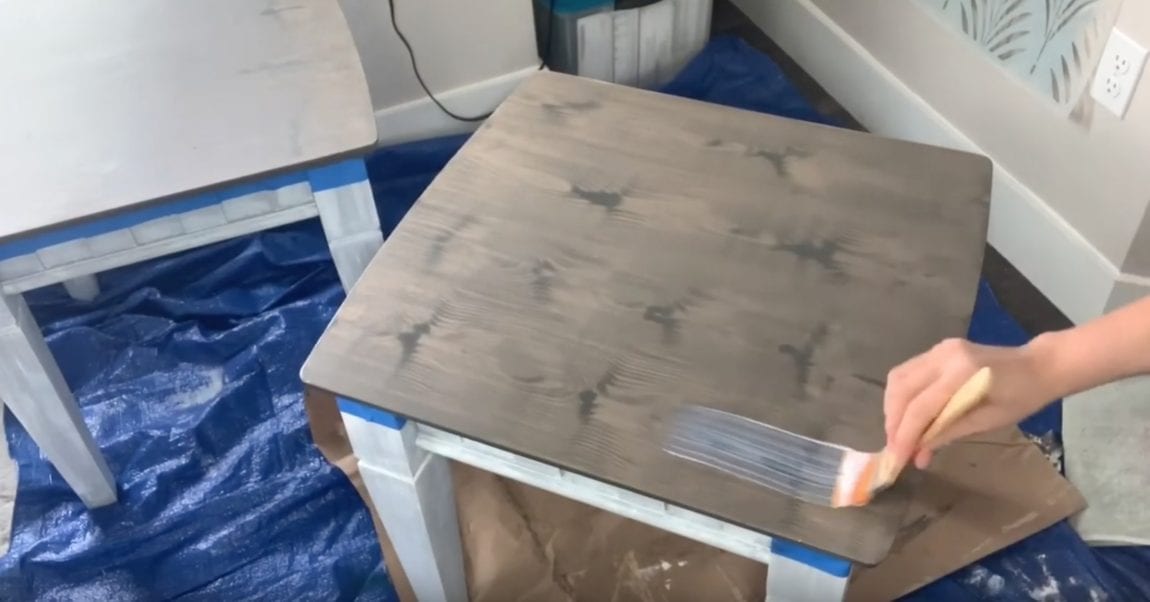
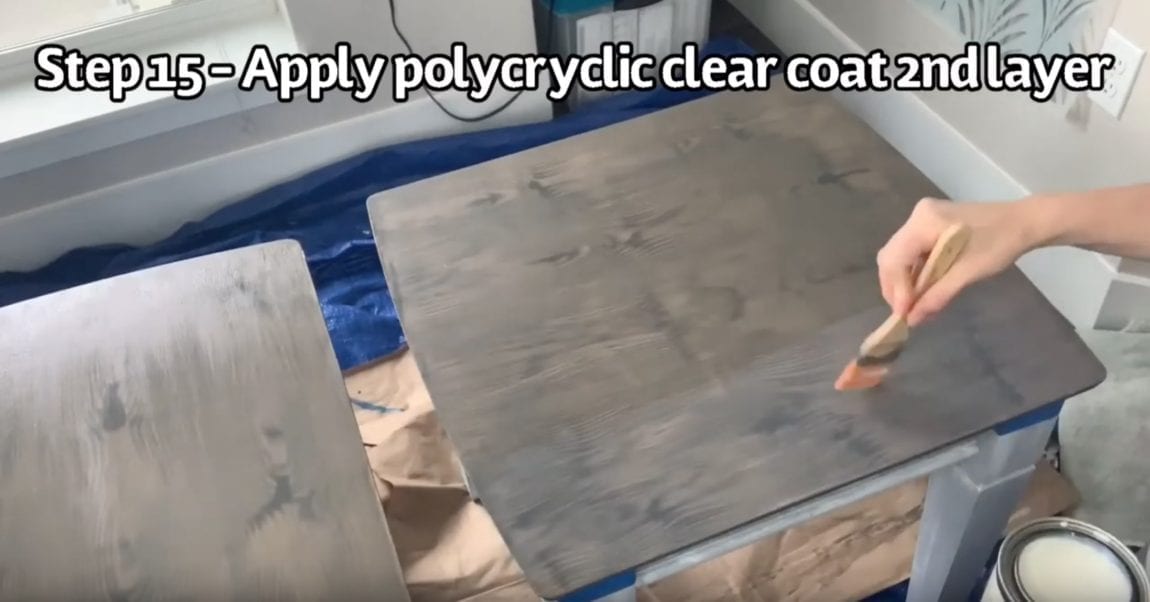
Step 15 – Apply the second layer of top clear coat
You wouldn’t have even known that I had applied a polyacrylic topcoat. It blended in with the work I did so well. I applied 2 coats to the whole table to make sure it was completely protected from damage
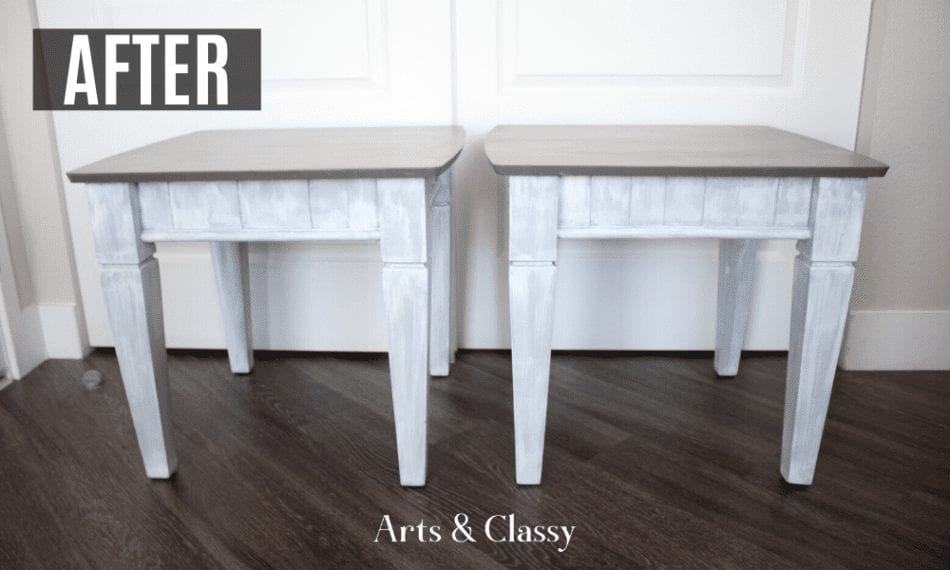
I really hope you enjoyed this project as much as I did. Let me know what you think in the comments below! ENJOY!
If you liked this post you may also like…
- $11.99 Goodwill Find Side Table Stenciled Makeover
- Drop Leaf Table Vintage Furniture Makeover
- How to Chalk Paint a Table Set – Farmhouse
- Goodwill Find Gets a Rustic Farmhouse Makeover

.