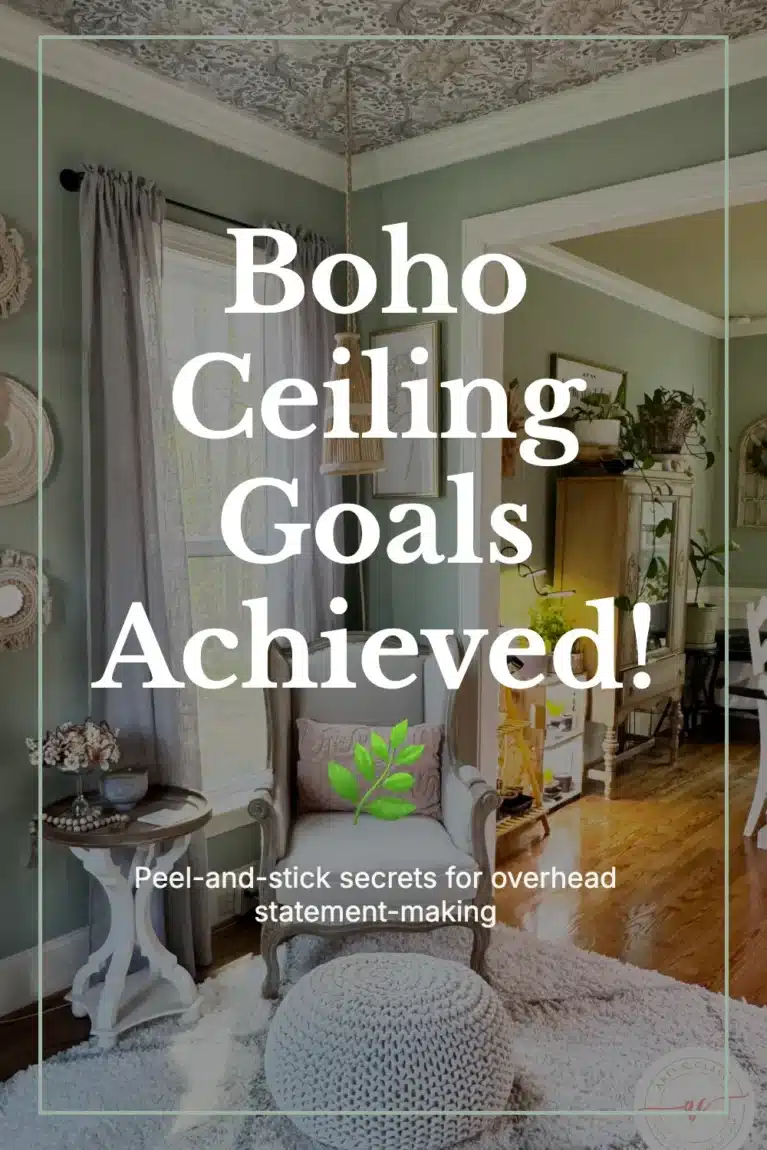
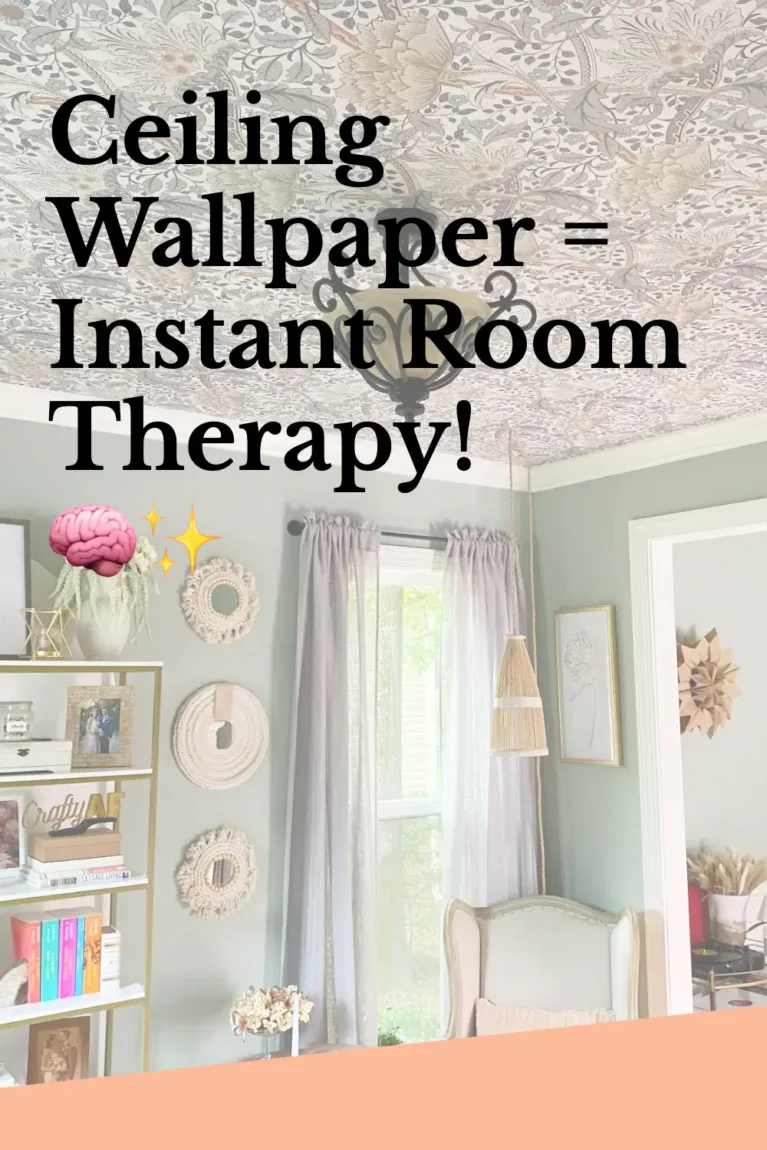
Setting My Sights Higher: Installing Peel and Stick Wallpaper on My Boho Office Ceiling
You know that feeling when you’re itching to give a room a fresh look, but the thought of messy paint or wrestling with traditional wallpaper just makes you sigh? I totally get it. My home office has been on my list of to-dos for some time now. That’s why we’re diving into the magic of installing peel and stick wallpaper on my home office ceiling.
It’s seriously one of the quickest, most satisfying ways to totally transform a space without a huge commitment or a ton of fuss.
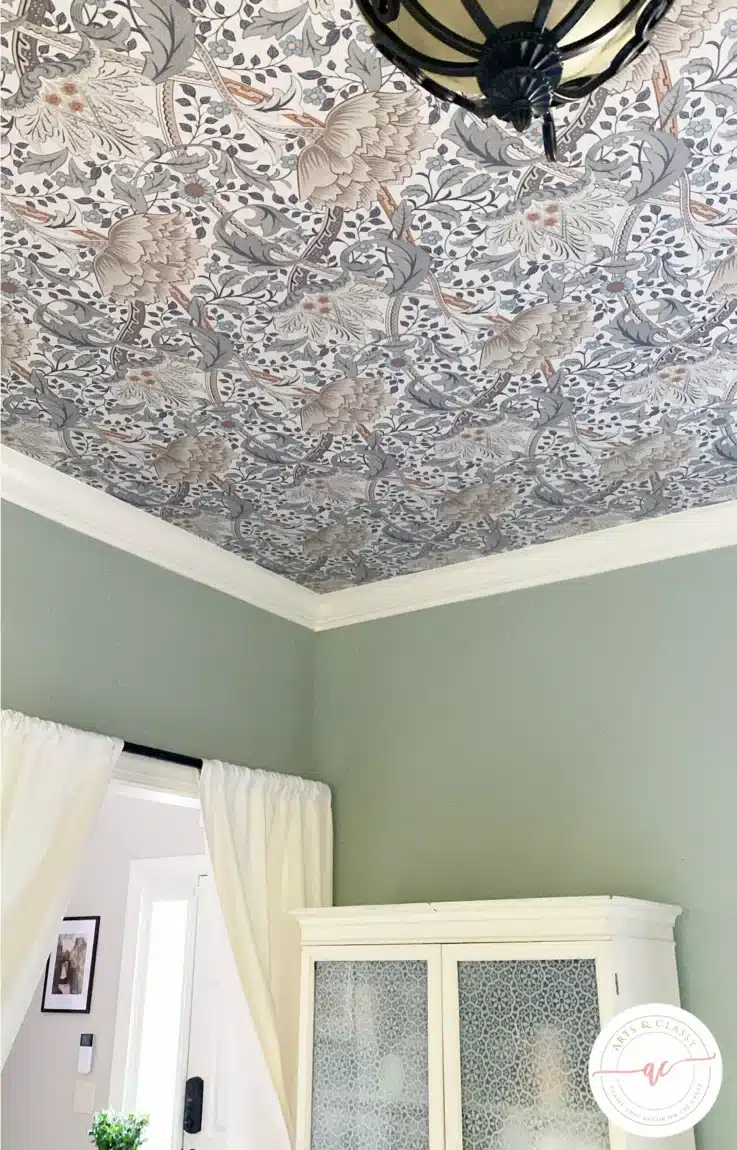
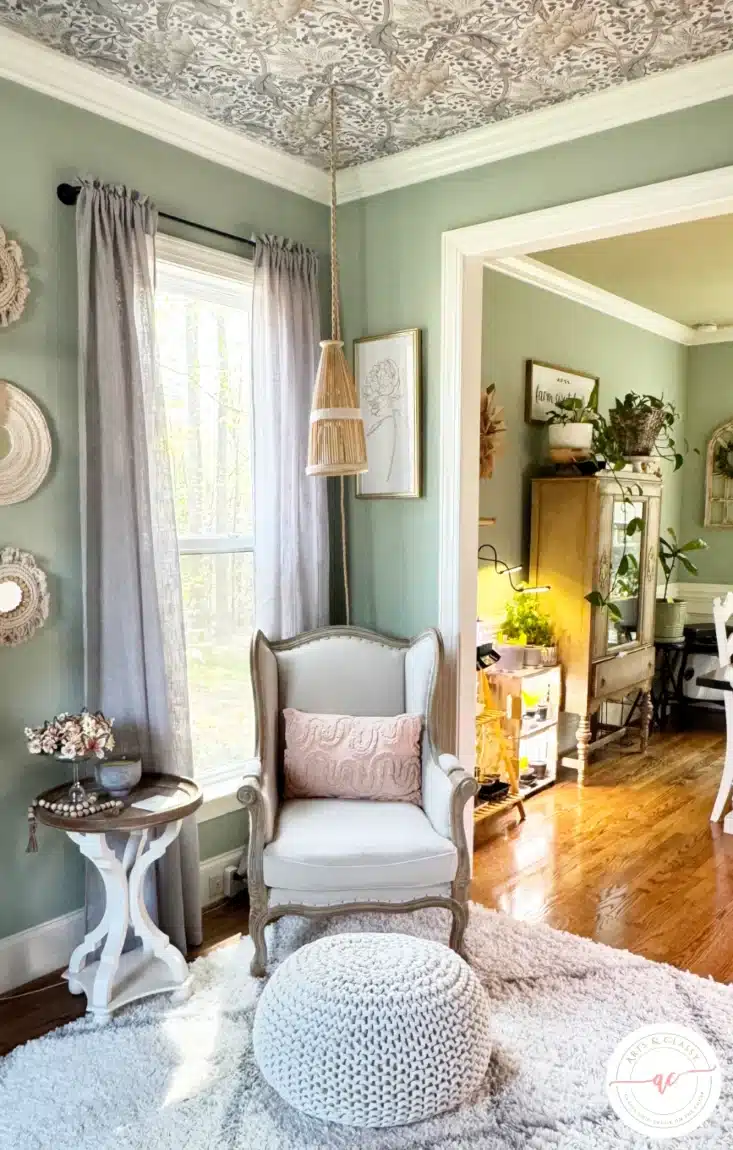
And this time, we’re not even sticking to the walls. Nope, we’re taking things up a notch – literally – by tackling my office ceiling.
Get ready to turn that often-ignored “fifth wall” into an unexpected focal point that adds so much character. That elevates the space visually and aesthetically. It’s a surprisingly simple way to make a big statement, and trust me, it’s a lot more manageable than you might think!
This post contains some affiliate links. I may earn a small commission if you purchase through one of these links. See more information in my full disclosure policy.
Materials Needed For Installing Peel and Stick Wallpaper On The Ceiling
Let’s get down to business. Here’s what you’ll need:
- A Pencil
- Peel and stick removable wallpaper (obviously!) It has a self-adhesive backing and is less messy than traditional wallpaper installation.
- I recommend buying more than you think you need because with DIY projects like this, there will be mistakes during application, and having a bit of excess supply will prevent you from having to make another purchase. See calculations below to support you when you order.
- A ladder or step stool
- Tape measure
- A straight edge ruler to ensure a straight line and edges
- Utility blade/knife
- A squeegee or smoothing tool
- A friend for moral support, I chose my chihuahua and an audiobook (optional but highly recommended)
Shop My Peel and Stick Wallpaper Recommendations and Supplies For Installation (below)

This Was My Home Office When I First Moved In Back In 2021
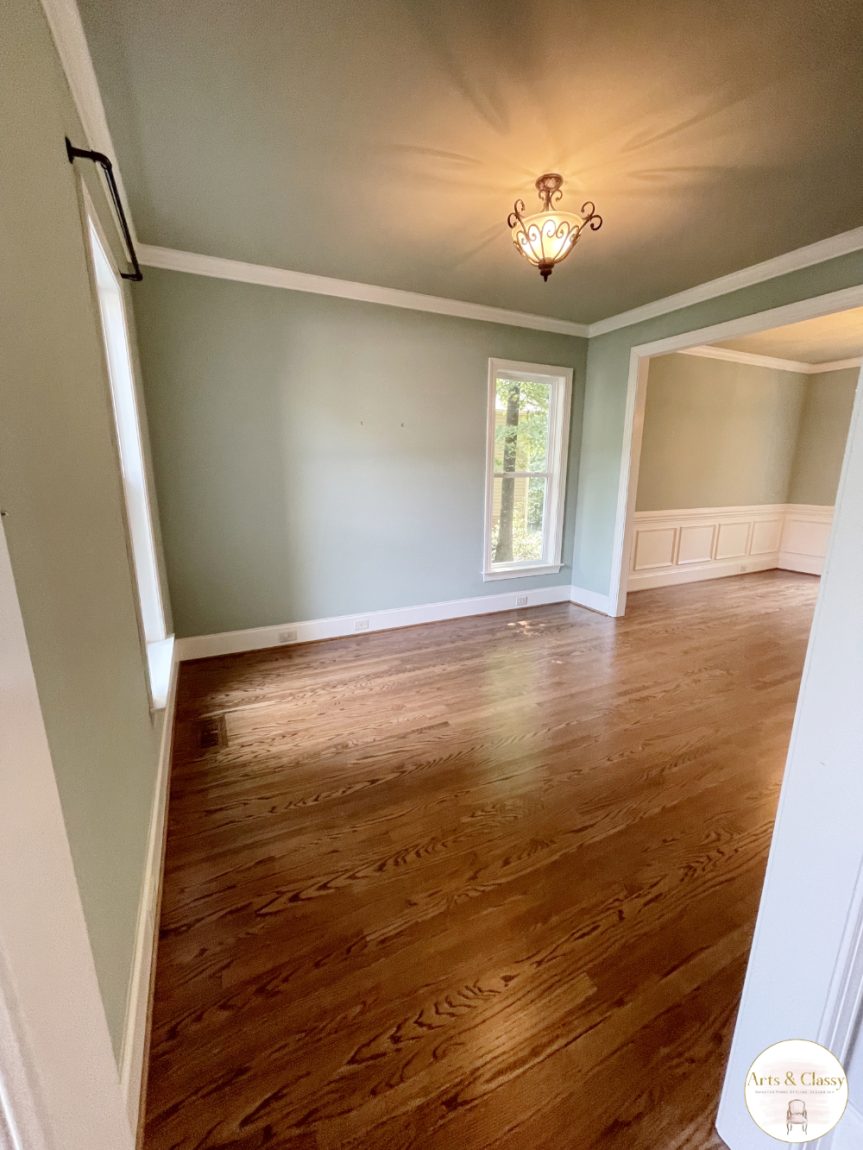
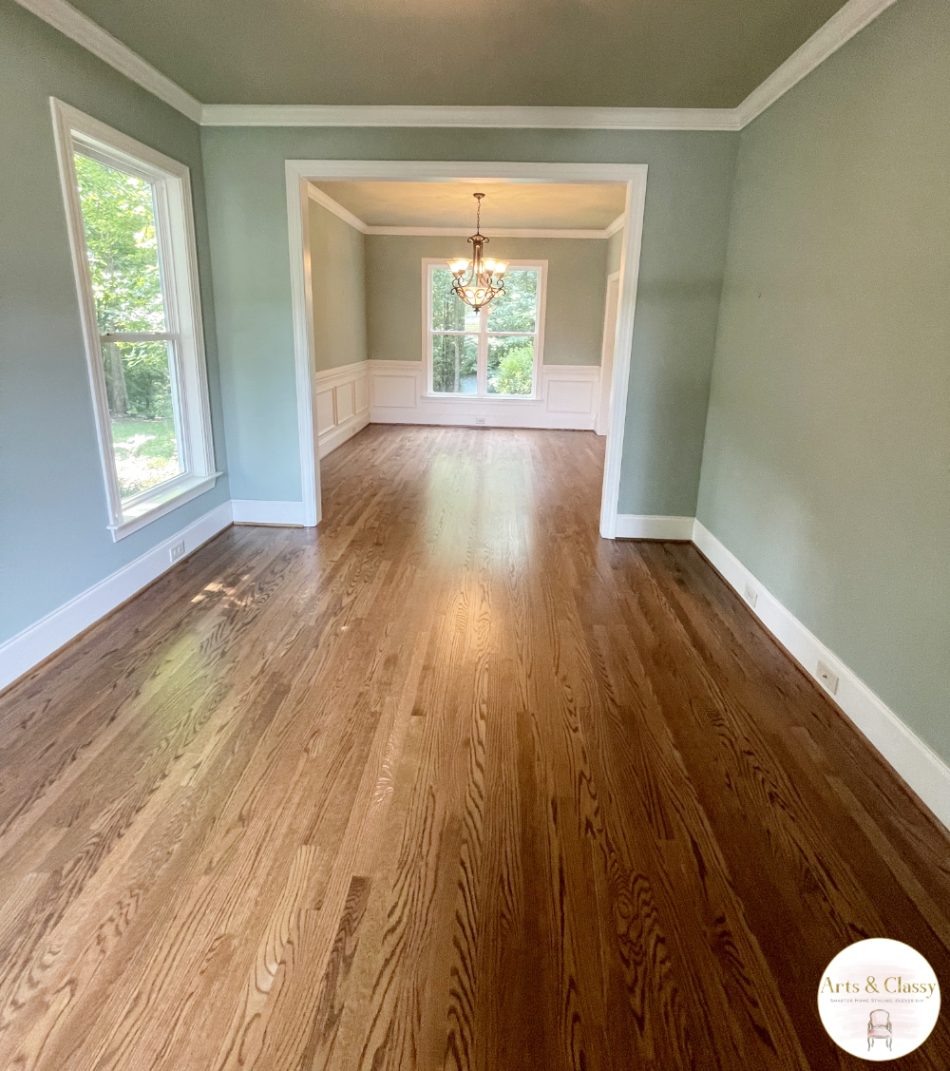
RELATED: My First Attempt At Making This Home Office Space My Own
Ordering Your Wallpaper: Best Practices
Let’s be real, gravity isn’t always our friend, and patterns can be divas. So, here’s how to make sure you grab enough rolls and avoid that panicked “oh no!” moment mid-project.
First, grab your tape measure and get the full dimensions of your ceiling: its length and width. Simple enough. Now, here’s the crucial bit: find the pattern repeat on your wallpaper. It’s usually listed in the product description and tells you how often the design starts over. Think of it as the secret handshake for your wallpaper pattern. You absolutely need to factor this in.
For every strip you plan to cut, you’ll add this pattern repeat to your ceiling’s length. This is how you ensure everything lines up perfectly overhead, which is way more noticeable on a ceiling.
Next up, figure out how many actual strips you’ll need. Take your ceiling’s total width and divide it by the width of your wallpaper roll. That tells you how many vertical runs you’ll have. Multiply that by your “pattern-adjusted” length (that’s your ceiling’s length plus the pattern repeat you just added). That gives you your baseline – the amount you’d need if the universe was perfectly aligned and you made zero mistakes.
But let’s be realistic: working on a ceiling is a workout, and peel-and-stick can sometimes be a bit fussy.
So, to cover any wonky cuts, tricky alignment, or just general “oops” moments, you’ll definitely want to pad your order. I always suggest adding an extra 15-20% to your total linear footage.
If this is your first time wallpapering a ceiling, or if the pattern is super intricate, go for the higher end of that percentage. Trust me, having a bit extra for touch-ups or a complete do-over on one strip is way better than running short and having to re-order.
Finally, take that grand total (the one with your extra buffer included) and divide it by the total length that comes on one roll of your wallpaper. Always, always round up to the next whole number. That’s your golden ticket – the exact number of rolls you’ll need to confidently transform your ceiling from drab to fab! But excess material is nice to have for those just-in-case moments with DIY.
Preparation Before Wallpaper Installation
Before we start sticking, let’s prep like a pro:
- Clean your ceiling thoroughly to ensure a smooth surface. I would not recommend surfaces with texture for self-adhesive wallpaper.
- Measure twice, cut once! Measure your ceiling, wall height, and width to determine needed wallpaper.
- Pre-cut your wallpaper into manageable strips (if needed), allowing a little extra length to trim later.
Tips and Instructions For Beginners For a Seamless Look
Feeling nervous? Don’t worry, we’ve all been there. Here are some tips to ease your nerves:
- Start in a corner for easier alignment.
- Take your time and work in small sections.
- Smooth out any air bubbles as you go – trust me, they’re sneaky little devils.
- Pro Tricks Tip: If you struggle to get the bubbles out of a wallpaper strip with the squeegee tool, take your utility knife and make a small puncture in the center of the bubble to allow the air to escape, then smooth it out with the squeegee tool.
- Don’t stress about perfection. Imperfections add character!
RELATED: Creative and Cost-Effective: Home Office Makeover on a Shoestring Budget
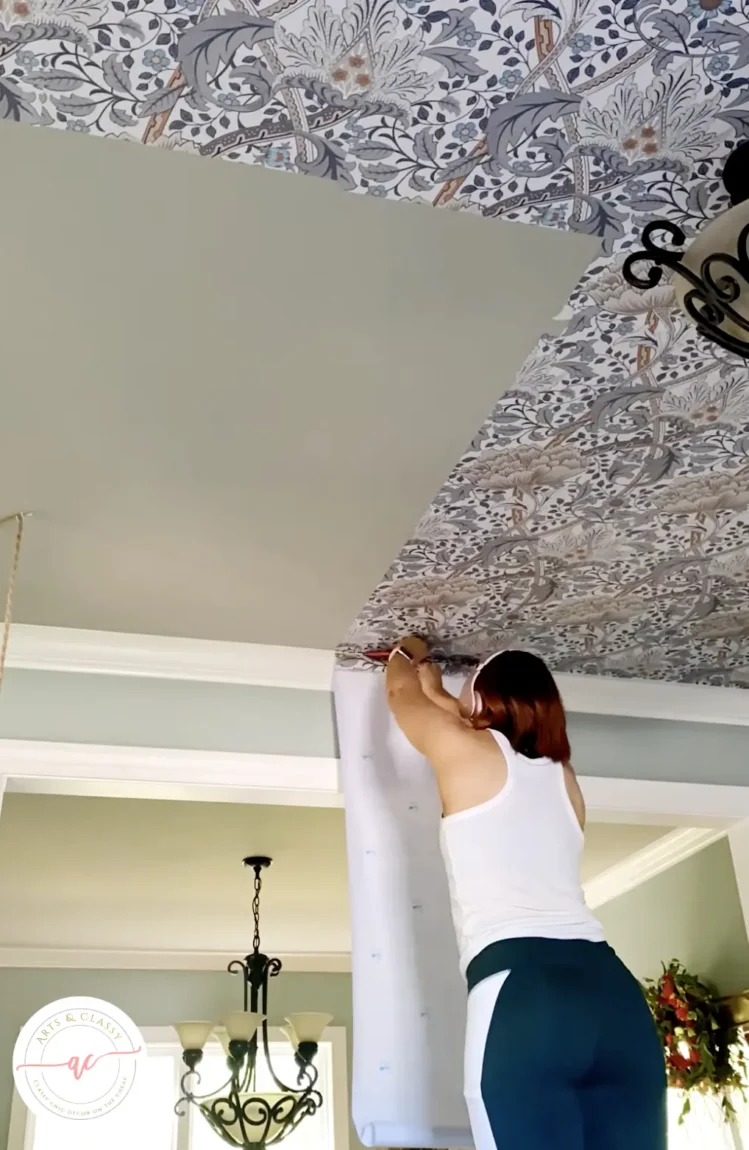
Applying The Strips of Wallpaper On the Ceiling
Alright, it’s showtime! Here’s how to stick it to the ceiling:
- Peel off a small section of the backing and carefully position the wallpaper on the ceiling, ensuring it’s straight.
- Pro Tricks Tip: Allow for an extra inch of overlap with the second strip next to it to prevent a vertical seam from showing.
- Slowly peel off the rest of the backing while smoothing the wallpaper with your hands or a squeegee.
- Continue this process, overlapping each strip slightly until your ceiling is covered in glorious wallpaper goodness.
Additional Tips For A Smooth And Seamless Installation Process
For that extra polish, here are some bonus tips:
- Use a sharp utility knife to trim any excess wallpaper along the edges.
- If you have textured ceilings, warm up the adhesive with a hairdryer for better adhesion.
- Be prepared to take many breaks. Your neck being at the angle of looking up, can be exhausting for your muscles so make sure to plan to take breaks to not strain your neck. I broke my office ceiling installation up into 2-4 hour sessions to allow for my neck muscles to relax.
- Stand back and admire your handiwork – you deserve it!

Voilà! You’ve just unlocked the secrets to effortlessly installing peel-and-stick wallpaper on your office ceiling.
RELATED: My Journey to the Perfect Modern Interior Doors (and an Inspiring Office!)
From planning, measuring, and prepping to smoothing and admiring, we’ve conquered each step with finesse together.
Now, as you revel in the chic ambiance of your revamped workspace, remember: the sky’s the limit when it comes to DIY creativity. I would LOVE to hear what you thought of this transformation. Happy installing! 🌟
Shop My Peel and Stick Wallpaper Recommendations and Supplies For Installation (below)
Did this transformation WOW you like it did for me? Make sure you are following me on Instagram, Facebook, Pinterest, YouTube, Hometalk, and TikTok for more ideas on decorating your home!
The next project for this entire room on my list for my blogging home office makeover will be replacing my super-dated ceiling light and getting some new custom doors to enclose the space! Stay tuned!
If you liked this post about installing peel and stick wallpaper, you might also enjoy:

While installing peel-and-stick wallpaper on a ceiling can be a bit more challenging than on a wall due to gravity and working overhead, it’s definitely a manageable DIY project. Patience, proper measuring, and a helper make the process much smoother.
To minimize bubbles and wrinkles when applying peel and stick wallpaper, start by preparing a clean, smooth surface. Peel back only a small section of the backing at a time, and use a smoothing tool (like a squeegee) to firmly press the paper from the center outwards as you go.
For best adhesion and a flawless finish, peel and stick wallpaper works best on smooth surfaces. While some lightly textured walls might work with extra adhesive spray, heavily textured surfaces like popcorn ceilings aren’t recommended without first smoothing them out.
One Comment
Comments are closed.