Create an Affordable Home Office Magic with 5 Simple Steps
I am very excited to share this blogger office makeover with you today! It’s been an adventure since I first moved into my new home back in August 2021. I have learned much along the way and wanted to share my journey with you. If you have been following A&C for a while now, then you know my favorite decorating is thrifty. As in, I love thrifting for decor and furniture.
He and I both work full-time and have our side hustles. Since we both work from home, having separate places to do our full-time gigs and our creative outlets was a big priority. Since I am a homeowner now, my husband and I decided we wanted to utilize the rest of the house.
We want to spend time in every room daily. We didn’t want to become that household that has rooms that go unused, yet you have to clean them each week. This factored into our housing hunt because we didn’t want to get a home we would outgrow quickly or one that was too big to maintain. Finding that sweet spot of square footage ended up being about 2400 sq ft.
After residing in our home for about 3 months, we discovered that the original vision for our “study” was going to be my blogging home office.
I felt totally out of my blogging and social media groove when we first arrived. Since I didn’t have a hub where I could be creative and feel a sense of calm and that needed to change stat!
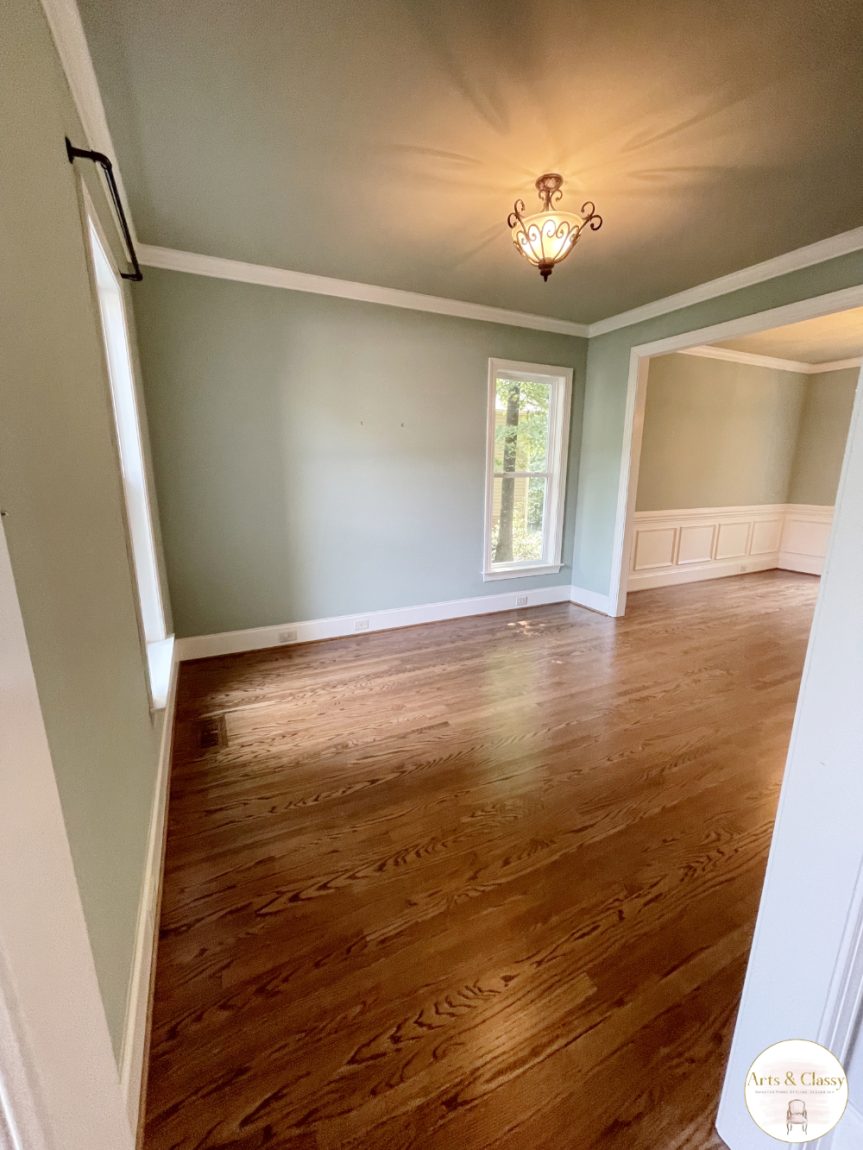
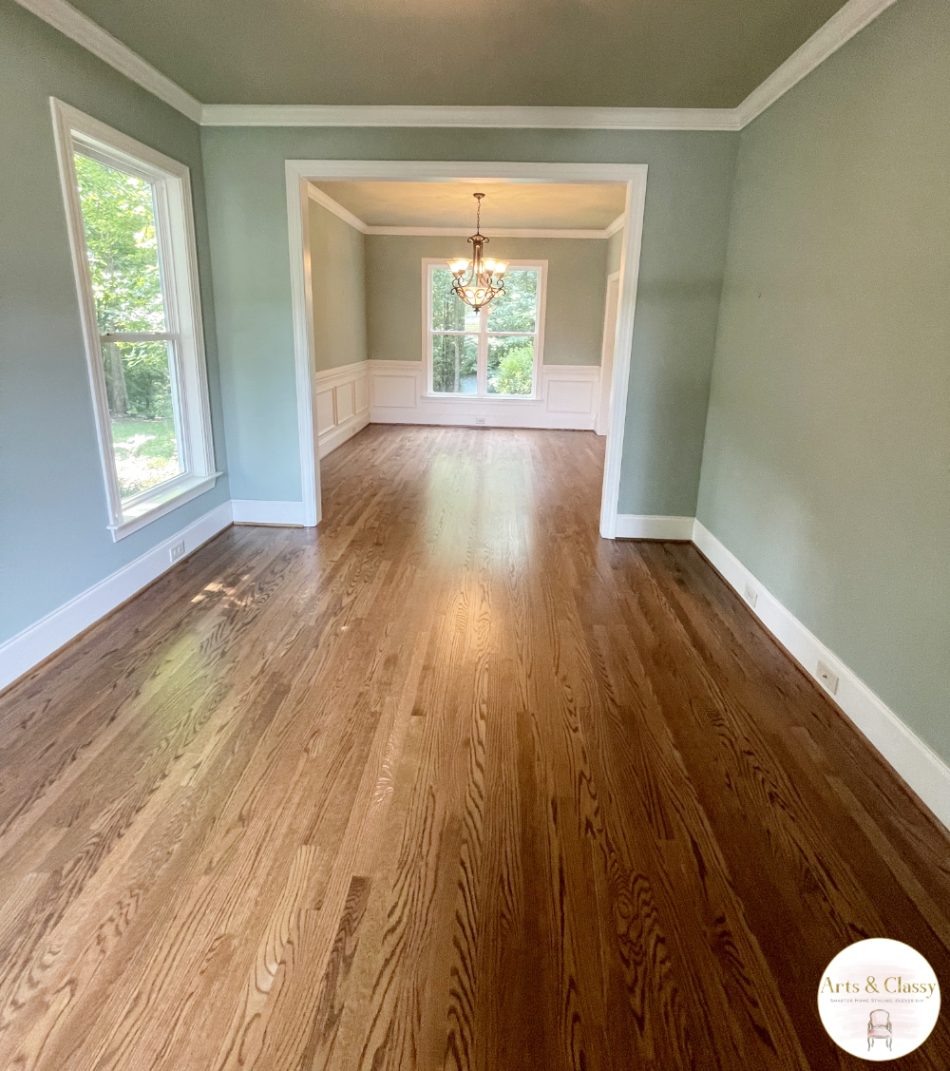
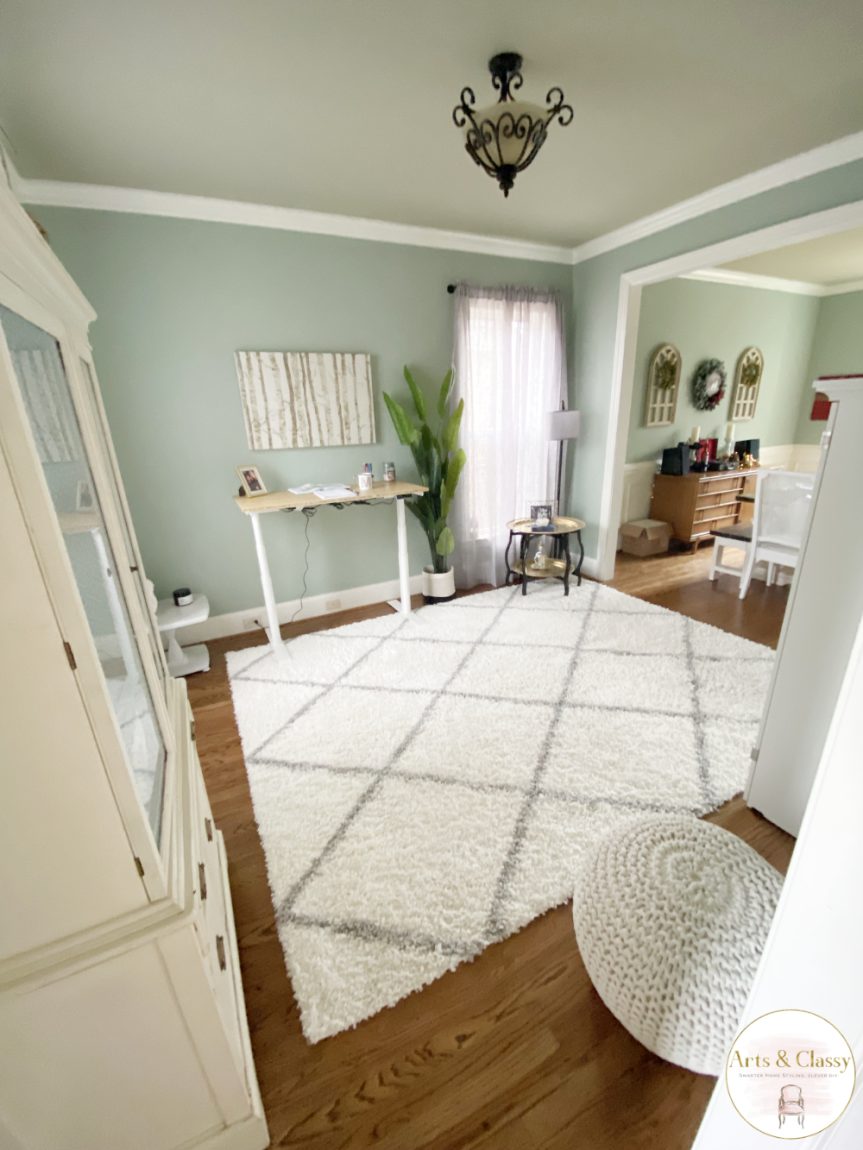
Check out the BEFORE of my blogger home office space when it was empty.
1. LOCATION
After being in my home, figuring out the location of my office was the first step. Like I said above, the original plan we had for one room turned into my blogging home office. I was really grateful for the opportunity to turn this room into my A&C HQ and hub for all things design, DIY, and decor.
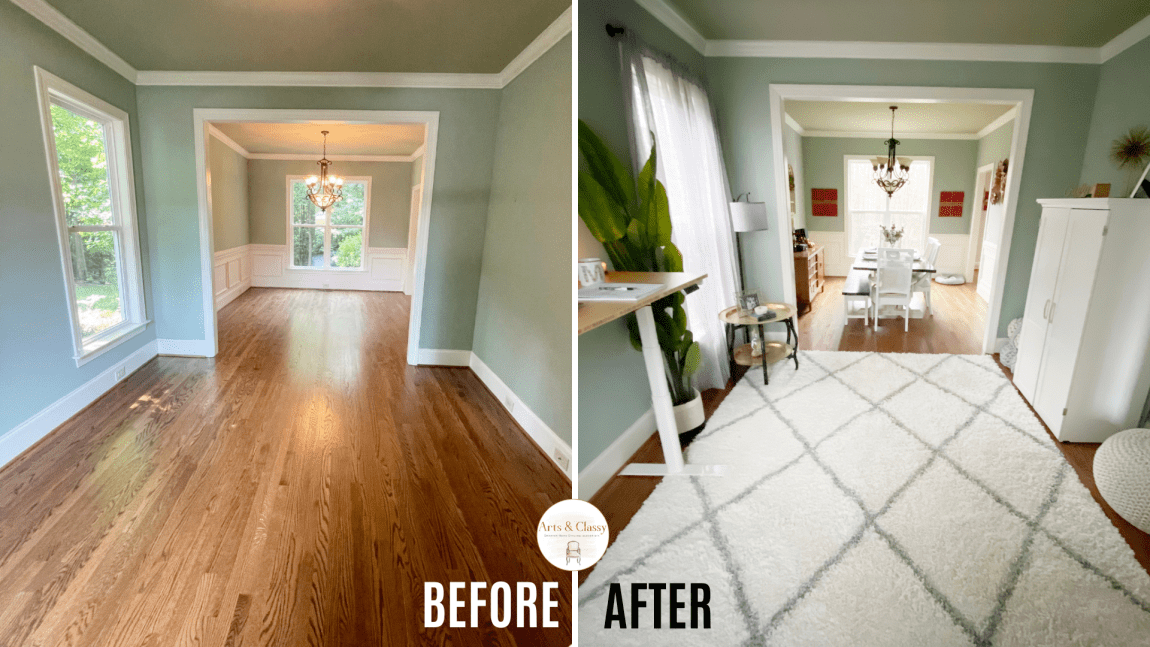
It’s also joined by my beautiful dining room, where I shoot a lot of my Hometalk TV episodes out. I feel like this is an extension of my office because this space is optimal for shooting projects on this table.
As you can see from the before photos, these walls were already painted a beautiful color. I didn’t want to mess with this quite yet. If anything, it complemented my design inspiration quite nicely.
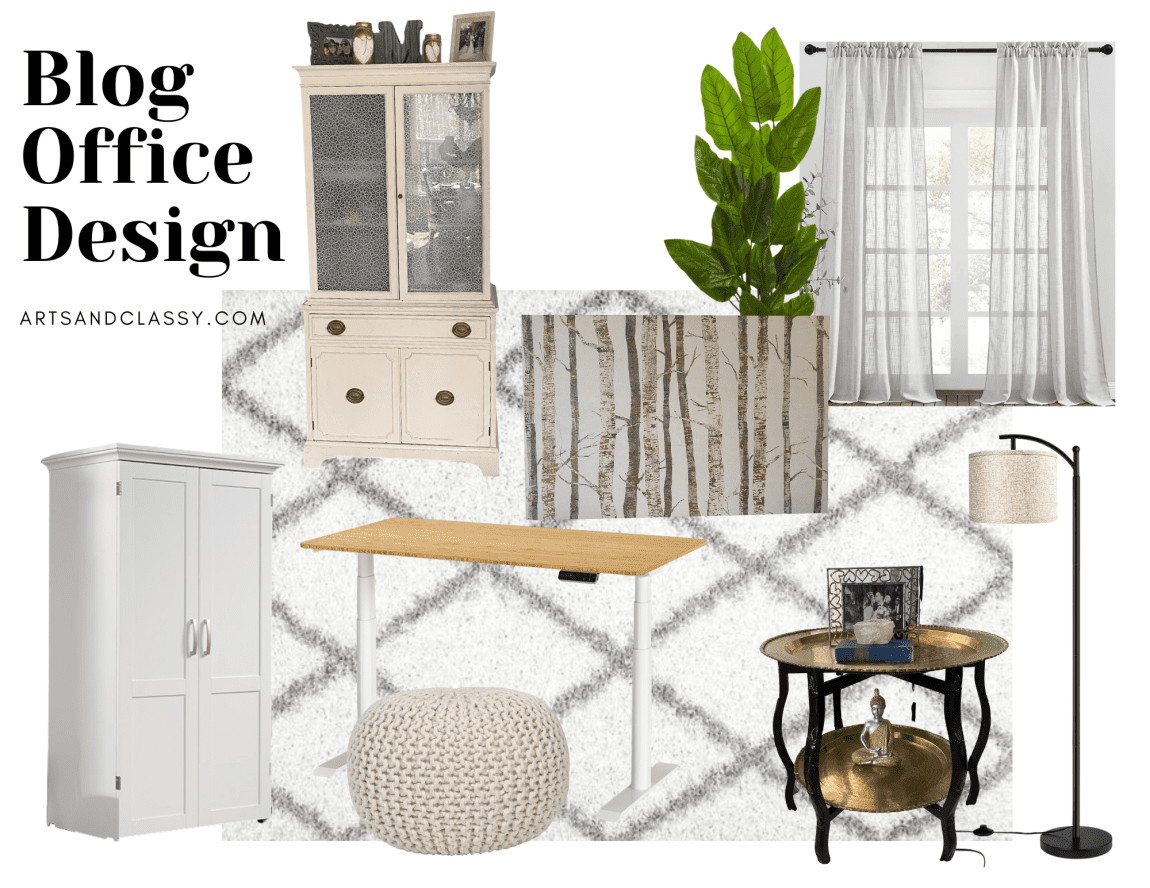
Whenever I feel inspired to makeover a space, a great place to start it to make a design board of my idea to see how it would work together. I use the program Canva for these types of projects. A combination of texture, storage solutions, and wall color was really going to help give the feel of the space I was looking for.
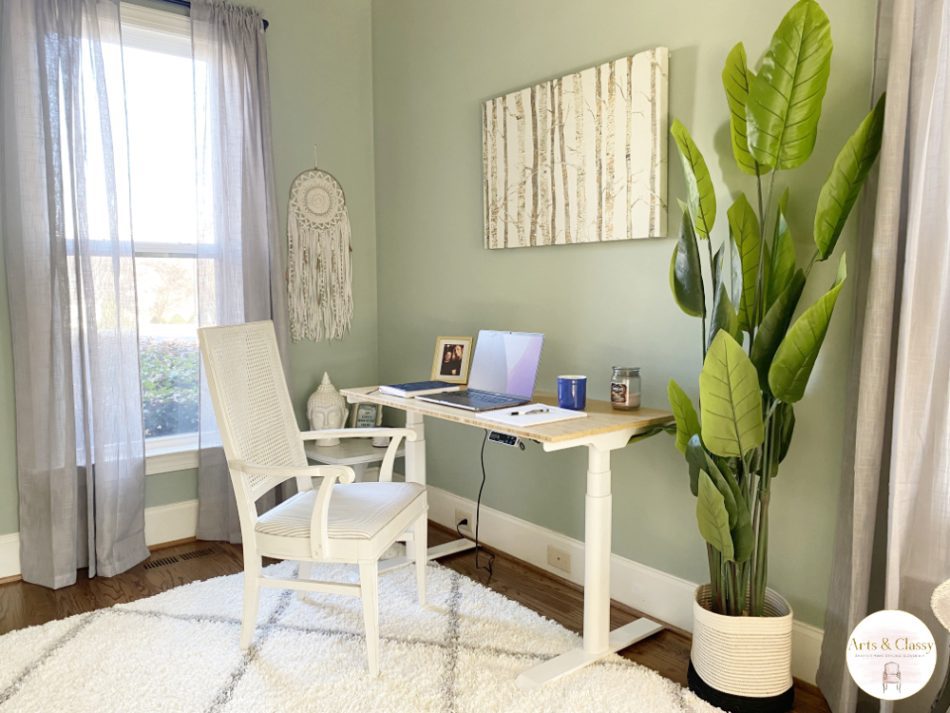
Another thing I wanted to avoid at all costs is putting TOO much furniture in the room. I didn’t want to overcrowd the room.
I wanted to make this blogger office makeover feel like a calm oasis!
This post contains affiliate links that help to support the A&C website.
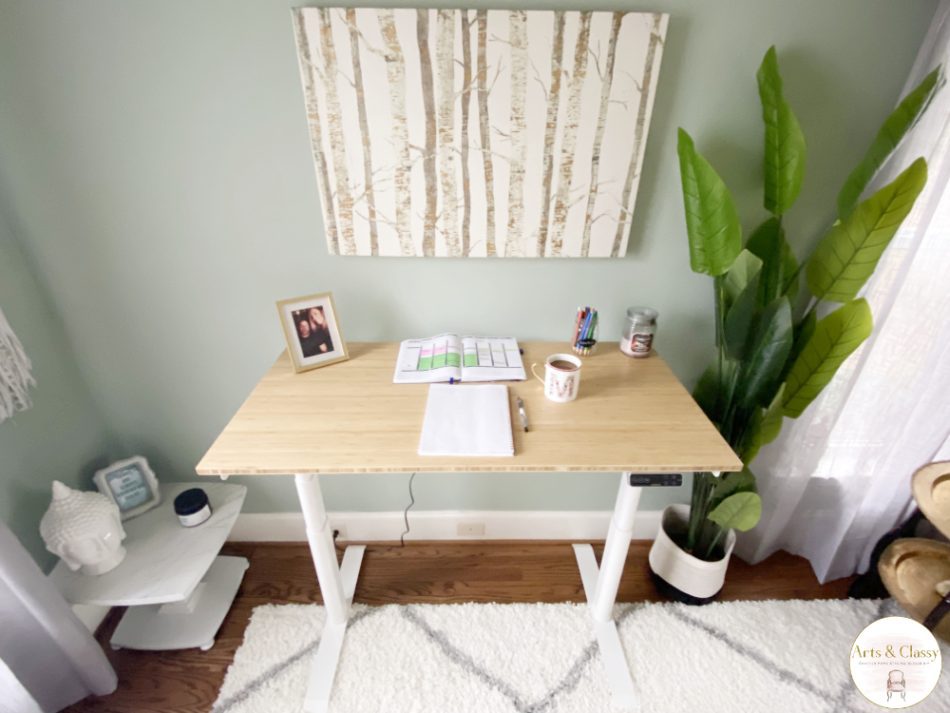
2. DESK AND WORK SURFACE
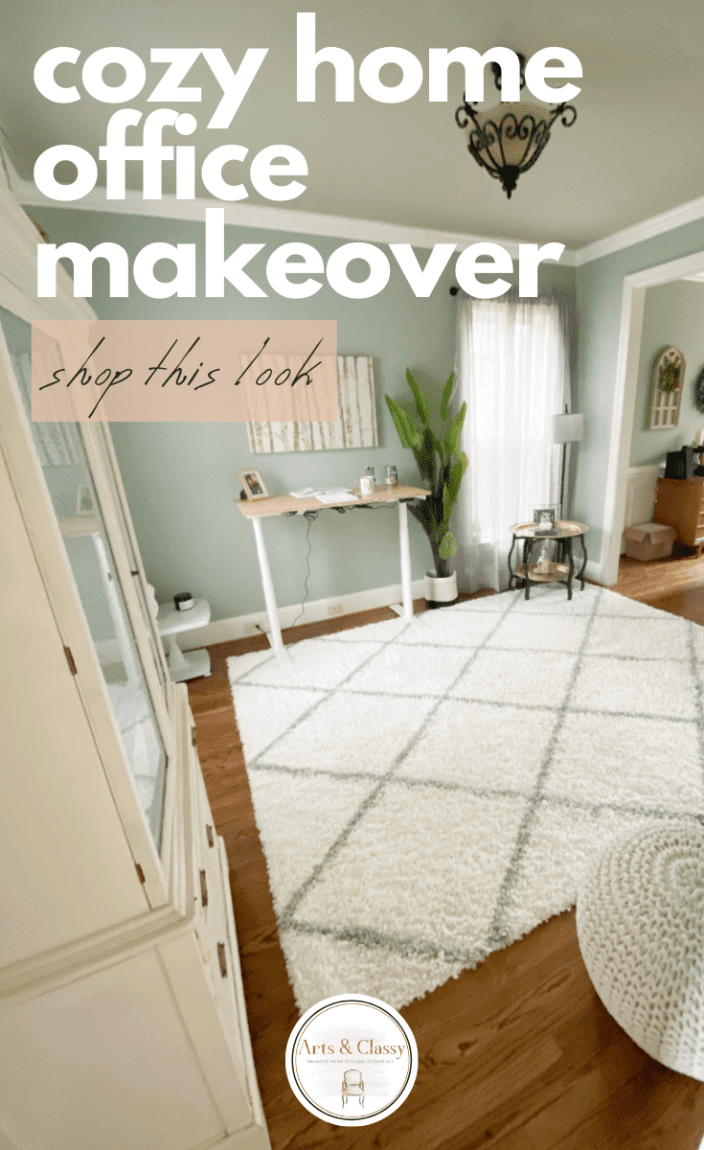
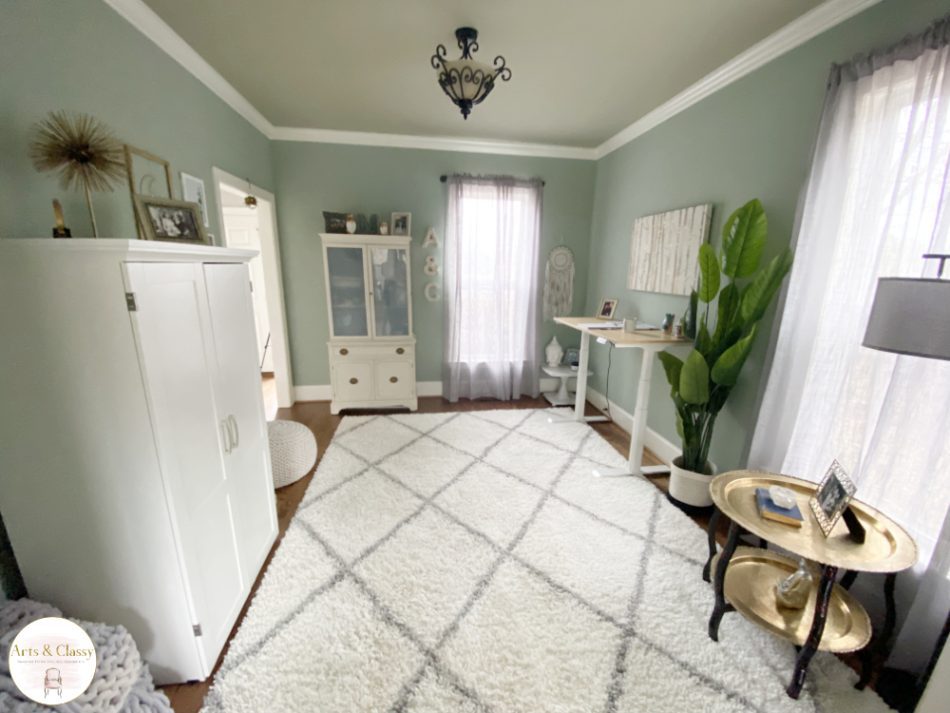
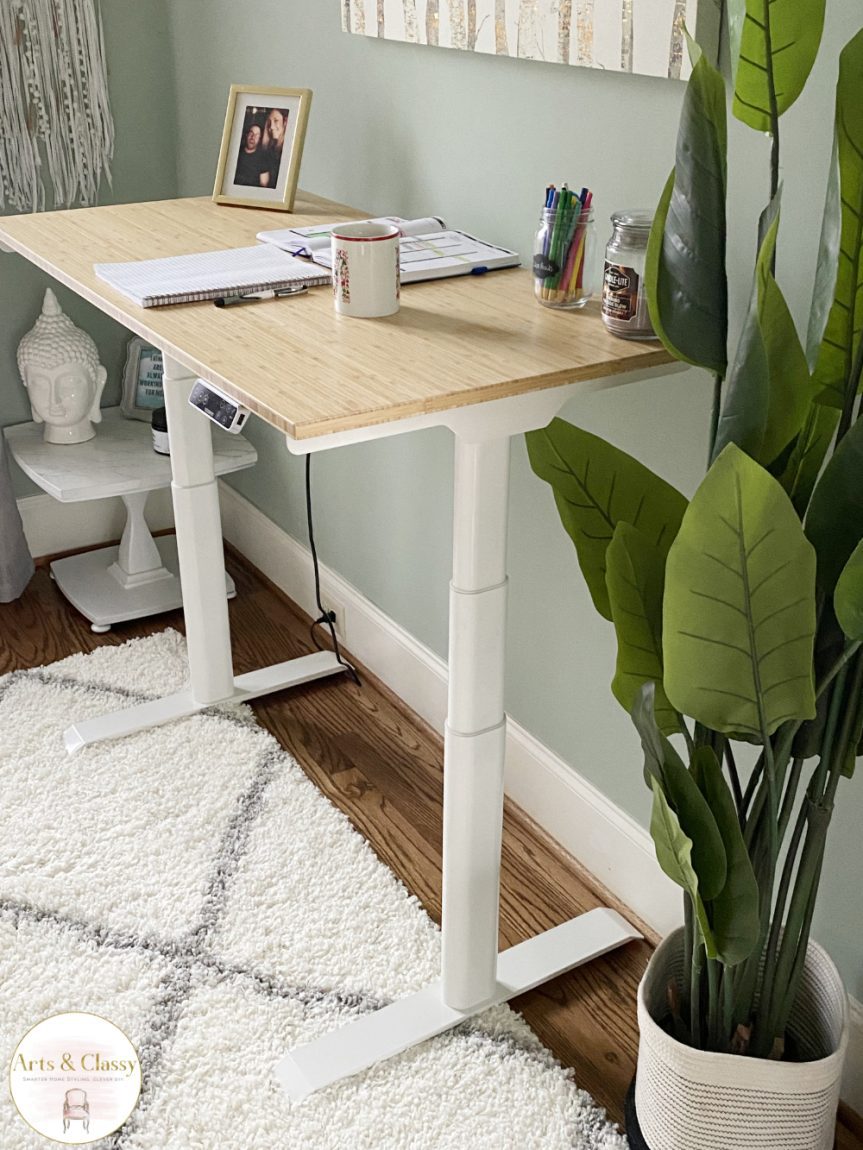
My new Flexispot adjustable desk is an exciting new work surface in my blogger home office!!
Earlier in 2021, when I was still living in Denver (in an apartment), I invested in an adjustable desk in my Health Coaching office since I work full-time there. I love having the option of standing vs sitting for work. I find that it helps me stay more active in my days when I am standing more.
The reason I shared this information is that I was a little bummed to not have the same option in my blogging office. Until the company, FlexiSpot, reached out to me and expressed interest in working with me to send me an adjustable desk for this makeover. Hooray! SO Big thank you to them. I love this desk and have already used it for projects like my DIY gallery art sign.
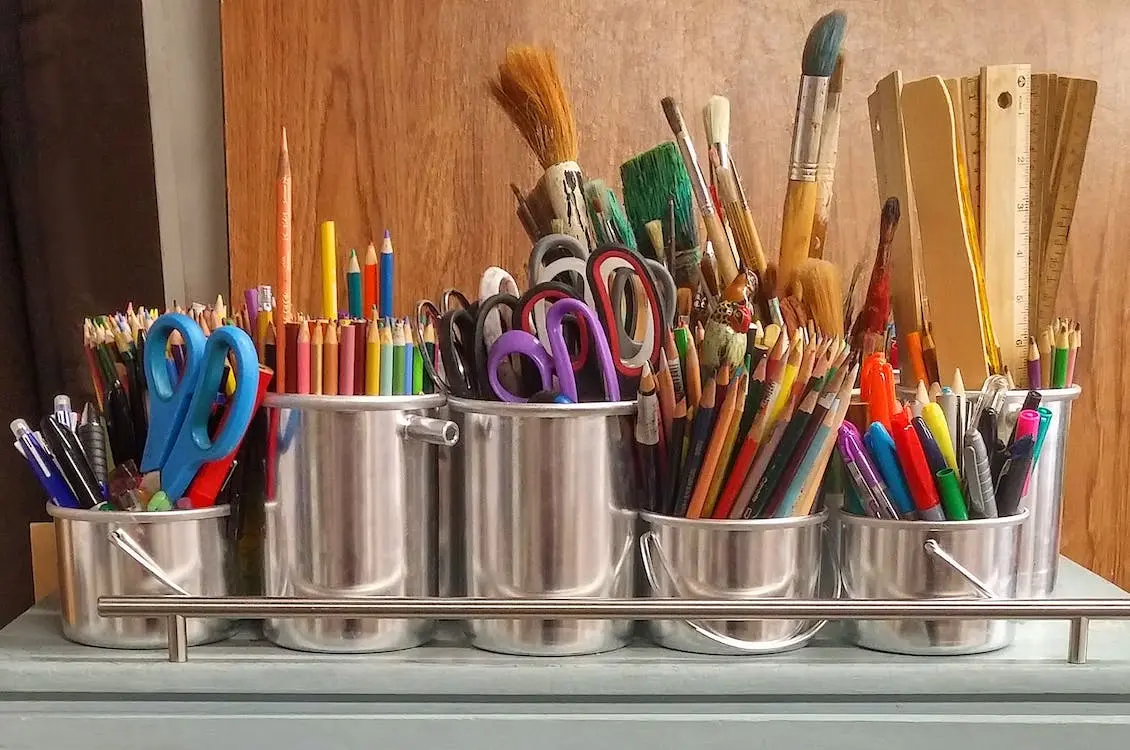
With this desktop workspace, having minimal desk accessories and décor was my biggest goal. Clutter makes my brain cluttered, and I can’t function at my highest level.
3. LIGHTING
There are many things my husband and I plan to do with this house in the long run. One of the first things we plan to tackle is the lighting fixtures. Now, we have only been in our home for about 4 months, so this isn’t an emergency. We are working with what we have for now.
Side note: We are so grateful for our home and all that came with it. Our home was built in 2009, and the light fixtures definitely reflect that.
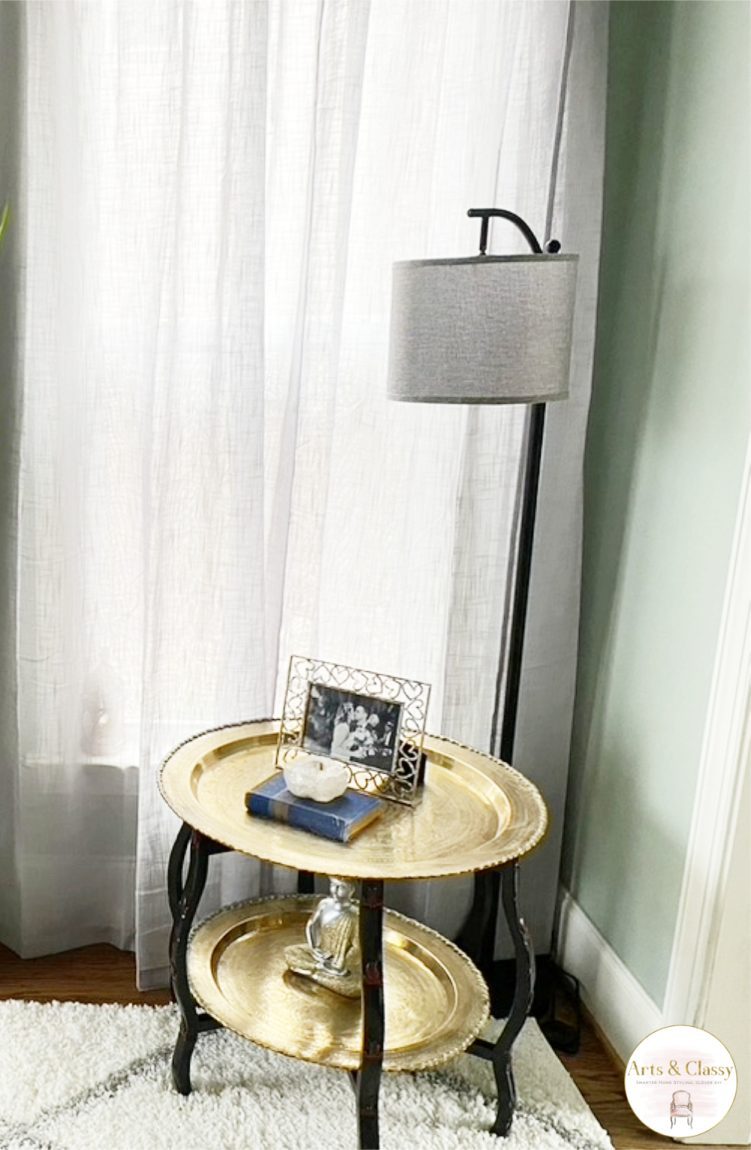
Long-term changing out the fixtures is on the docket. However, for now, my goal was to add more light to this space. This is where I found a cute farmhouse floor lamp.
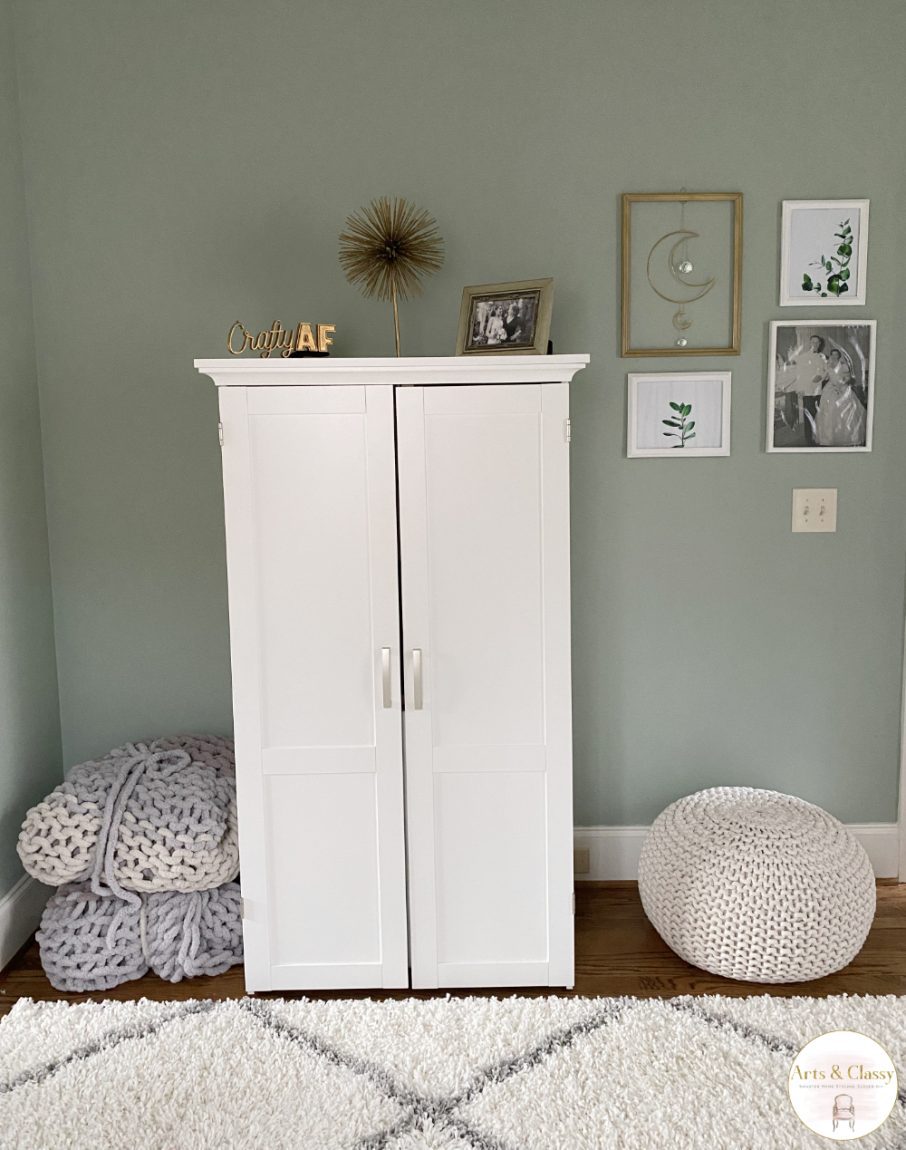
4. STORAGE
One of the problems I wanted to solve with my blogging office makeover was the ability to work on crafts of all sizes. While also being able to tuck everything away nicely in case we have company. Double-duty furniture was the right idea, so my supplies aren’t out for everyone to witness. I can get messy with my projects, so hidden storage is KEY!
I was able to solve this issue in 2 ways.
- Sauder Sewing Armoire that houses my things, like my Cricut Maker. (2 of my favorite purchases this year) I have a lot of smaller craft supplies for projects, and this was a great solution.
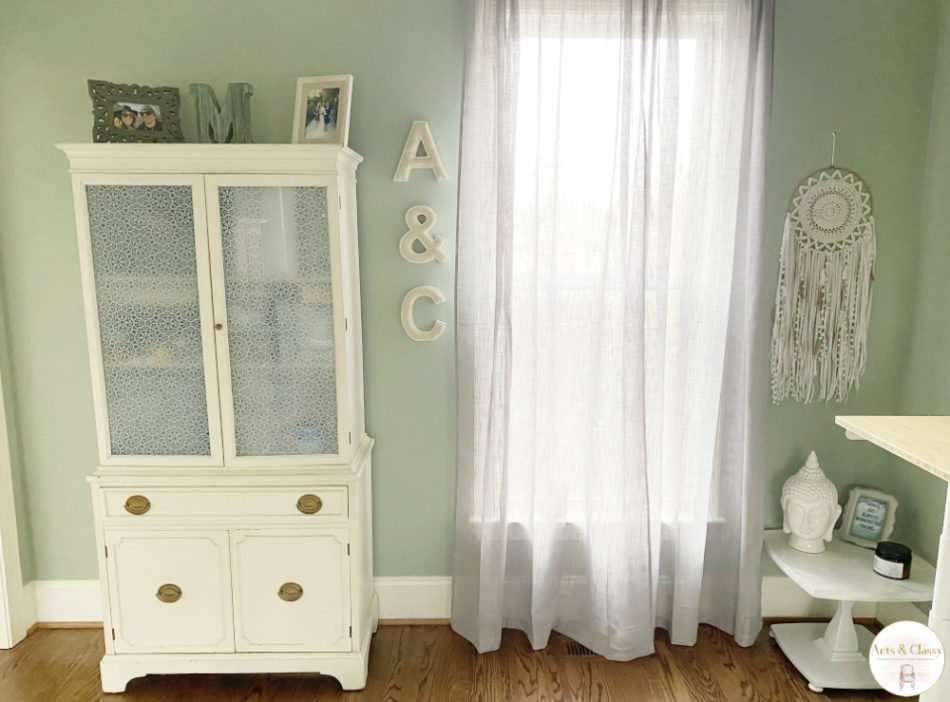
- My vintage hutch. This has been in my family for years, and this was one of the first projects I flipped back in the early days of A&C. This houses a lot of smaller craft stuff like paint, paint brushes, ribbon, twine, my sewing machine, etc.
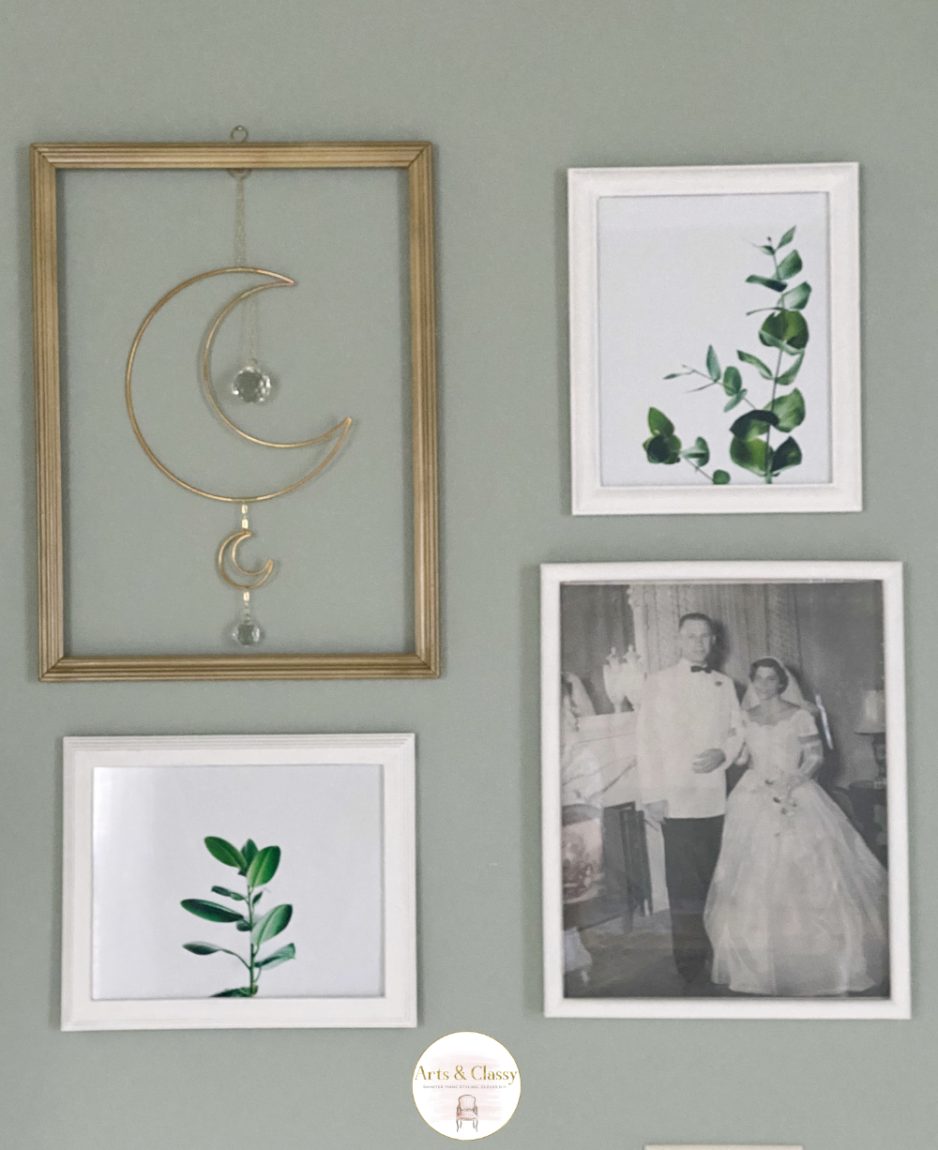
5. CREATING AN ART GALLERY WITHIN YOUR OFFICE
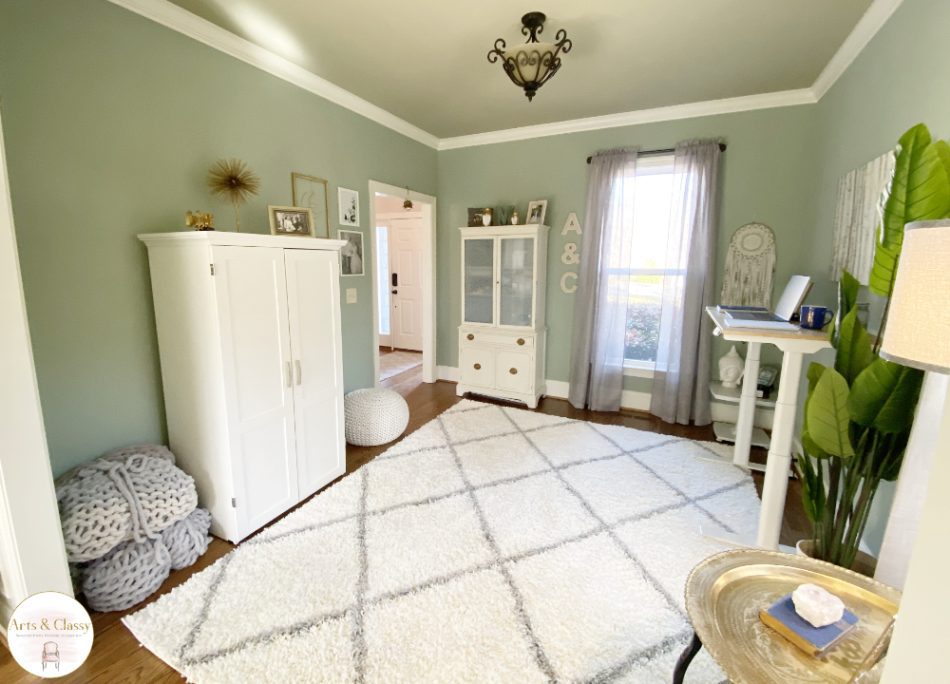
Adding serene and peaceful artwork to my office was high on the priority list. I have a love for peaceful nature imagery and also for embracing my heritage. You can see a beautiful photo of my maternal grandparents when they were married in the 1950s. It was important for me to display their wedding photo in my office. I love being able to look at them daily.
I looked for a lot of my artwork and picture frames at thrift stores. For example, the birch tree art piece at Goodwill is for $6.99. The frames for my art were also sourced from thrift stores. I used them to create an art collage in my home blogger office.
I took the frames and coated them with some spray paint. This gave them a makeover suitable for my home office makeover.
One of my biggest tips for anyone trying to decorate their home on a budget is to source frames from thrift stores. Yard sales are also a great place to get the best deal on frames. They are easy to change if needed.
Check out the blogger’s office makeover BEFORE AND AFTER below.
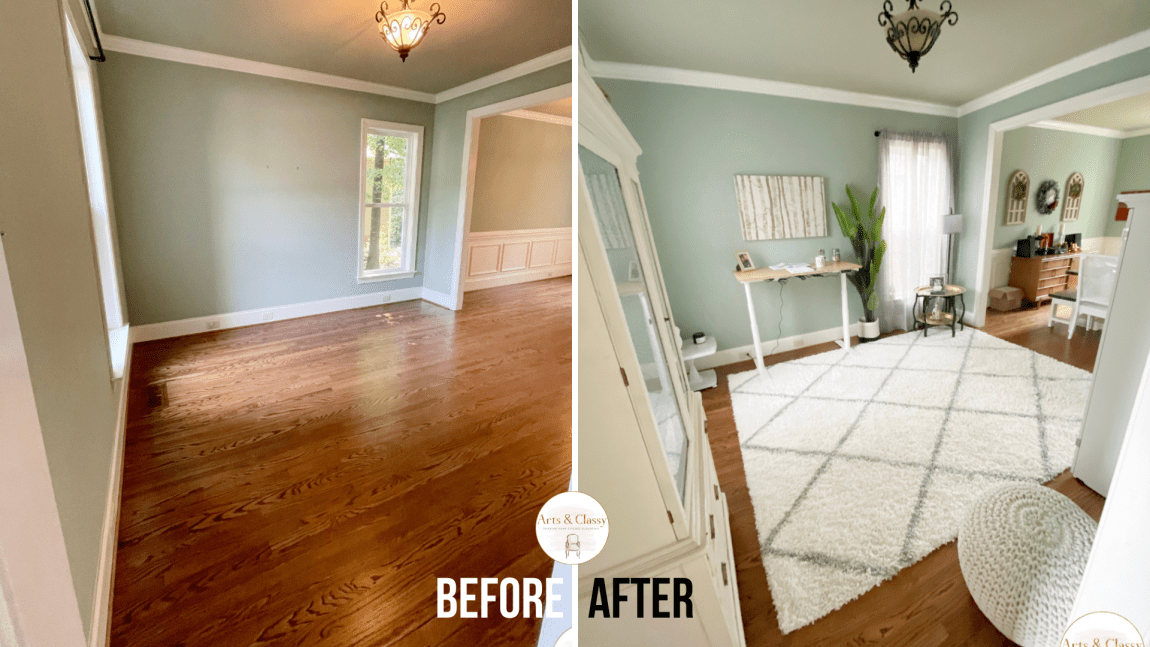
Check out an overview of the before and after of this space. I am pretty excited with how it has turned out!
In the future, I think a fun accent wall or maybe a complete paint job to give this room a whole new makeover. What do you think of this home decorating makeover? Did you like it? Let me know in the comments below.
Even better, check out and give my Instagram and Pinterest a follow to see the latest going on at A&C. Cheers to January and 2022 as a whole!
If you enjoyed this blogger office makeover, you may also enjoy:
Source List:
- Sauder Sewing Armoire
- Vintage Hutch (antique from family)
- Glass Window Film for Hutch
- FlexiSpot Standing Desk
- Birch Tree Art (Similar)
- Faux Marble Table (sourced at Goodwill and painted white + faux painted marbled top)
- Vintage Brass Japanese Vintage Table (antique from family)
- 6′ Artificial Canna Plant
- 8’x10′ Area Rug (Similar)
- Cable Knit Pouf
- Floor Lamp
- Gray Curtains
- Moon Mobile
- Farmhouse Curtain Rods
- Cricut Maker