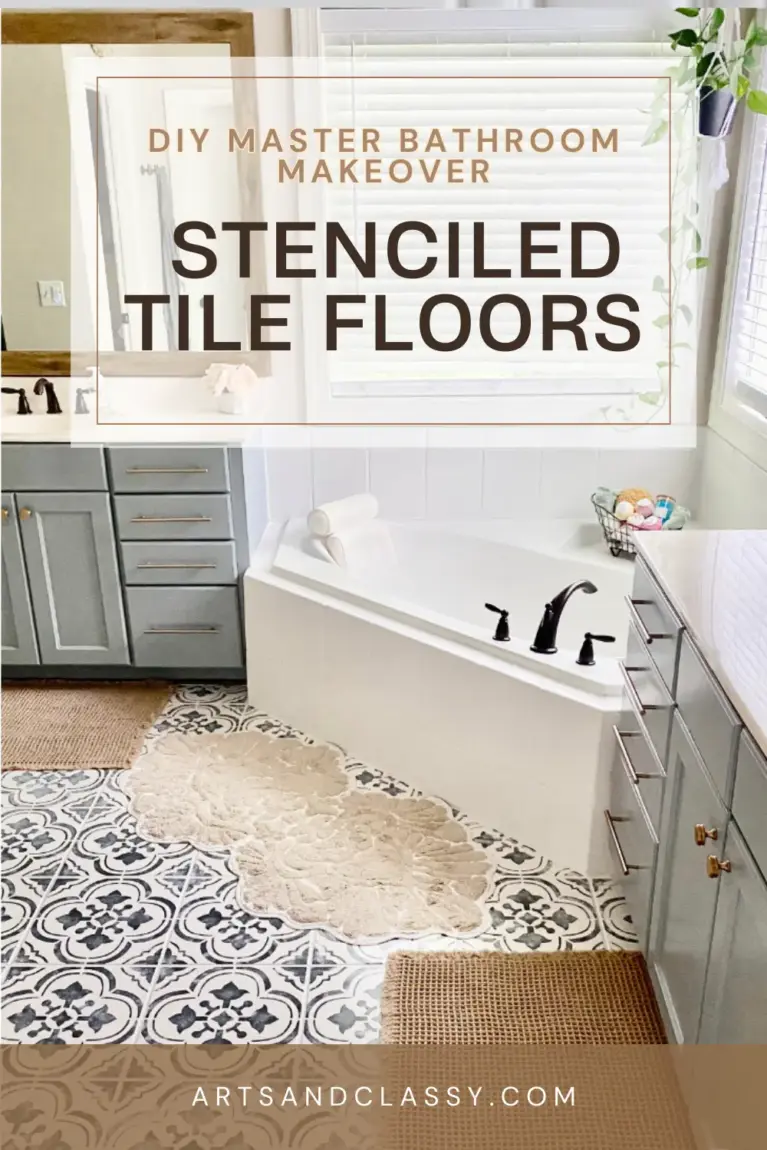
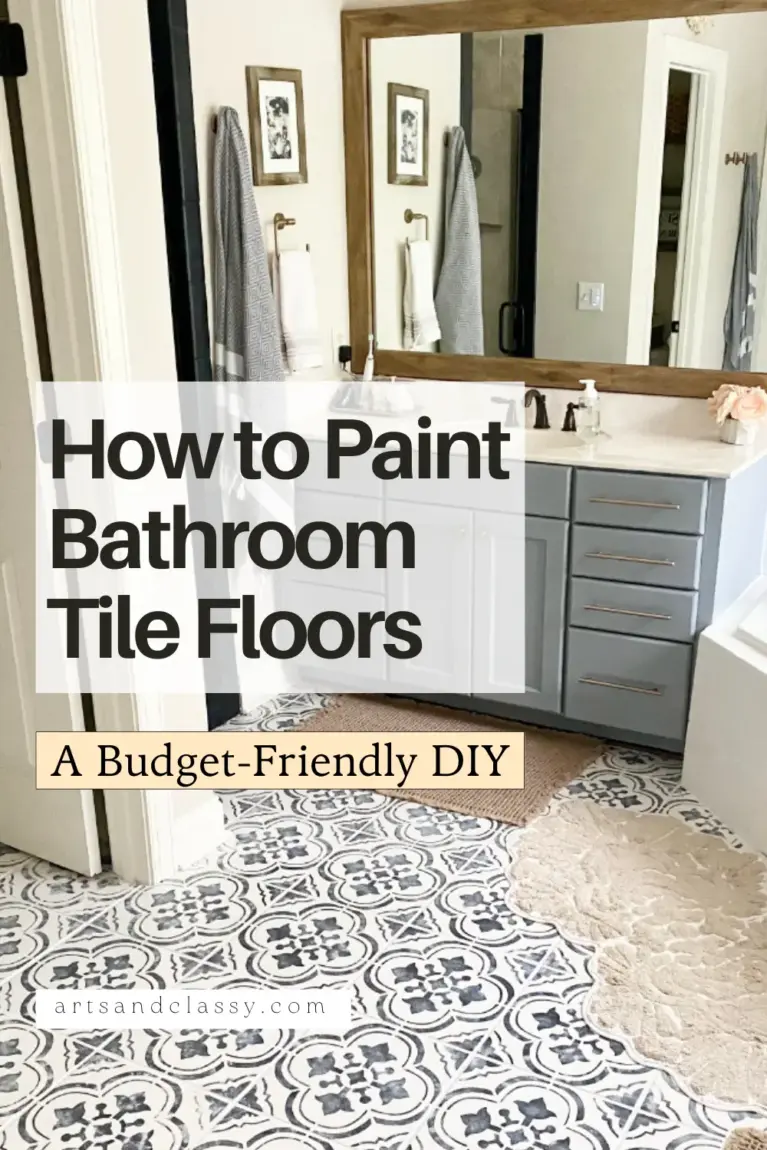
DIY Master Bathroom Makeover: How to Paint Your Tile Floors on a Budget
Welcome back, DIY enthusiasts! Today, we’re diving into a budget-friendly project that will completely transform your master bathroom – painting your tile floors. If you’re tired of your outdated bathroom tiles but don’t want to break the bank on a full renovation, this step-by-step guide is for you.
I’ll walk you through the process of painting your tile floors, giving your bathroom a fresh, new look without spending a fortune. So let’s grab our paintbrushes and get started! If you have been keeping up with my master bathroom makeover, check out The Ultimate Guide to Designing a Dreamy Modern Farmhouse Master Bathroom and The Life-Changing Dated Rustic Bathroom Makeover You Can’t-Miss – #Phase1.
Key Takeaways
- You can successfully paint tile floors to update your bathroom without a full renovation.
- Choose the right high-quality paint and follow essential steps to prepare the surface for painting.
- Use tools like stencils to add unique designs and personality to your painted tile floor.
- Sealing the painted surface with a clear coat ensures durability and a polished finish.
- This budget-friendly project provides a fresh, modern look for your bathroom while saving money.
Can tile floors be painted?
Yes, tile floors can be painted. Painting tile floors is a popular and cost-effective way to update the look of a space without the need for a complete replacement. With proper surface preparation and the right type of paint, you can successfully paint your tile floors to achieve a fresh, new appearance.
Is painting floor tiles a good idea?
It’s important to choose high-quality paint specifically formulated for tile surfaces and follow the appropriate steps for cleaning, priming, and applying the paint. Keep in mind that proper maintenance and occasional touch-ups may be required to keep the painted tile floors looking their best over time.
This blog post was partially sponsored by Cutting Edge Stencils! They were kind enough to send me 2 custom stencils for this project. This post contains affiliate links to products or services that we recommend. By purchasing through these links, we may earn a small commission, which helps support our blog and allows us to continue providing valuable DIY content. Rest assured, we only recommend products or services that we have personally used and genuinely believe will be beneficial to our readers. Your support is greatly appreciated! See more information in my full disclosure policy.
Preparing Your Bathroom for the Makeover
Before diving into any painting project, it’s important to prepare your workspace properly. I did a lot of research on the process of painting tile floors and what paint types to use. I’ll cover essential steps such as cleaning the tile surfaces, removing any existing sealants or wax, and repairing any damaged tiles. These simple yet crucial tasks will ensure that your painted tile floors look flawless and last for years to come.
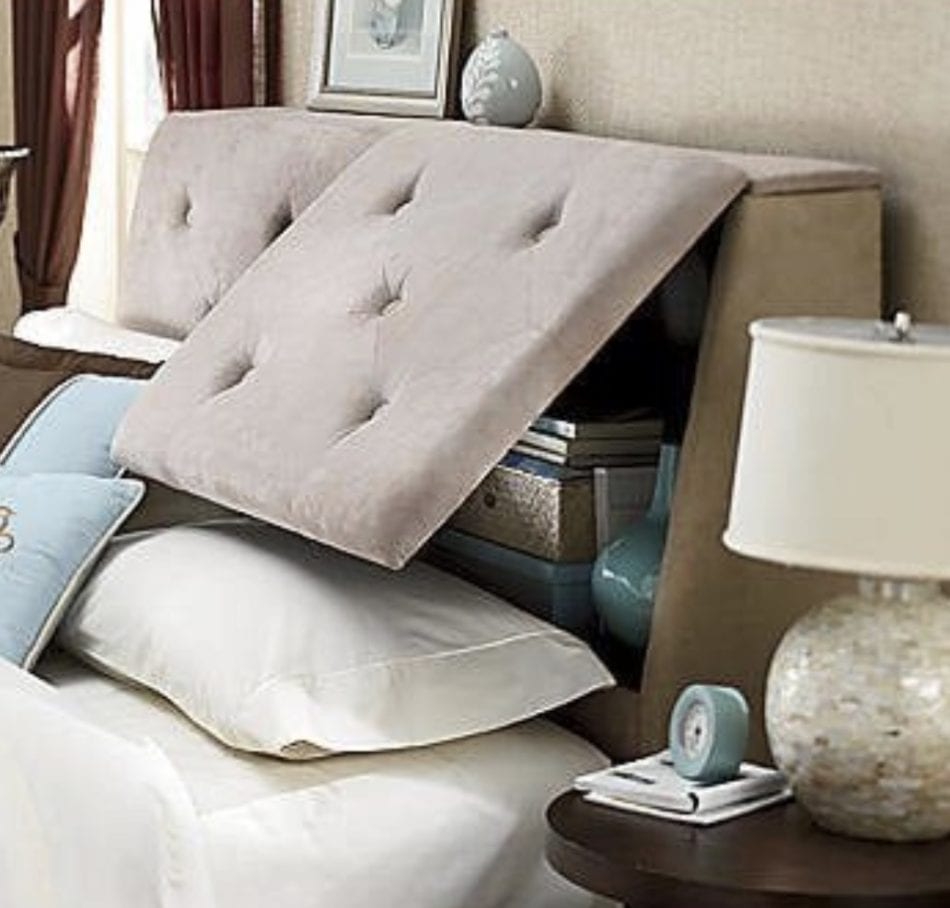
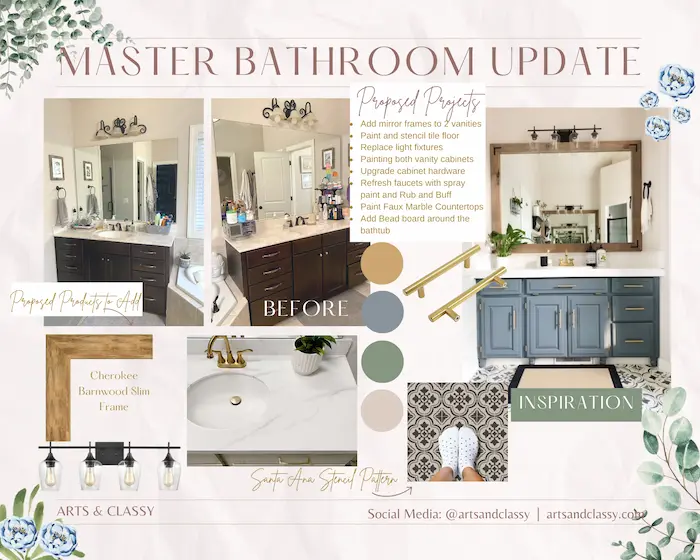
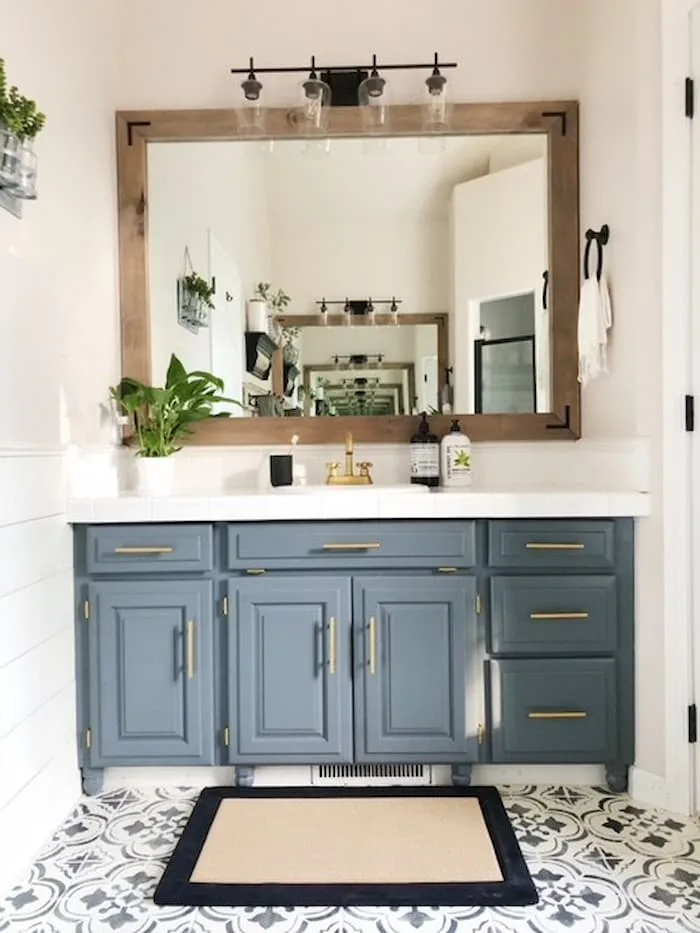
This has been my master bathroom makeover inspiration mood board for reference.
Choosing the Right Paint and Tools
Picking the right paint and tools is key to achieving professional-looking results. I’ll guide you through selecting the appropriate type of paint for your bathroom floor tiles, considering factors such as durability, moisture resistance, and finish options. Additionally, I’ll provide a list of essential tools you’ll need for the project, making your shopping experience a breeze.
I was cautious while picking my primer and my floor paint. Since our master bathroom is a high-traffic area and moisture accumulates in this bathroom, I wanted to make sure I chose the perfect match to ensure this paint job lasts. I didn’t want to risk the possibility of peeling. I chose the Stix waterborne bonding primer.
What supplies do you need to paint your tile floor?
You can shop all these supplies in my Amazon Storefront for my Master Bathroom Makeover.
- Rust-Oleum 100806 Home Floor Tile Paint Coating Kit White
- Santa Ana Tile Stencil – Cutting Edge Stencils – You can also find it on Amazon.
- Stix Acrylic Waterborne Bonding Primer
- Scotch Original Multi-Surface Painter’s Tape
- Fast Drying Grout Repair Kit
- 11 Piece Paint Roller and Brush Kit with Tray
- Paint Extension Pole
- Paint Roller Kit with Paint Tray
- Behr Chalk Paint – Aged Grey
- Behr Chalk Paint – Classic Noir
- Stencil Paint Brush
- Small Stencil Foam Roller
- Foam Roller 4 inch
- Cellulose Sponges
- Round Craft Sponges
- Polycrylic Top Coat Water-Based Protective Finish Satin
You can also shop for supplies here by clicking on the images below.
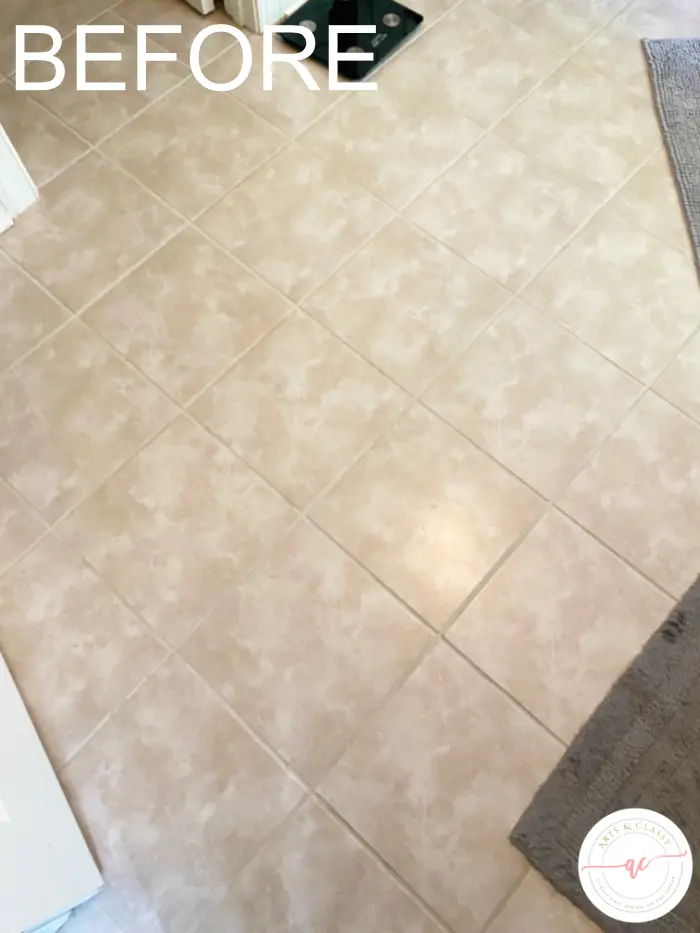
Prepping the Tile Surface
Proper surface preparation is the foundation of a successful tile floor paint job. During my bathroom floor makeover prep, I came across a few cracks in my existing tile. To ensure a flawless finish, I used a grout repair kit. Using the kit’s putty-like filler and a putty knife, I filled in the cracks, creating a smooth surface.
After drying and light sanding, the repaired areas seamlessly blended with the rest of the tile. Taking the time to address the cracks before painting was crucial for a professional result. Don’t overlook any imperfections – a grout repair kit can make a significant difference in your bathroom floor makeover.
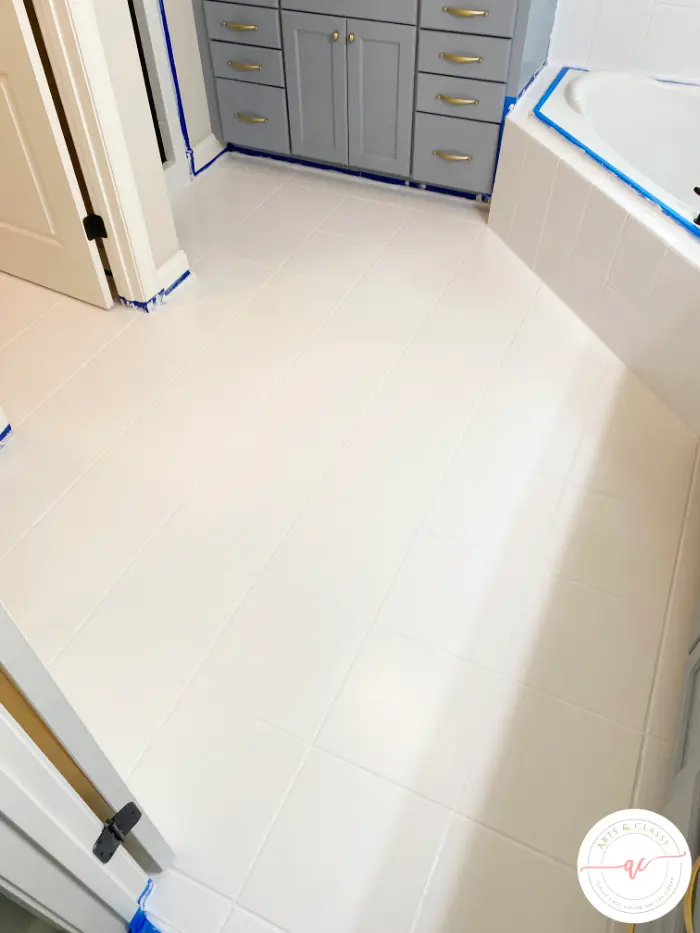
After filling the cracks in my bathroom floor, it was time to prepare for painting.
To protect the baseboards and vanities, I used painter’s tape. I carefully applied the tape along the edges, creating clean boundaries between the floor and the walls. This simple step prevented any accidental paint splatters and made cleanup a breeze. Remember to use painter’s tape to safeguard your fixtures during your own bathroom floor makeover – it’s a small yet crucial detail that ensures a professional result.
Included in the Rustoleum floor 2-step painting kit is a convenient degreaser cleaner that ensures a thorough cleaning of your bathroom floor before priming. By following the provided instructions, I mixed the degreaser with warm water and applied it generously to the tile surface.
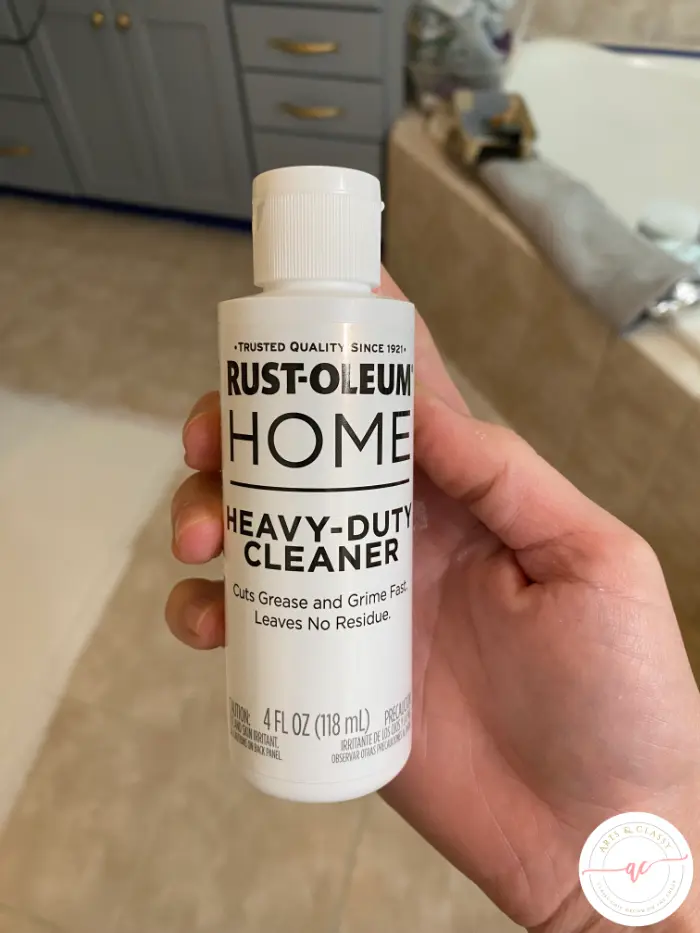
After scrubbing away dirt, dust, and grime, I rinsed the floor and let it dry completely. This step ensured proper adhesion of the primer and paint, making my bathroom floor makeover a success. The inclusion of the degreaser in the kit was a convenient and cost-effective addition that simplified the process. Trust me, taking the time to properly clean and prepare the surface is well worth it for a beautifully transformed floor.
Applying the Paint
Now comes the exciting part – applying the paint to your tile floors! For the priming, I used a paintbrush and painted all the grout lines around the ceramic tile floor first. Then I used the larger paint roller and an extension pole to cover the old tile surface.
Also, I also have a box fan to help with dry time between coats. I did 2 coats of the primer and allowed 24 hours to dry and 7 full days to allow it to completely cure and set per the directions on the can.
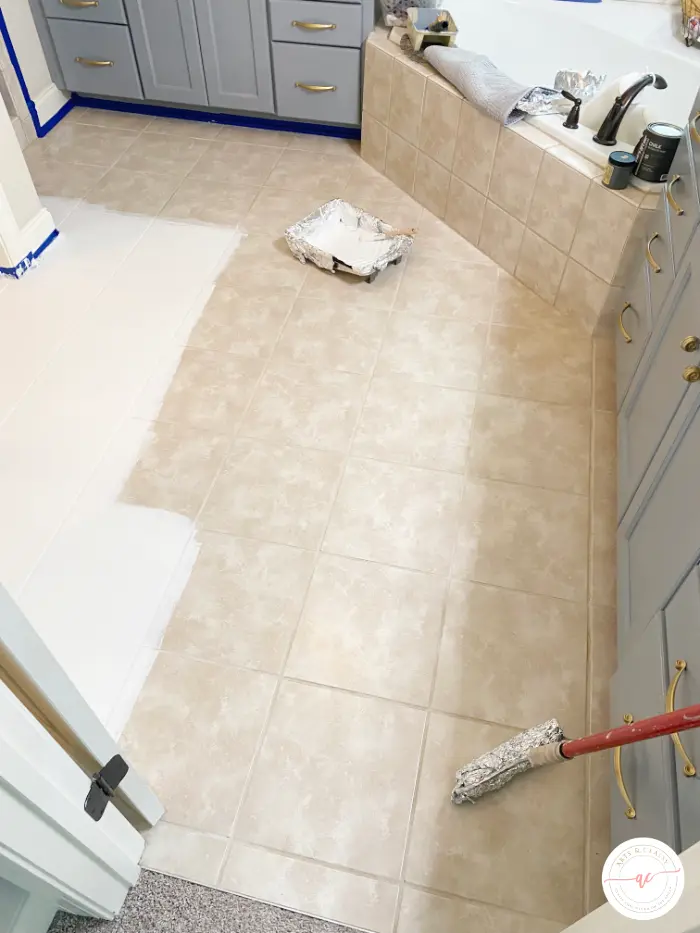
Then I was able to use step 1 of the Rustoleum tile floor paint kit to apply my first coat of paint. After that base coat dried, I did a second one for full coverage just to be safe.
Applying the Stencil and Chalk Paint
Now comes the fun part – adding a touch of pattern and personality to your painted tile floors! For my master bathroom makeover, I chose the stunning “Santa Ana” stencil from Cutting Edge Stencils to create a beautiful and unique design. This stencil features intricate geometric patterns that perfectly complement the style I wanted to achieve.
Then it came time to apply the Santa Ana stencil to add my pretty pattern. Here is the reference photo from my inspiration from Shannon @ Living with Lady, so you can see what my goal was.
Shop supplies to recreate this look in your bathroom:

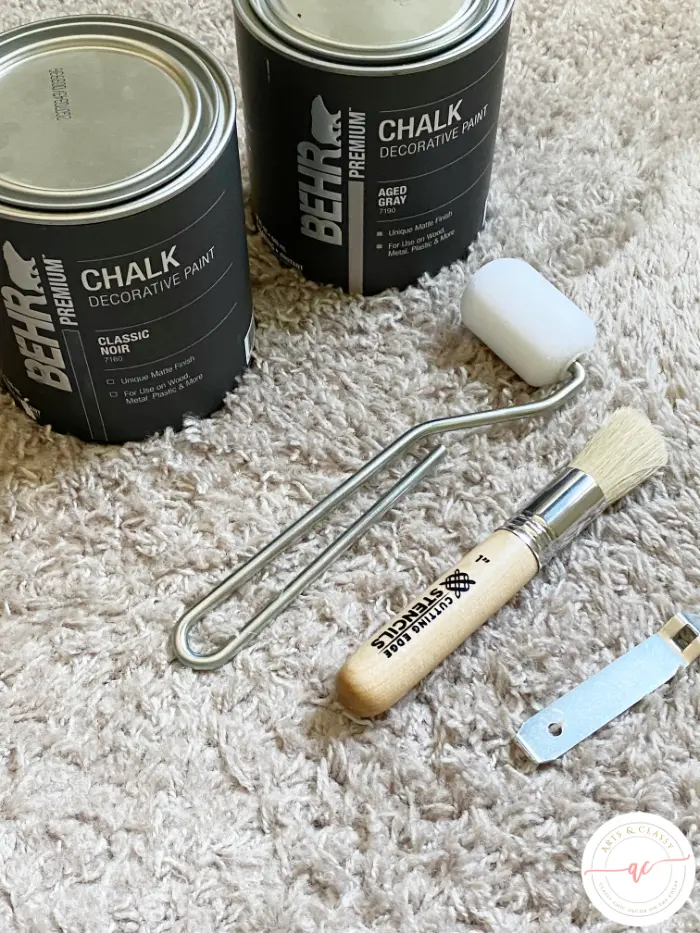
As for the paint I wanted to use for this step, I chose the Behr Decorative Chalk Paint in the colors Aged Gray and Classic Noir.
I decided to mix them in a separate container until I got the perfect shade of gray that I wanted. I would say the ratio was 2 to 1, with the Aged Gray being the larger amount during the mixing process. The Classic Noir darkens things up quite a bit.
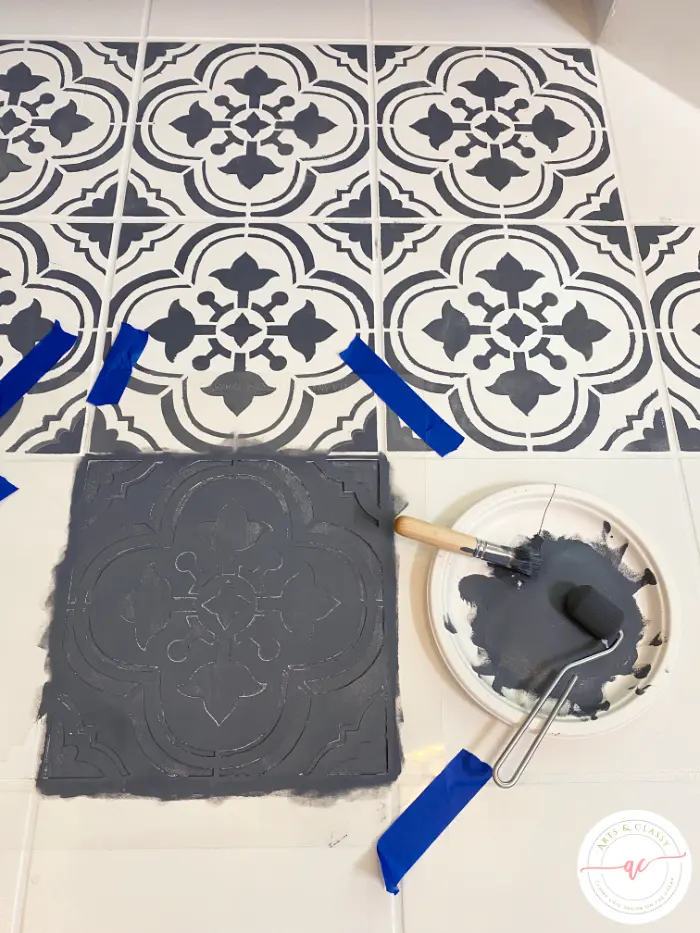
I taped the stencil securely, ensuring it laid flat against the painted tile floor.
Using a foam roller or stencil brush, I loaded it with chalk paint. Carefully applying the paint, ensuring even coverage and no smudges or bleed-through.
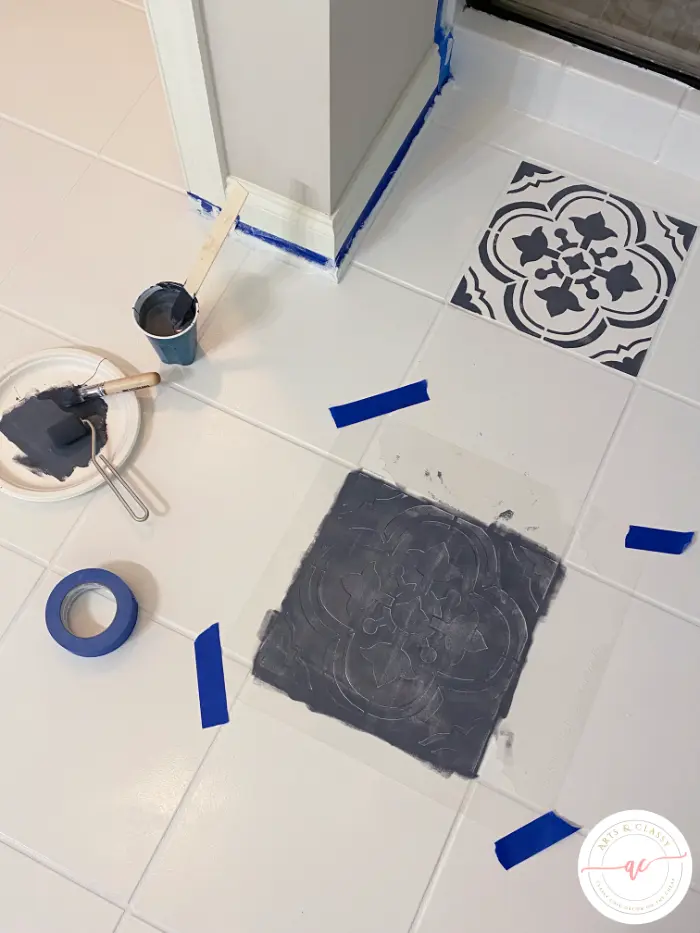
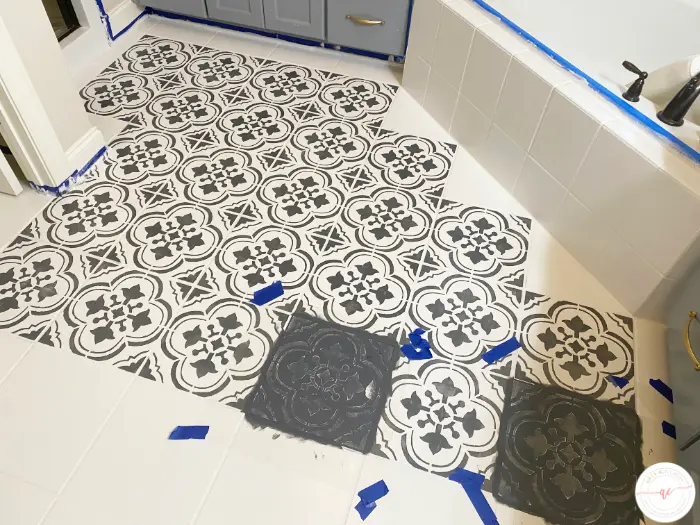
Working in small sections, I gradually moved the stencil across the floor, aligning it perfectly to create a seamless pattern. I took my time, gently tapped the paint, and avoided excess buildup for crisp lines.
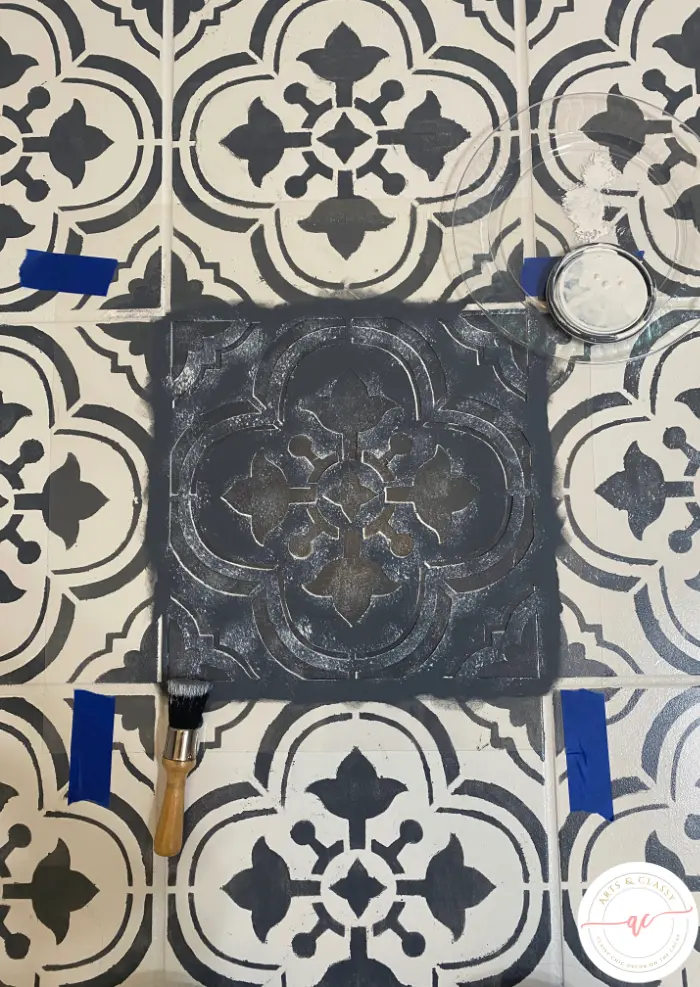
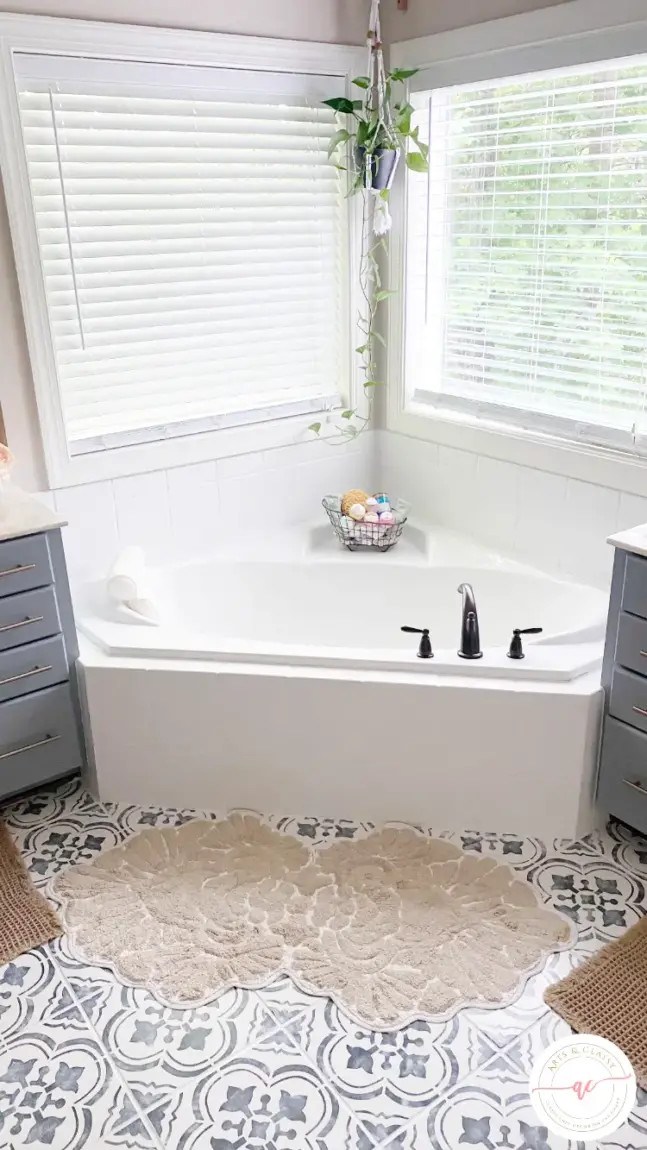
After stenciling the entire floor, I aged the design using a sponge and dry brush. Parts were intentionally darker, creating a statement with subtle elegance. By dabbing white paint in certain areas, I achieved a beautiful patina effect.
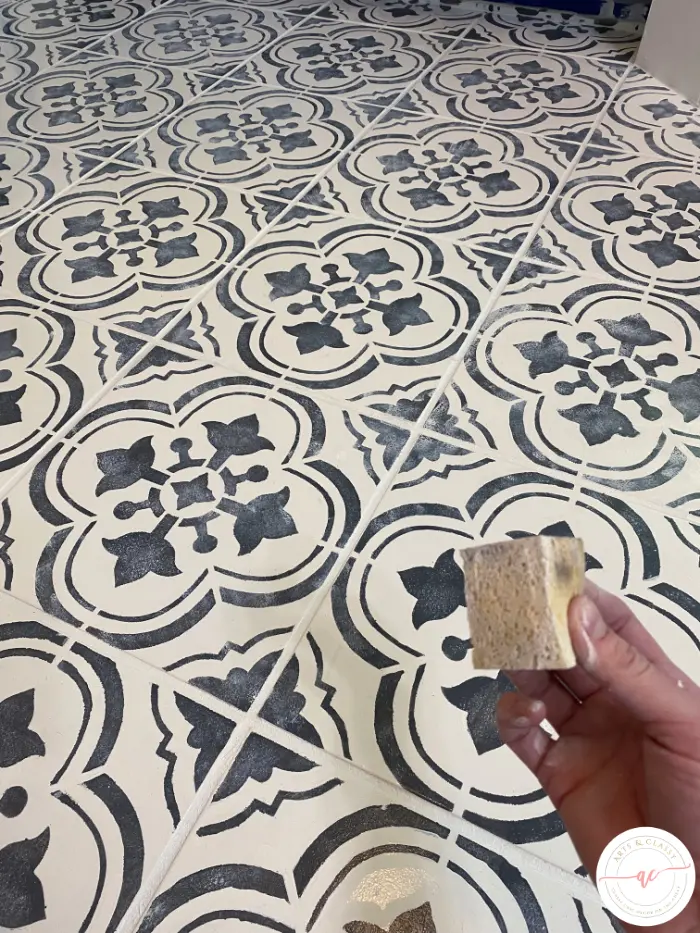
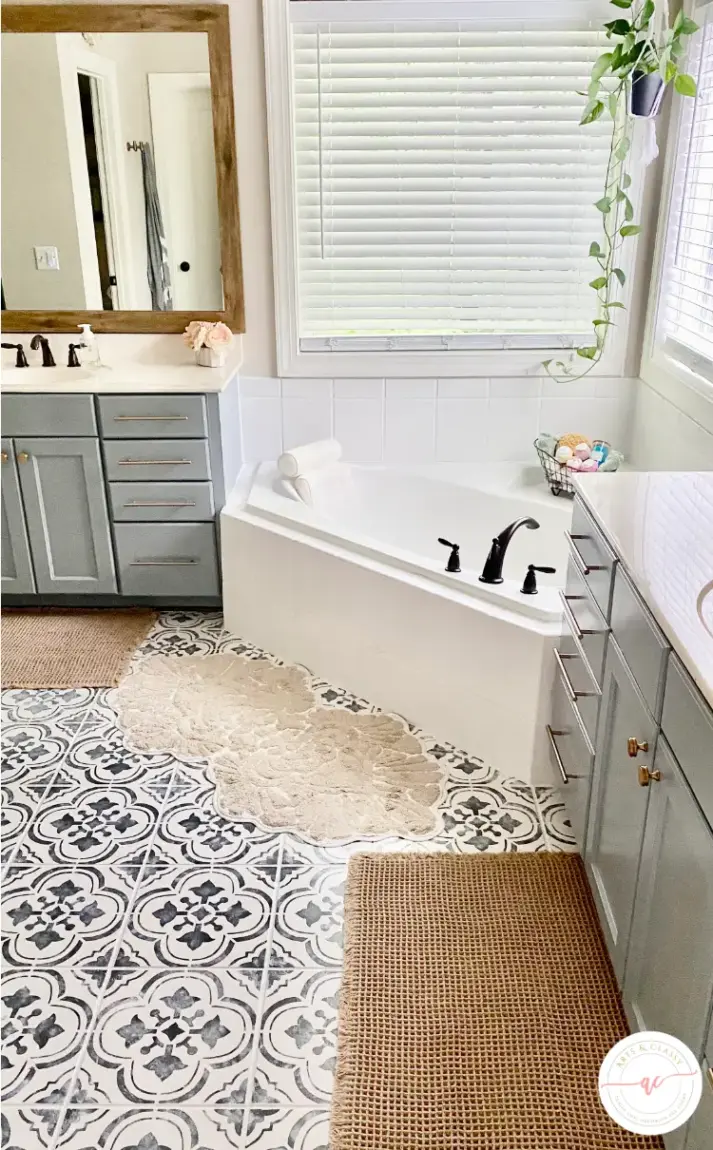
Once I completed the entire floor, I stepped back to admire the transformation.
The Santa Ana stencil had added a touch of elegance and visual interest to my master bathroom, elevating it to a whole new level. The intricate patterns created depth and texture, giving the space a unique and personalized touch that truly reflected my style.
Remember, when applying a stencil to your painted tile floors, take care to choose a design that complements your overall aesthetic. Cutting Edge Stencils offers a wide range of beautiful options to suit various tastes and preferences. Embrace your creativity, follow the instructions provided with the stencil, and enjoy the process of transforming your bathroom into a true masterpiece.
You can also shop for supplies here by clicking on the images below.
Sealing and Protecting the Painted Surface
After painting and stenciling tile floors, protect your hard work with Rustoleum Clear Coat Step 2. This coat adds protection and a polished sheen, formulated to work seamlessly with the paint.
Applying the clear coat was a straightforward process. Using a clean brush or roller, I carefully spread an even layer of the clear coat over the painted tile floors. It’s important to follow the instructions provided with the kit, allowing sufficient drying time between coats if multiple coats are recommended.
The Rustoleum Clear Coat Step 2 acted as a barrier, shielding the painted surface from daily wear and tear, moisture, and potential stains. This protective layer ensures that your newly transformed tile floors retain their vibrant color and withstand the test of time.
When using a tile floor painting kit, like the one I utilized, take advantage of the Rustoleum Clear Coat Step 2 to seal and protect your painted surface. By doing so, you’ll not only enhance the appearance of your floors but also ensure their durability and longevity.
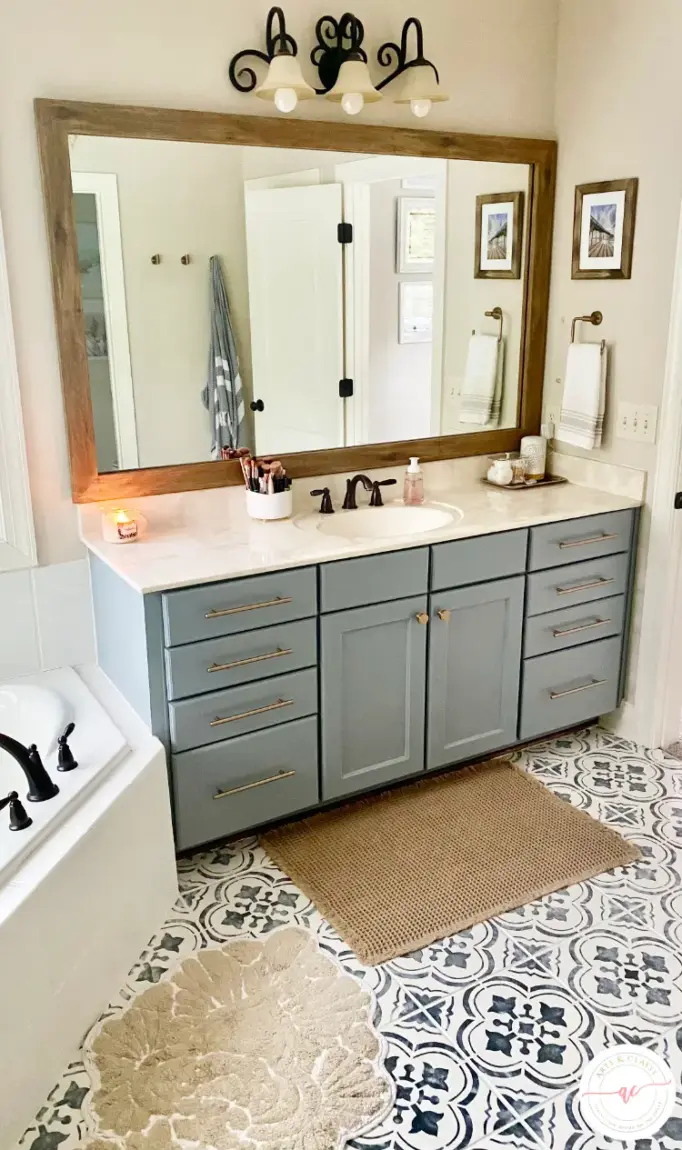
The Big Reveal!
Now, step back and revel in the beauty of your master bathroom makeover, knowing that your painted tile floors are both stunning and well-protected.
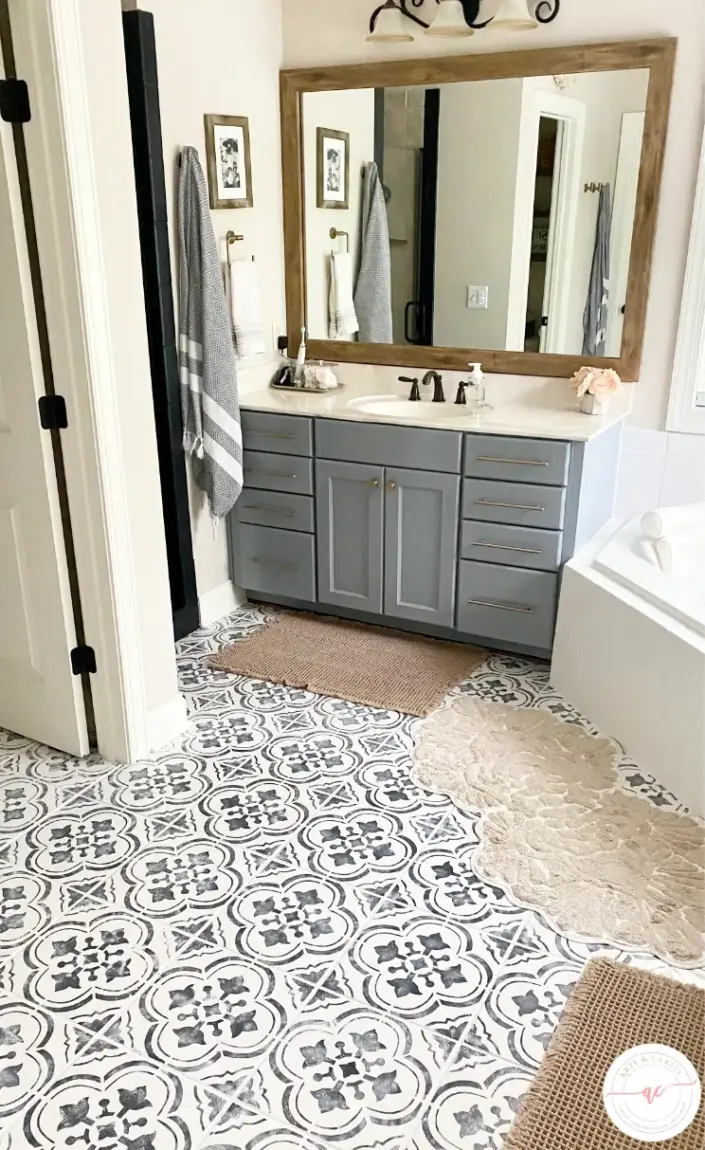
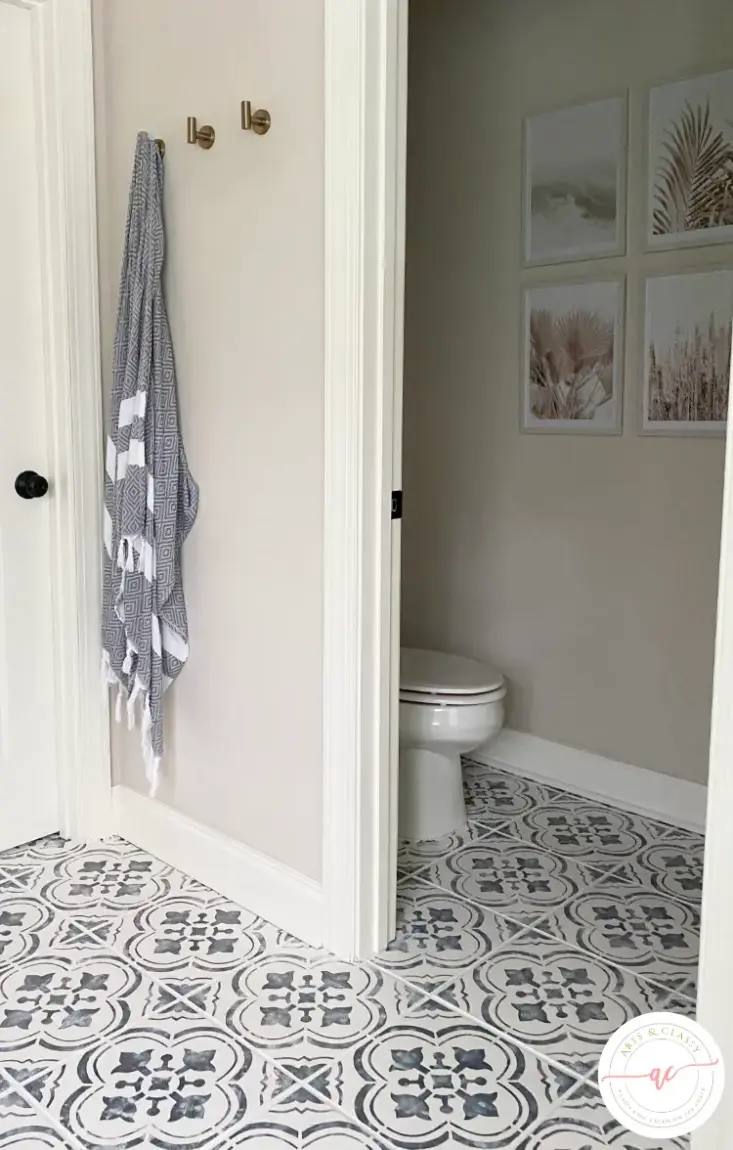
By following this budget-friendly guide to painting your tile floors, you’ve given your bathroom a fresh, modern look on a budget. We hope this step-by-step tutorial has empowered you to tackle more DIY projects and unleash your creativity.
Make sure you are following me on Instagram, Pinterest, YouTube, Hometalk, and TikTok for more ideas on how to decorate your home! Remember, with a little paint, a stencil, and some elbow grease, the possibilities are endless. Happy DIYing!
If you enjoyed learning more about how to paint a tile floor, you may also like: