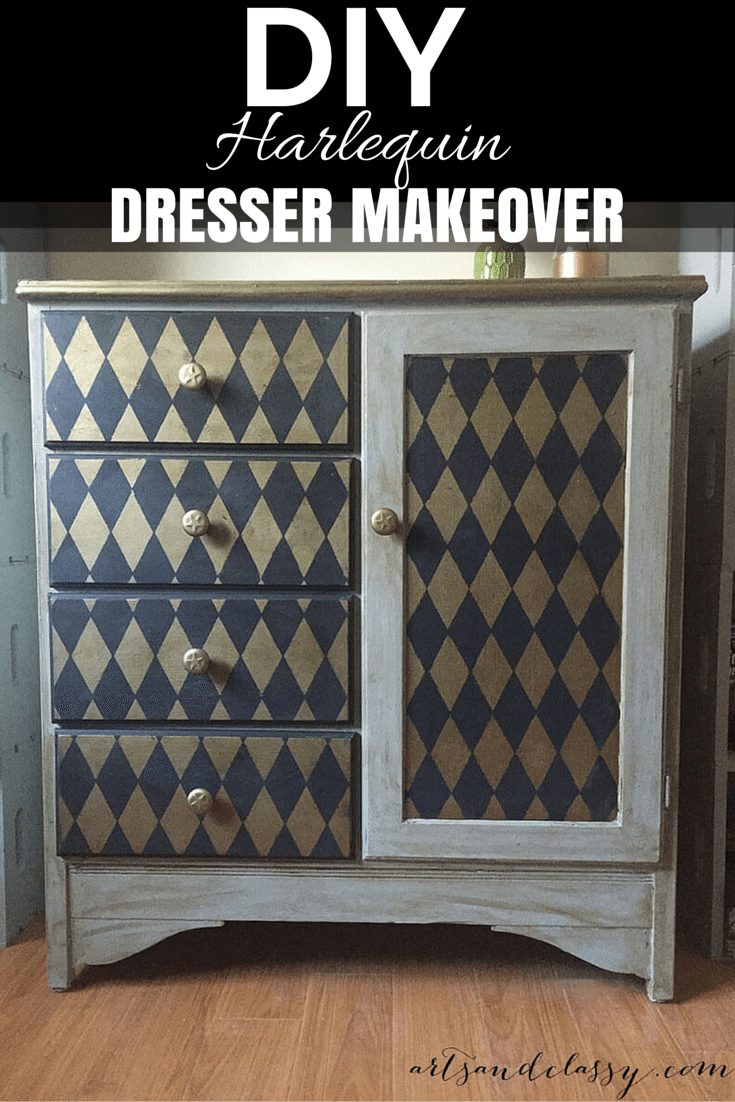
Baby Dresser Gets a Harlequin Makeover
Lately, stenciling has become an obsession in my household! I’ve been absolutely thrilled to collaborate with incredible brands like Royal Design Studio, and it has inspired me to embark on an exciting project: giving my beloved baby dresser from the mid-’80s a much-needed makeover. This dresser holds so many cherished memories, and I couldn’t bear the thought of parting with it.
Thankfully, my parents, who are in the process of downsizing as they prepare to move, generously passed it on to me. I consider myself incredibly fortunate to have this wooden dresser in my possession, and now it’s time to infuse it with a fresh, modern look that will truly make it shine! So, join me on this exhilarating journey as I breathe new life into my dresser and transform it into a stunning piece of furniture.
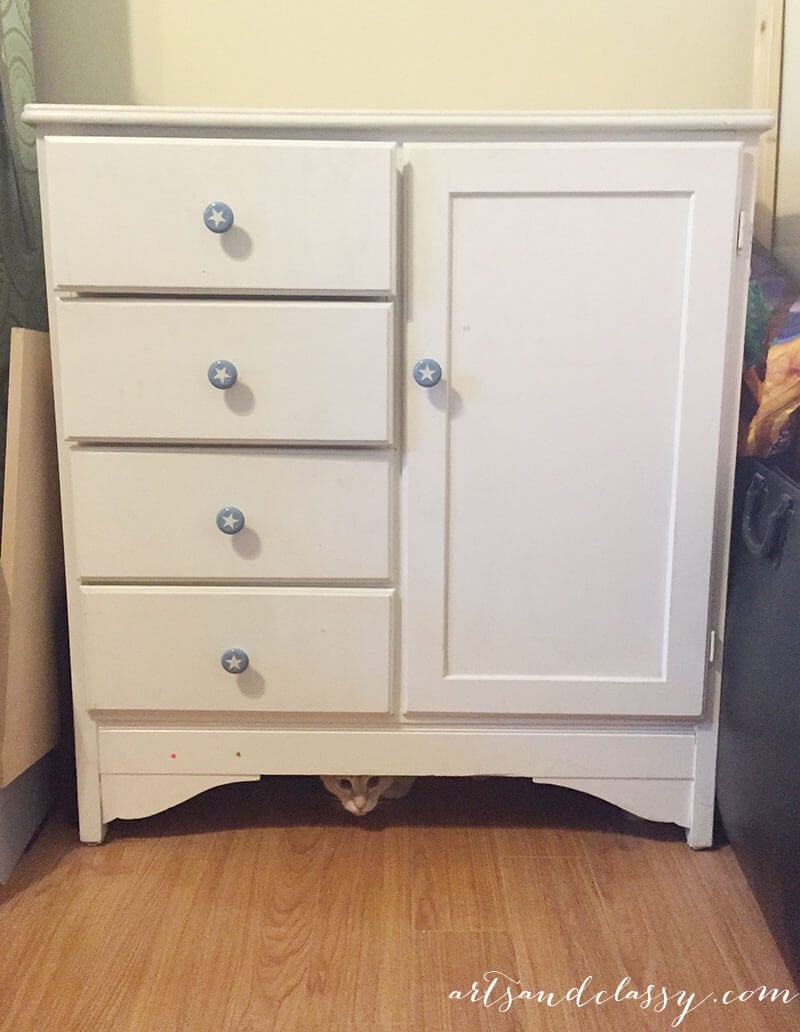
Want to see the before of this piece of furniture?
The knobs had been updated less than 5 years ago… and check out the cat underneath…
If you haven’t checked out my last furniture piece, I gave it a new look. You should see it! See how I made over a mid-century modern side table that I got on Craigslist for free with these awesome vintage geography maps that my stepdad bought for me!
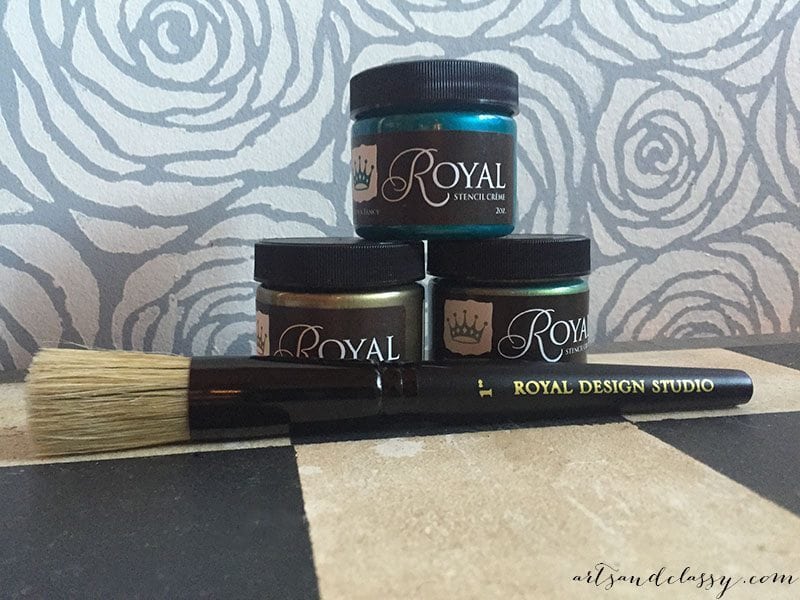
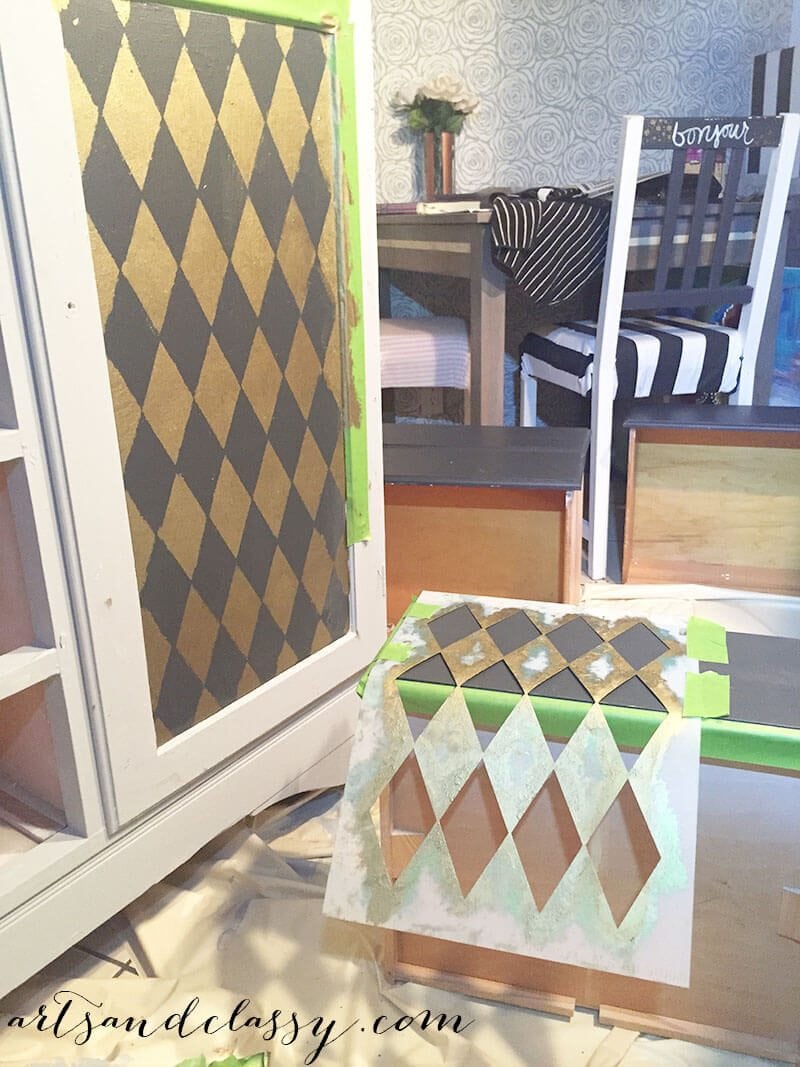
Onto this fun stencil DIY dresser makeover project brought to you by Royal Design Studio. I have fallen deeply in love with their stencil cremes! If you want to learn how to stencil check out their site!
The 3 colors I was sent for this old dresser tutorial were:
- Patina Green
- Antique Gold
- Peacock Fancy

Check out the basics of stenciling if you are a little intimidated by the idea of stenciling furniture.
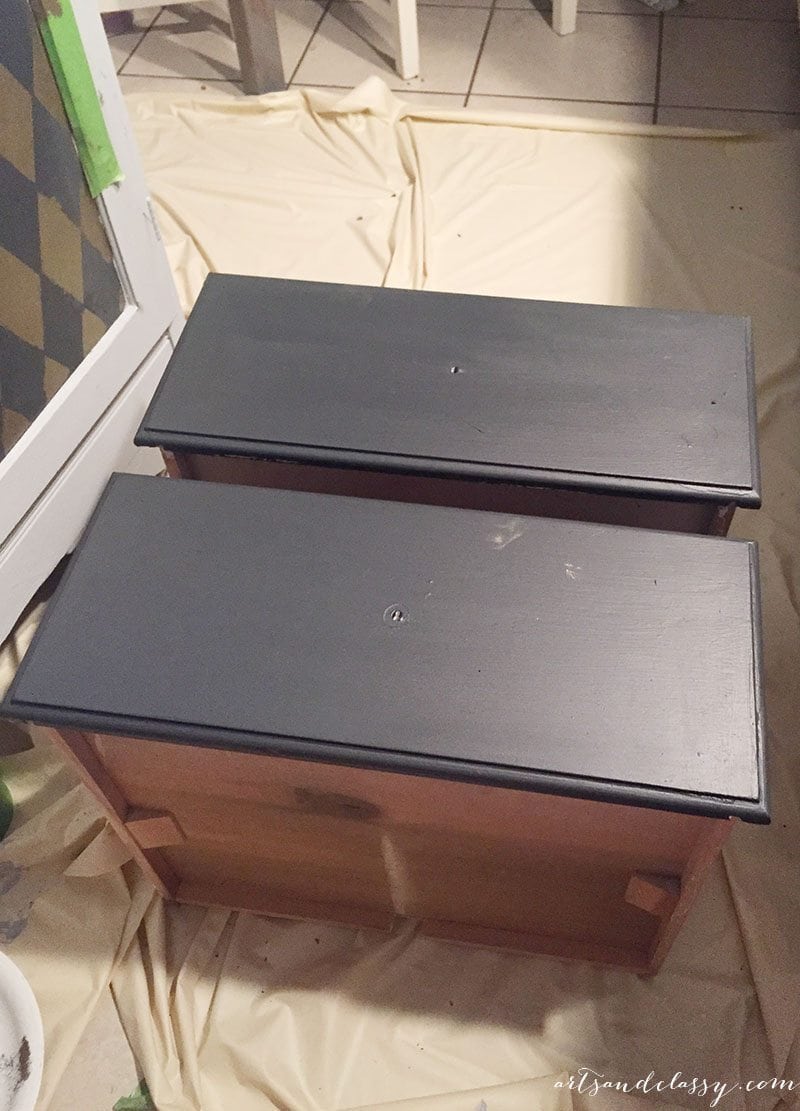
I chose 2 different paint colors of chalk paint to cover the entire vintage dresser makeover. This included the exterior and the drawer fronts. Also, I used gold spray paint to coat the drawer pulls to make it look like new hardware. Then, I also use painter’s tape delicate surfaces tape, or frog tape on my furniture projects.
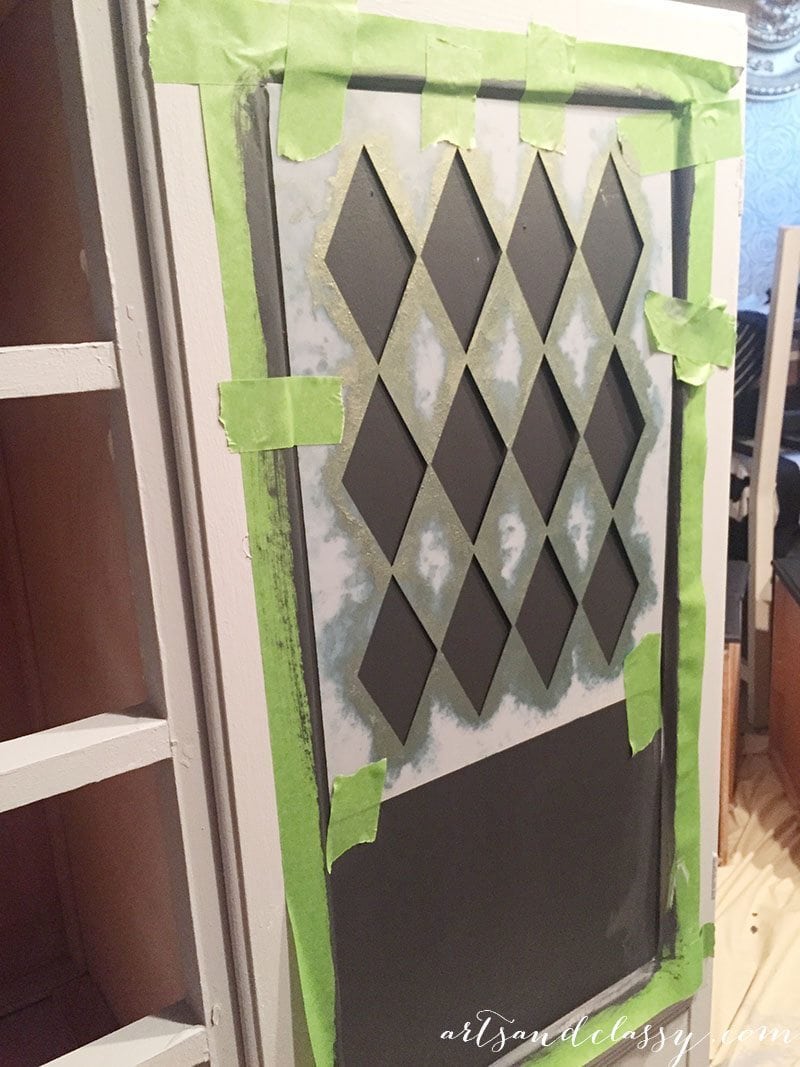
Side note** I started using the app Periscope for the first time on this project. I am trying to conquer my “on camera” fear/nervousness. So I showed a few people how to stencil using this awesome Harlequin Furniture Stencil from Royal Design Studio.
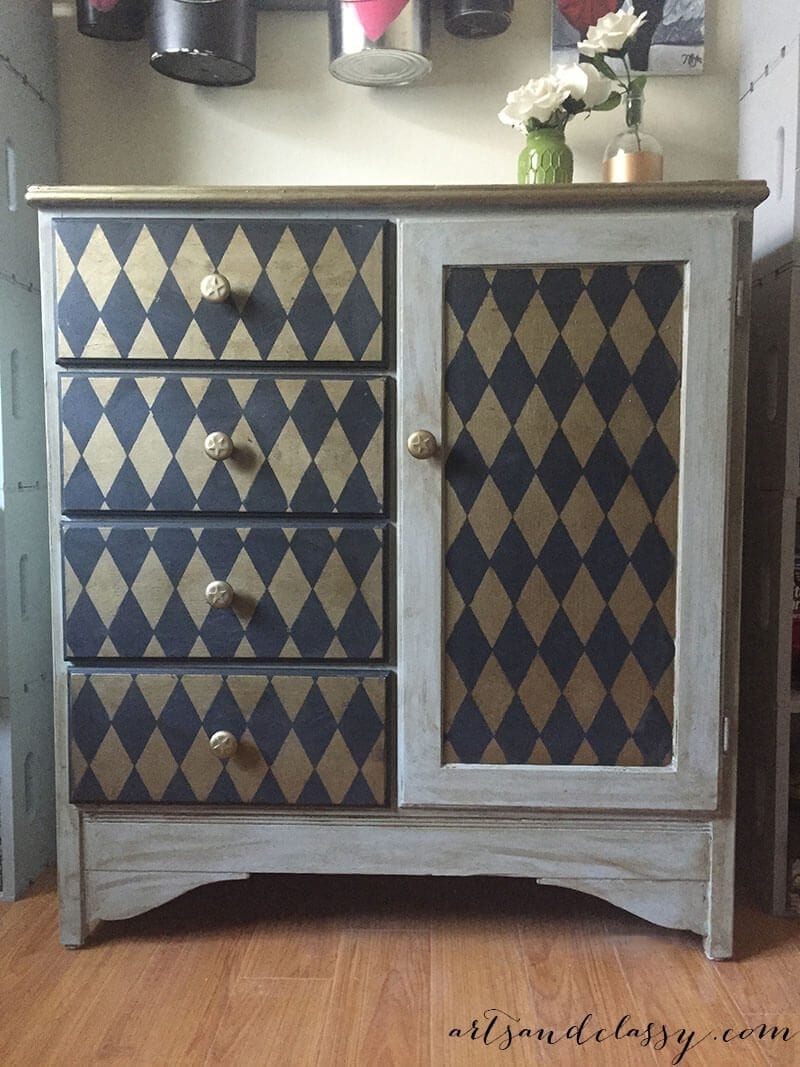
After a little more love with this awesome stencil, I was able to create dynamic overlays on this antique dresser piece that is both functional and beautiful with different colors and more texture. I added a seal to the entire piece with a brush, a rag, layered clear wax, and different colors of dark wax to age it down a bit. This also created a smooth finish.
Now onto the after photos of the new and improved chest of drawers!
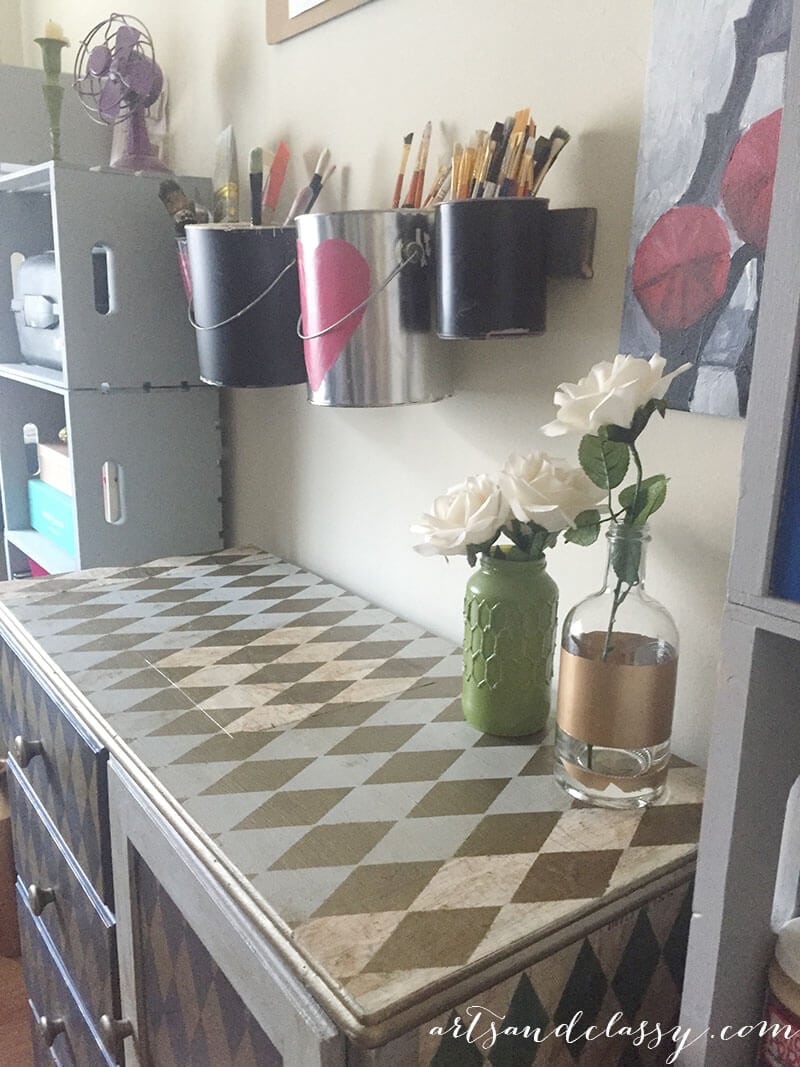
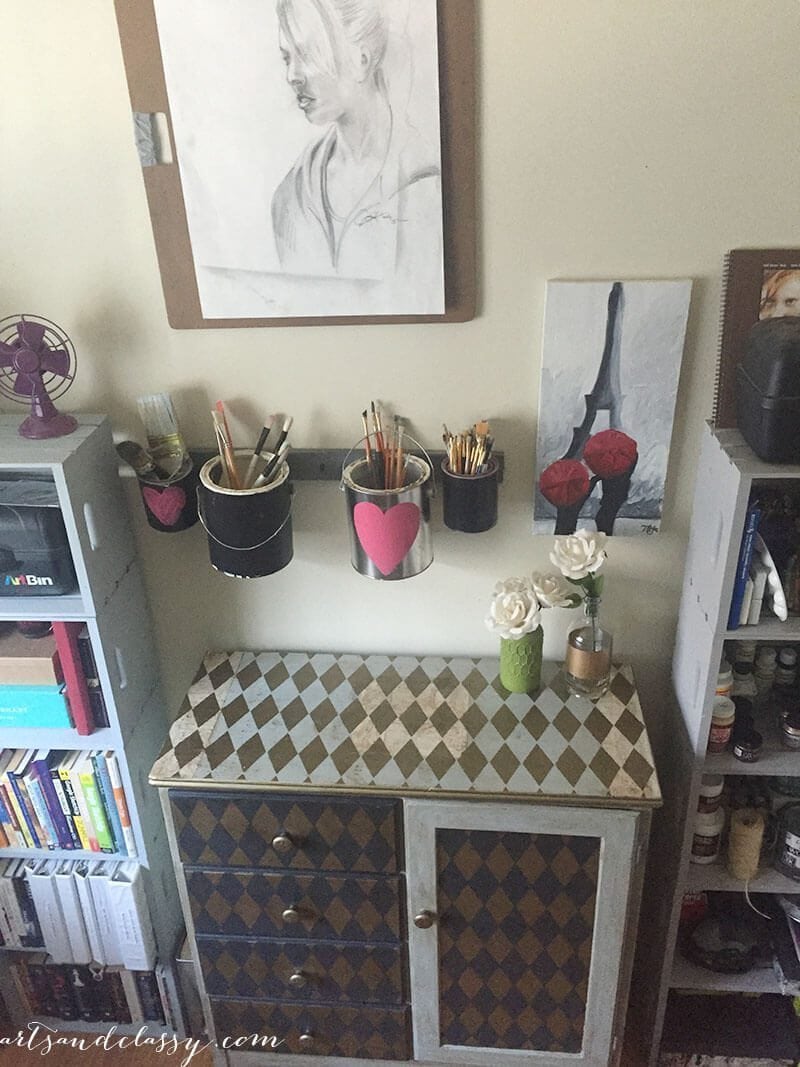
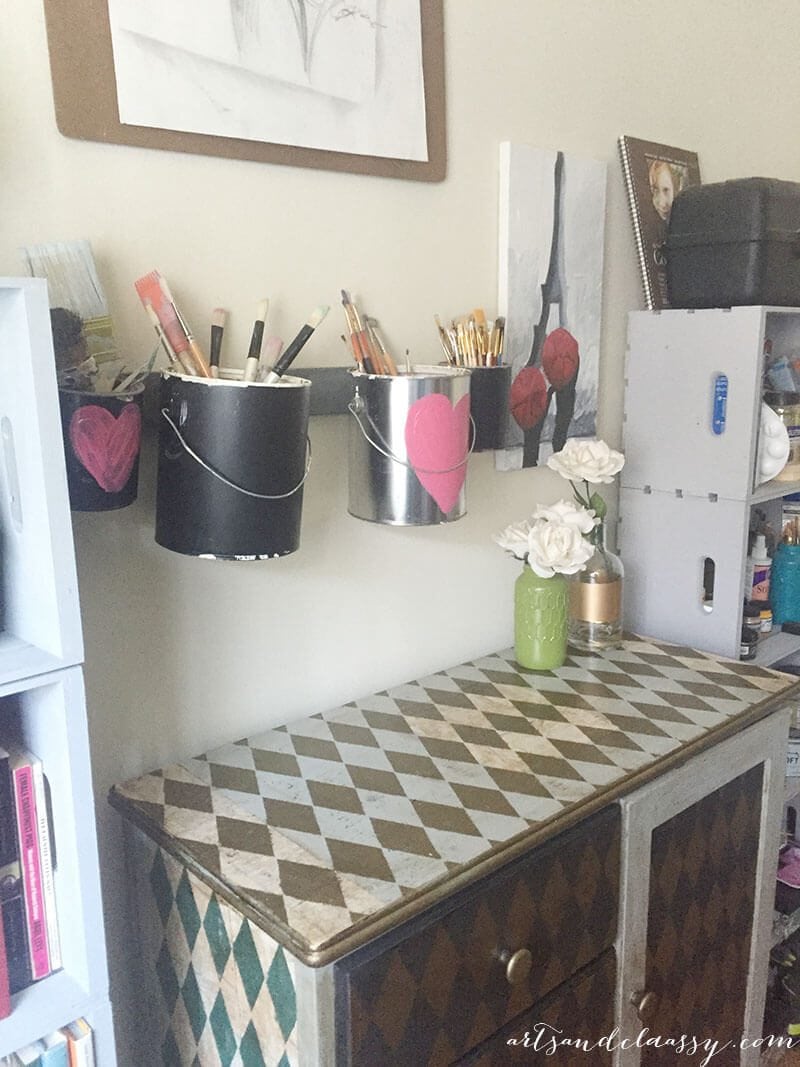
I am kind of loving this in my office! I was even able to upcycle some old paint cans to hold my many many paintbrushes just above the dresser. This will work so well as an additional standing workspace for any projects I am doing or photographing.
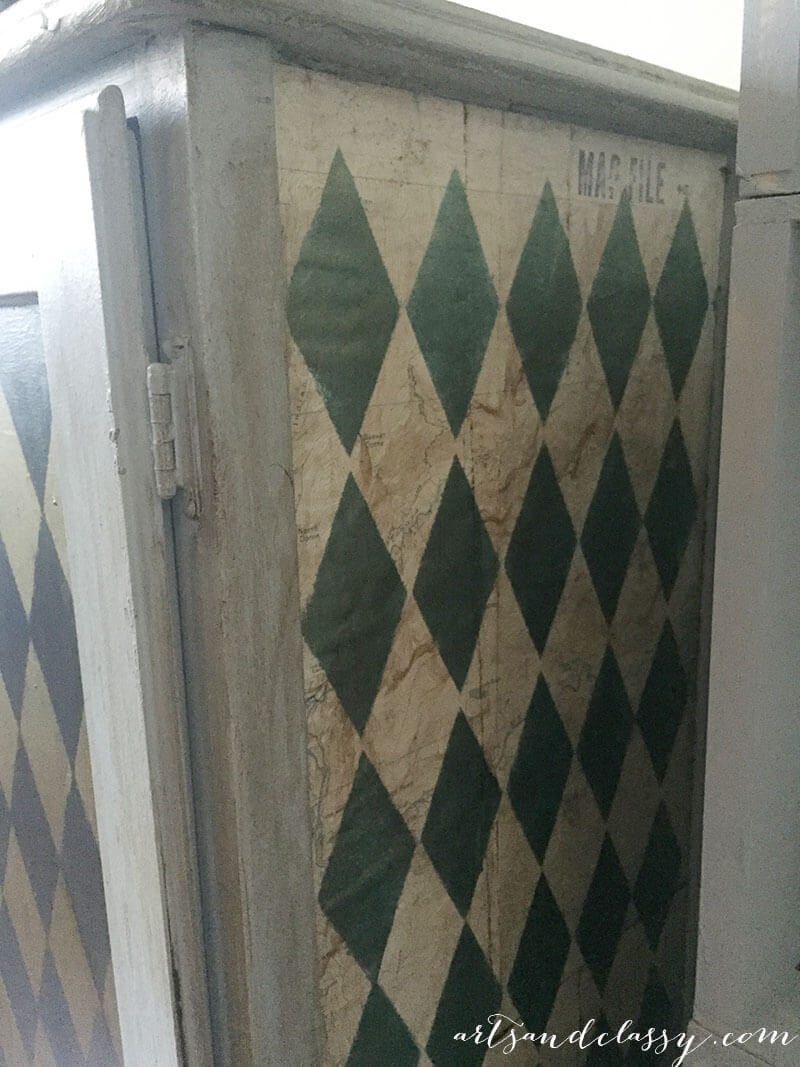
What do you think of the use of the vintage maps that are used like wallpaper applique on the sides with the stencil overlay?
It feels much nicer to have some inner peace now that the office is no longer a mess and can be a functioning workspace! Can I also tell you that I binge-listened to 2 podcasts while I did this? Check out Build Your Tribe & The Chalene Show on iTunes (or The Stitcher app if you have an Android phone). These podcasts will change your world!
I am so happy with the transformation of my old wood dresser. I can now use it more for craft storage and other supplies that I want to hide. When my home is cluttered and a mess, I feel distracted and it is super hard for me to focus. Trying to make a tidy space a habit.
Let me know what you think of this project in the comments below. If you like flipping old furniture, I encourage you to look at what hand-me-downs you could acquire, finds from garage sales, or thrift store finds. And don’t forget to check out the podcasts and my more dresser ideas on my Pinterest board for furniture makeover inspiration. Make sure you are following me on Instagram, Pinterest, YouTube, Hometalk, Facebook, and TikTok for more ideas on how to decorate your home!