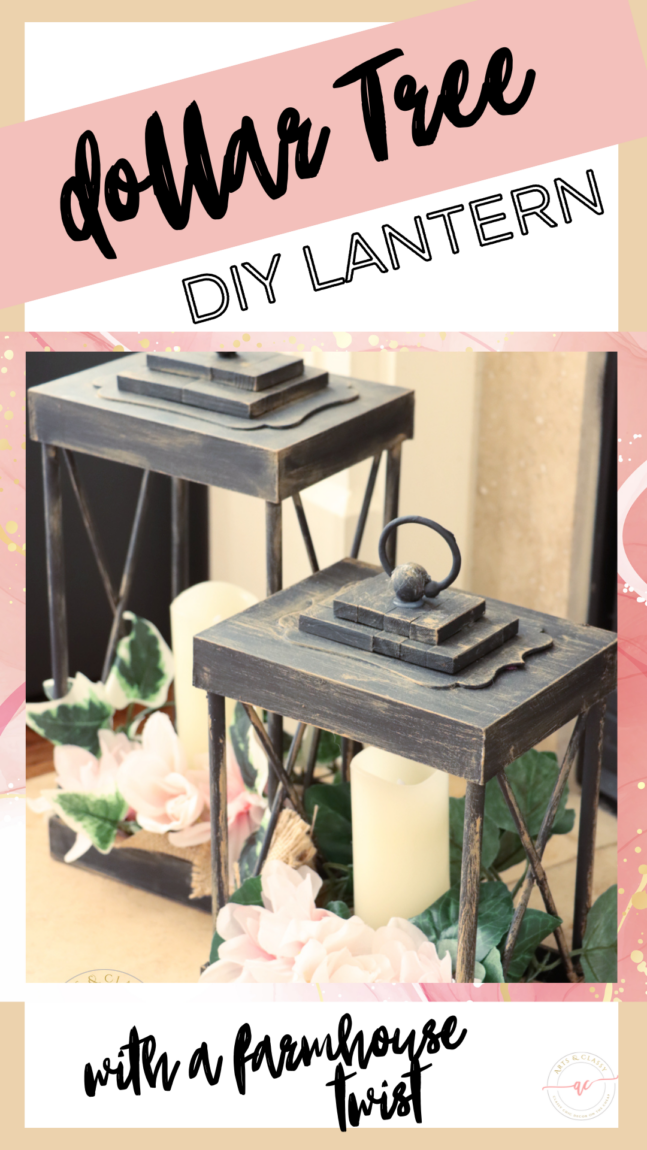
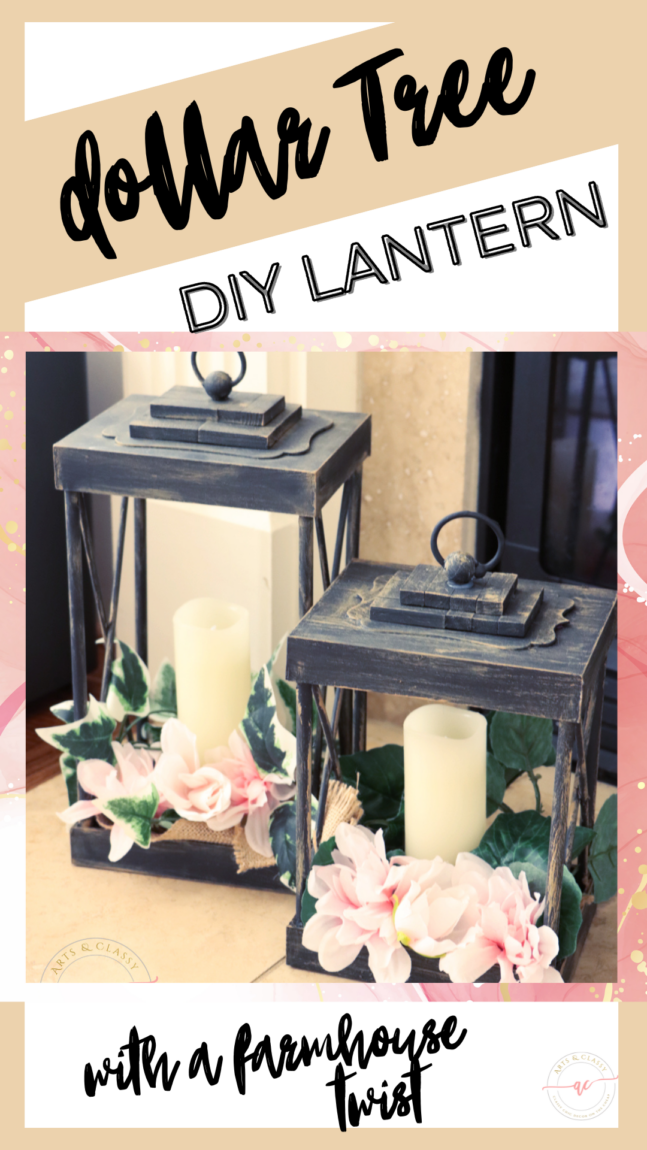
Easy DIY Dollar Tree Lantern: 7 Steps To Create A Farmhouse Twist
Have you been looking for something new and creative to make? This DIY Dollar Tree lantern is a fun project that pays off in the end. Learn how to create this DIY lantern project with a modern farmhouse twist.
Crafting can be a great way to not just make fun home decor, but to make something personal and unique! Here we will outline the DIY project of building a gorgeous, eye-catching Dollar Tree lantern. You will be able to craft this intricate piece of art quickly and with minimal effort. So get your supplies together and let’s get started!
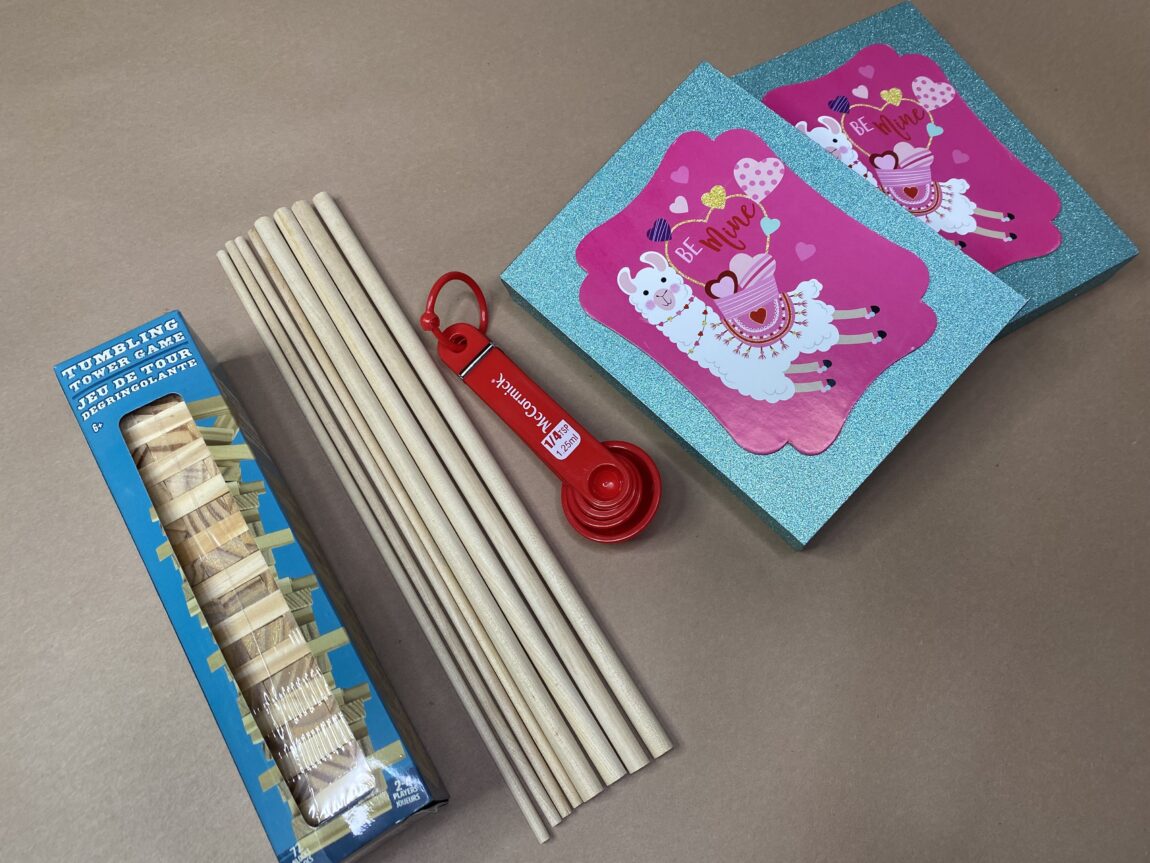
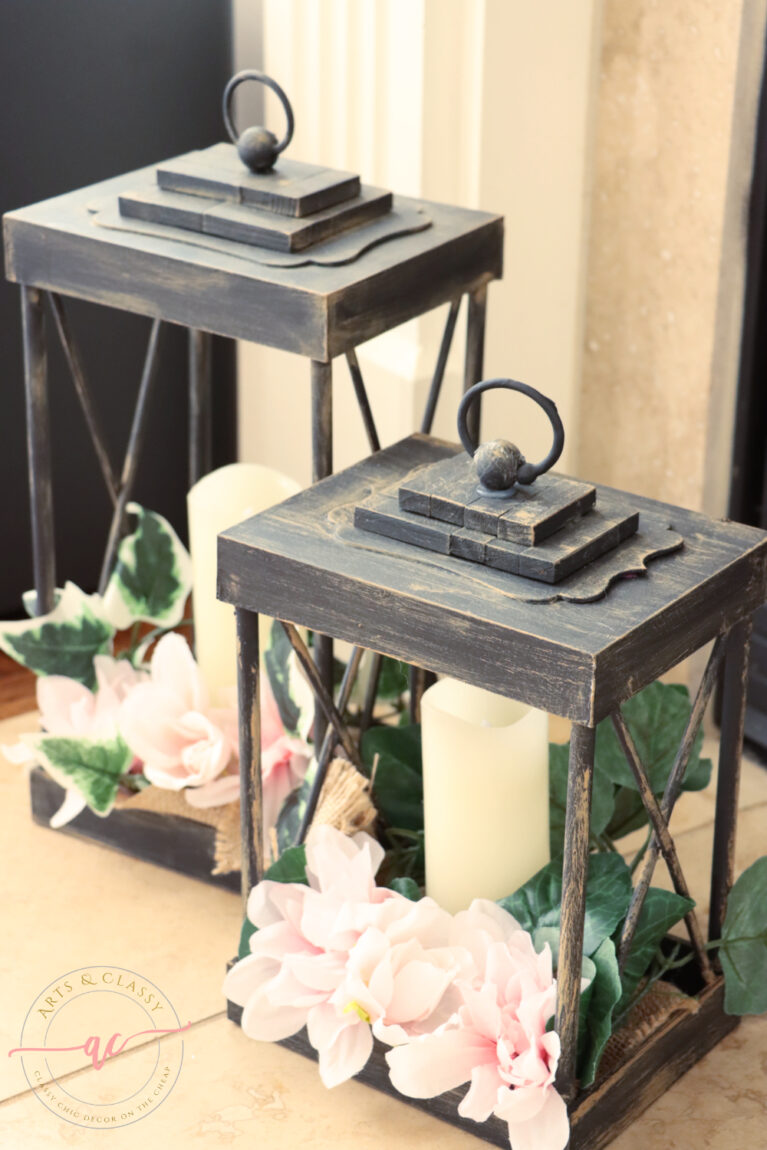
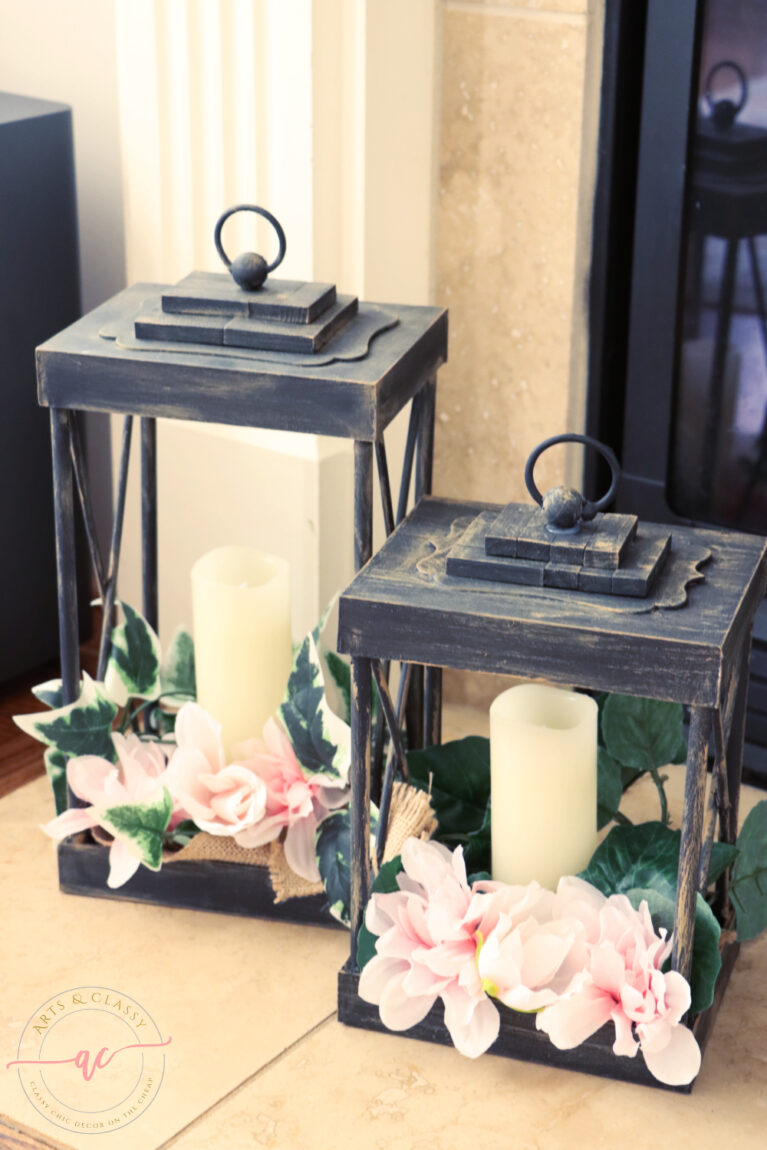
I was so excited to try my hand at this DIY dollar tree lantern project! Using only the Dollar Tree supplies required – two decorative pieces, measuring spoons, and dowel rods, plus some extra glue sticks and a hot glue gun for assembly – I built a unique one-of-a-kind piece of art. I used black paint to finish it off, and the effect when lit up from within gives me such joy!
This project proved to be a fun craft that turned out to be inexpensive as well. My DIY dollar tree lantern is a conversation starter in any room.
*Full disclosure*This post contains some affiliate links. I may earn a small commission if you make a purchase through one of these links. See more information in my disclosure policy.
What supplies do I need to create a gorgeous DIY lantern?
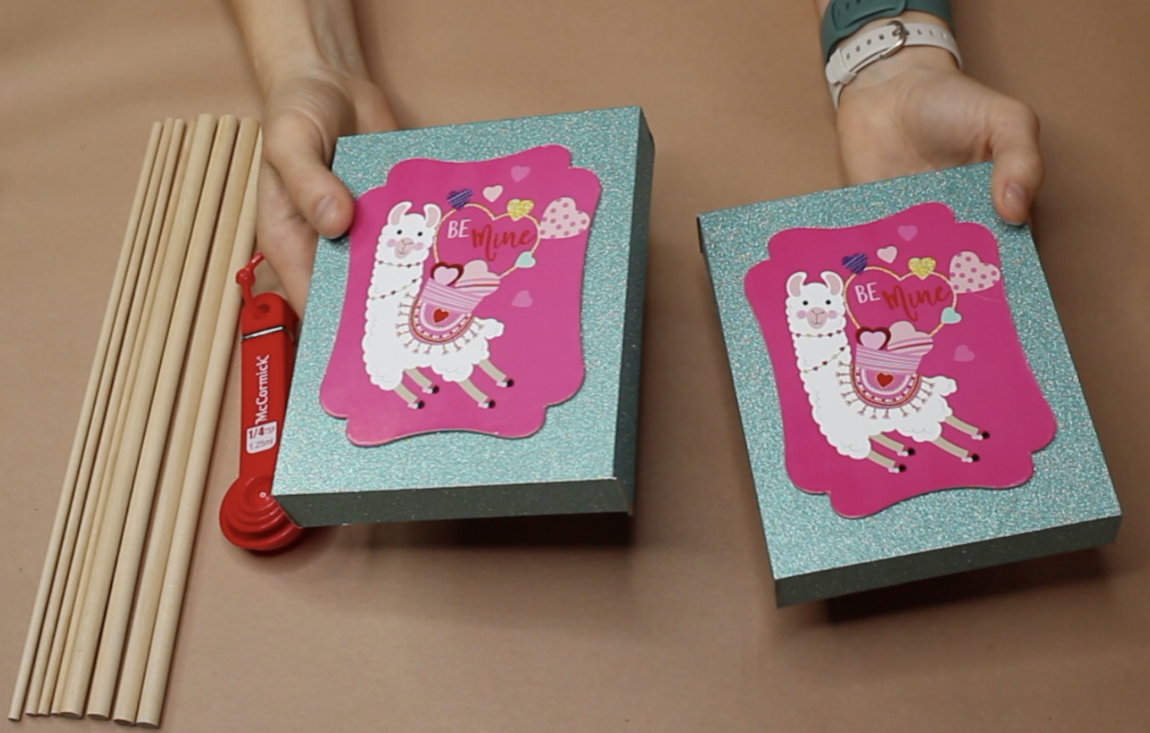
- 2 Decorative rectangle or square art pieces from Dollar Tree (Same Size) or you can order these!
- 4 thicker round dowels
- 4 thinner round dowels
- Hot glue gun
- Gorilla glue sticks
- Rustoleum black “Eclipse” milk paint
- Sand color or Honeycomb Taupe Acrylic Paint
- Paint brushes
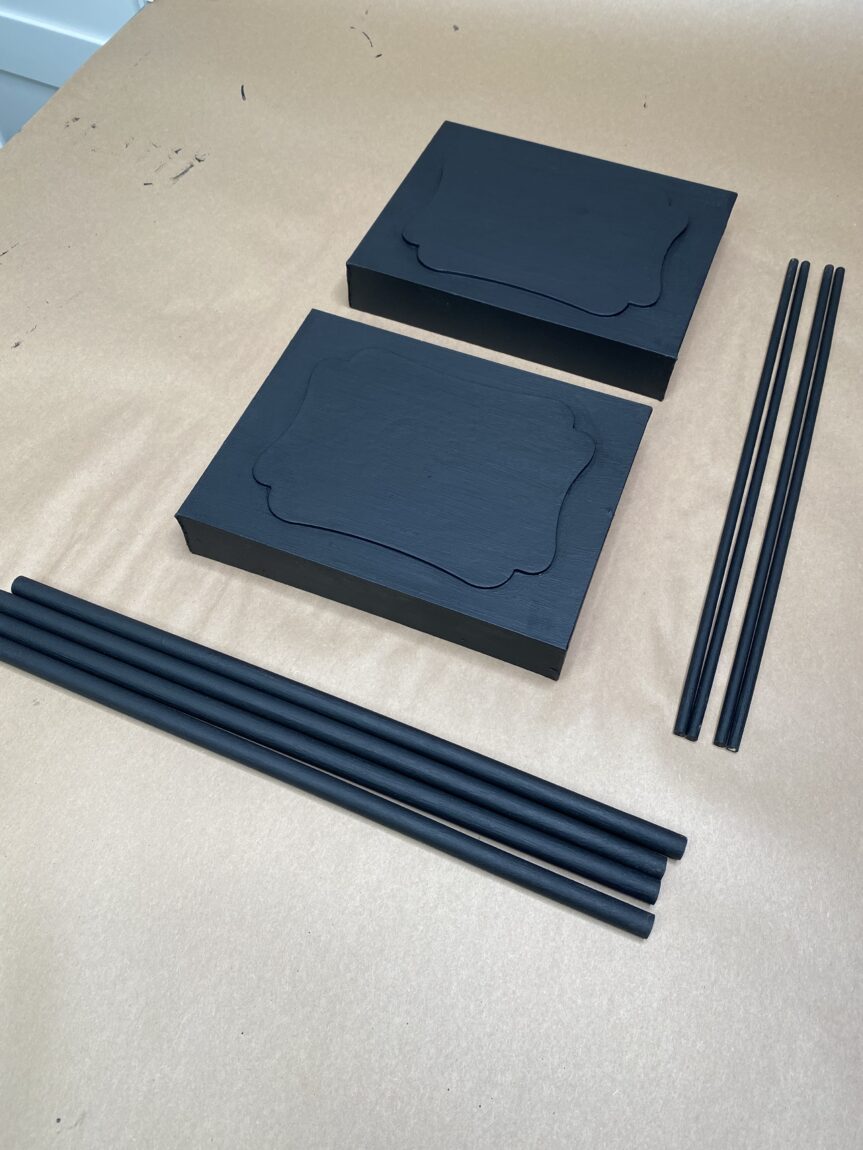
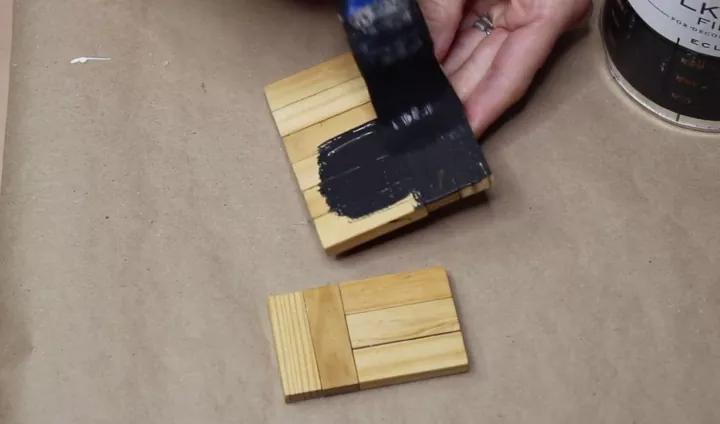
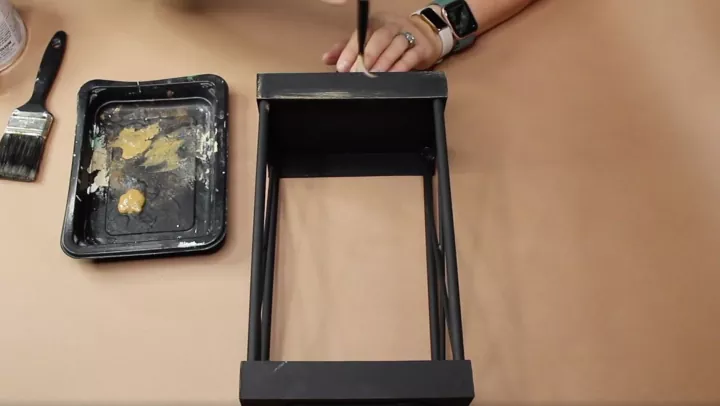
Step 1 – Painting the Materials in Black
The first step in creating your lantern is to paint all of the materials black. This includes the dowels, base, tumbling tower blocks, measuring spoon ring, and wooden bead.
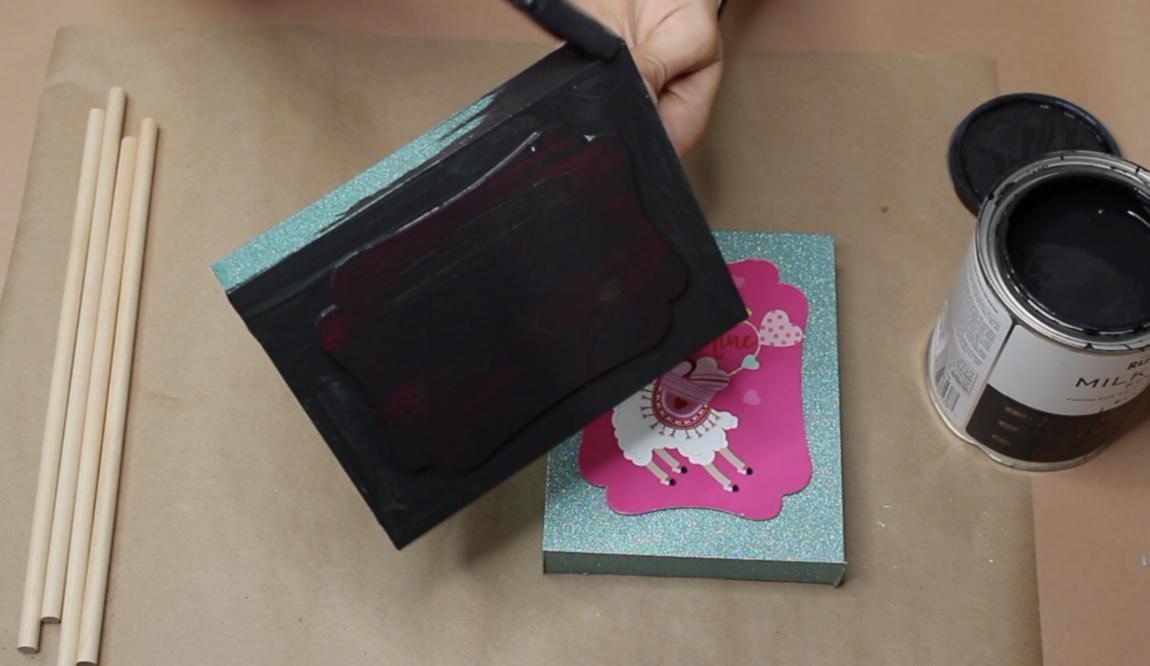
This creates a nice uniform look that will help your lantern come together nicely. To ensure that all of your pieces are completely black, you may need to do a few coats of paint.
RELATED: DIY Dollar Store Hacks & Projects
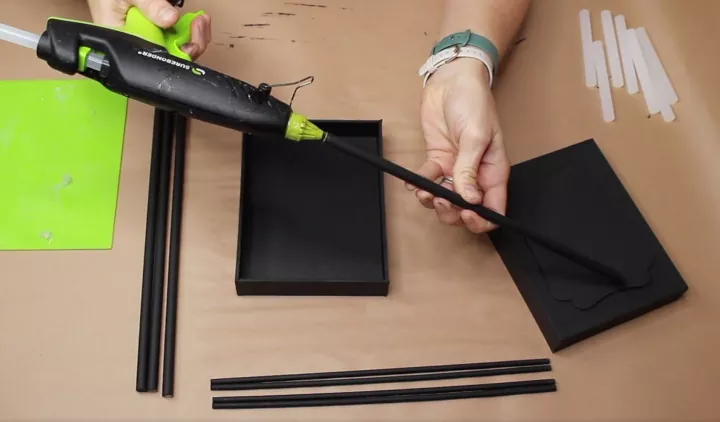
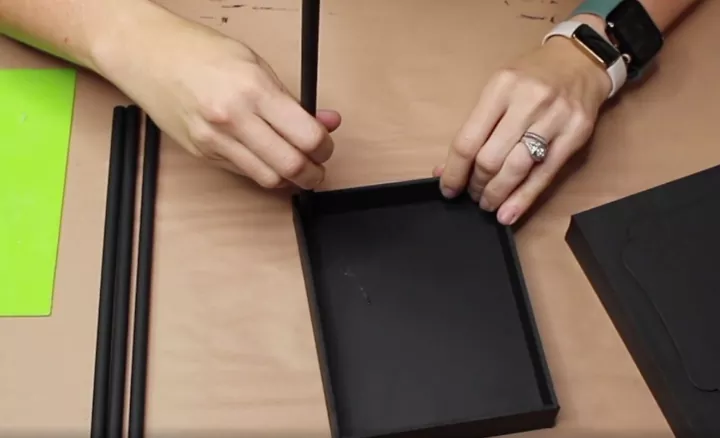
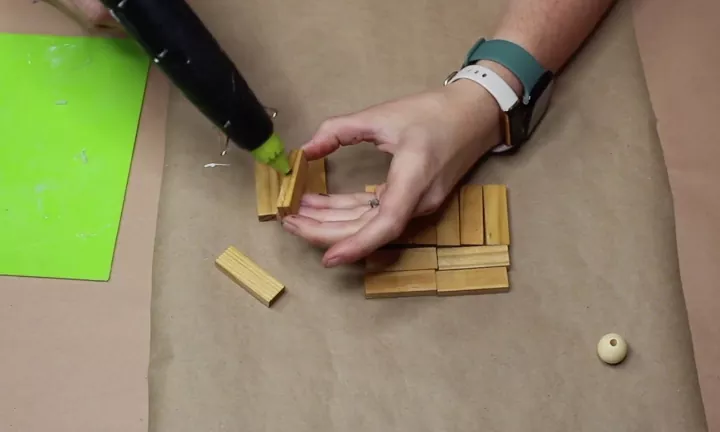
Step 2 – Attach the Dowels
Once all of your pieces are painted black, it’s time to start putting them together! Start by attaching four dowels to the bottom piece of art. You can use hot glue or another type of adhesive depending on what kind of material you have chosen for your base. When attaching the dowels make sure they are evenly spaced out around the perimeter so that all sides are secure.
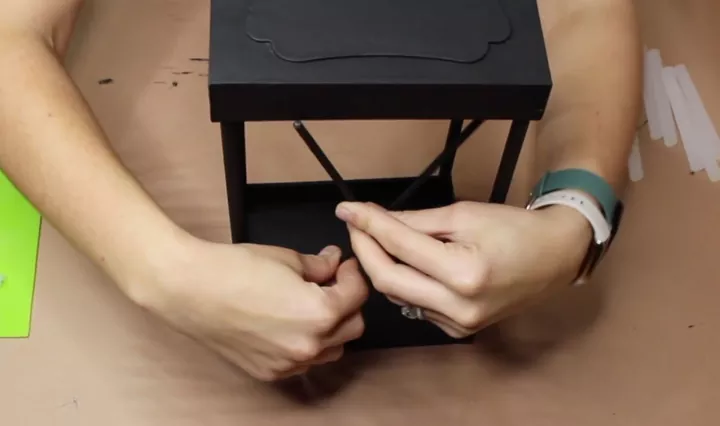
Step 3 – Place Tumbling Tower Blocks Around The Top
Next up is placing tumbling tower blocks around the top edge of your lantern frame. This helps create an interesting texture around the outside that gives it extra visual appeal.
You can choose any color tumbling tower blocks you would like as long as they match or complement whatever color scheme you have chosen for your lanterns’ overall aesthetic. Make sure each block is securely attached before moving on to step four.
RELATED: 6 Steps To Chic My Vintage Hutch Makeover Tutorial
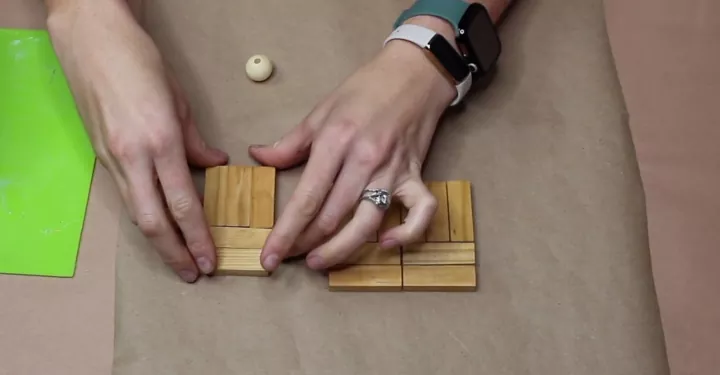
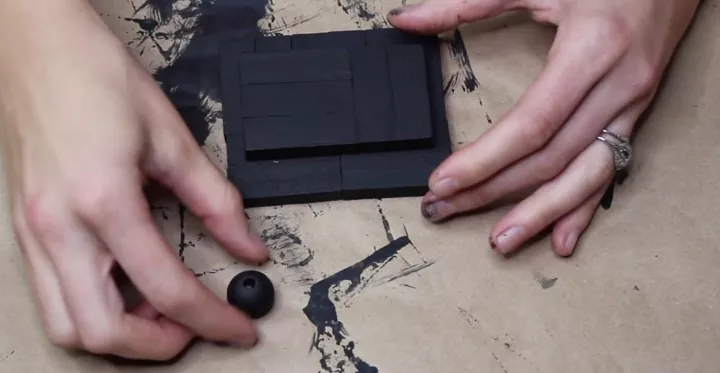
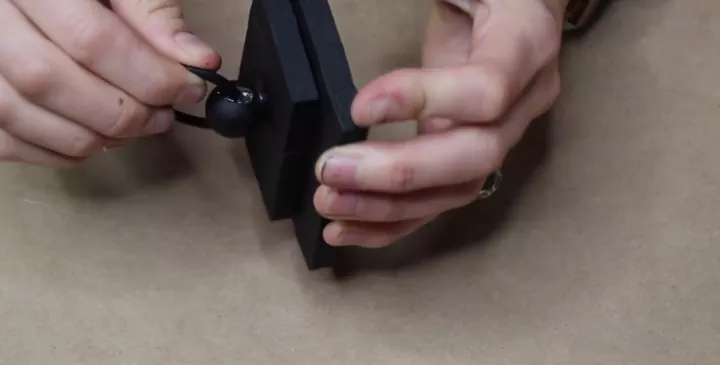
Step 4 – Secure A Wooden Bead Inside A Measuring Spoon Ring With Hot Glue
For this step, you will need a wooden bead and a measuring spoon ring. Using hot glue attach a wooden bead inside the measuring spoon ring so that it is secure and won’t come loose when moved around or handled.
Once attached place this piece onto one side of the top edge of your lantern frame.
I wanted it to look like it belonged there naturally without being too obtrusive or distracting from other elements in the design.
Step 5 – Add An Aged Look To The Edges With Honeycomb-Colored Paint
Finally, give your lantern an aged look by adding honeycomb-colored paint along its edges which gives it an antique feel that makes it look even more impressive than before! The exact placement and amount used will depend on how much detail you want in your design but generally speaking, applying some honeycomb-colored paint near each corner should do just fine!
RELATED: Easy DIY Farmhouse Rustic Paper Bag Snowflake Wall Art
Creating a beautiful DIY lantern doesn’t have to be complicated, require power tools, or be time-consuming!
By following these five simple steps outlined above any woman looking for connection and getting into DIY projects can make her own unique piece in no time! Whether you’re creating one as a gift for someone special or just want something special to add some personality to your living space – this project is perfect! So what are you waiting for – grab some supplies today and get started on making something truly one-of-a-kind! With a few simple steps and materials, you can assemble a lantern in the color of your choice.
This project was perfect to show my own unique style, while not breaking the bank.
For just a few dollar store supplies, I was able to build a beautiful lantern that will add a farmhouse touch to any space. Once completed, add greenery and battery-operated candles to the inside of the lantern to add some farmhouse rustic decor to your home. Now I like to switch up and change out the inside décor with the seasons – nothing beats how satisfying it feels when you make something special with your own hands.
So if trying your hand at a DIY project is something you’ve been considering, this lantern could be a great place to start!
And don’t forget to make sure you are following me on Facebook, Instagram, Pinterest, LTK, Hometalk, and TikTok for more ideas about creating an aesthetic that’s all your own. Until next time, happy crafting everyone!

Meredith,
This is incredible!! The attention to detail that you used and the way you put this together is amazing! They look so pretty!! Thanks so much for sharing at Home Imagined this week!!
Rachel! You are too kind! Thank you for your kind feedback and for hosting such a marvelous party each week!
Meredith, I love this project sooooo much! I enjoy anything with an aged look and you knocked it outta the park on this one. I am wondering if our Dollar Tree has all of the supplies. I always see such neat items, but our store never carries those nice pieces… LOVE THIS ONE~
Thank you so much, Cara!! I have found that I typically have to visit multiple locations for Dollar Tree gems. If you have “super” Dollar Tree (the bigger stores) they usually have more options and a more robust crafting section. 😉 Happy Crafting!