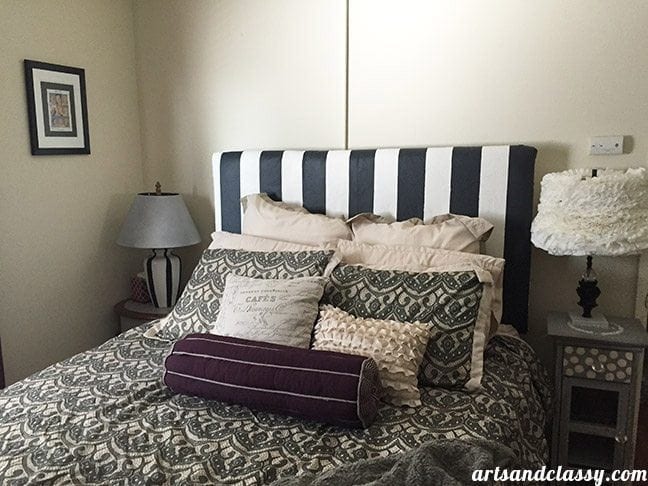
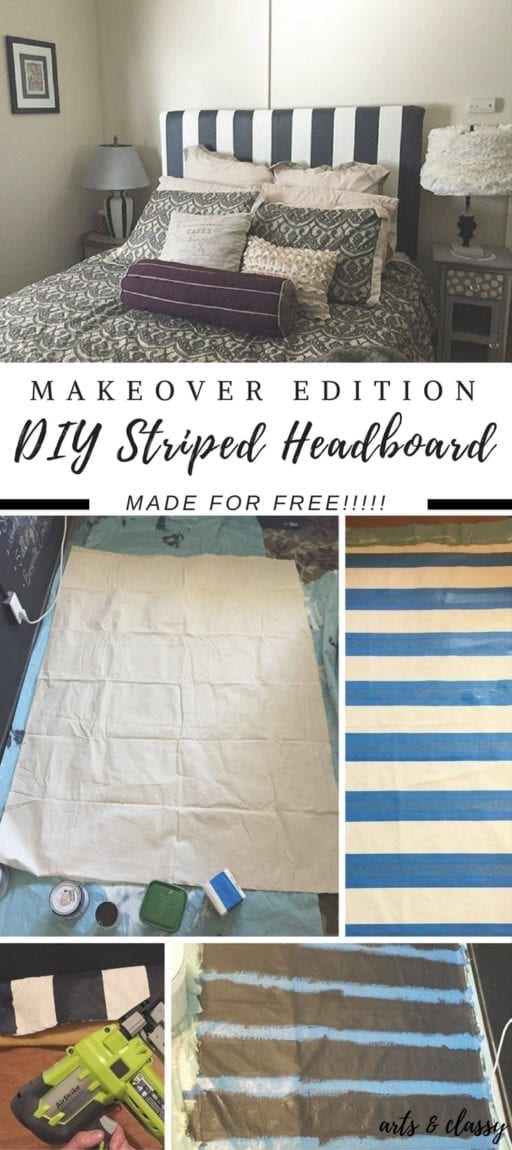
Makeover Edition: DIY Upholstered Headboard Made For Free
If you haven’t seen my last post about how I originally made my headboard for $20, you will want to check that out before this post. My Bedroom Makeover ends today and I am so excited to show you all what I did as a whole.
I wanted to show you how I updated my $20 DIY upholstered headboard and how did it for free!
This post contains some affiliate links. I may earn a small commission if you purchase through one of these links. See more information in my full disclosure policy.
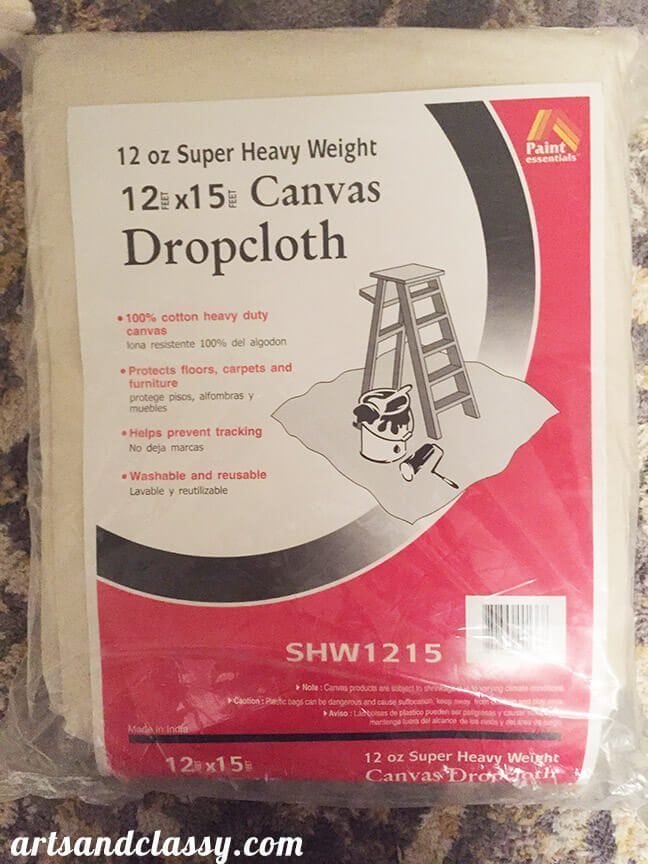
I am all about using things that you have around the house to try and accomplish the look you desire. For me, I had one of these heavy canvas drops that are used for masking the floor when painting the walls or ceiling.
I decided that I could use this canvas as the fabric on my DIY fabric headboard to achieve the striped pattern I wanted. Ever since I flipped my yard sale find Cane Arm Chair I have been obsessed with stripes! With a little creativity and some supplies like painter’s tape, spray adhesive, & chalk paint I was able to create my beautiful new patterned headboard for FREE!

The Official Supply List For This Entire Headboard Project:
(If you don’t have one of these supplies see my links to the appropriate product, for your convenience)
- Painter’s Tape
- Spray Adhesive
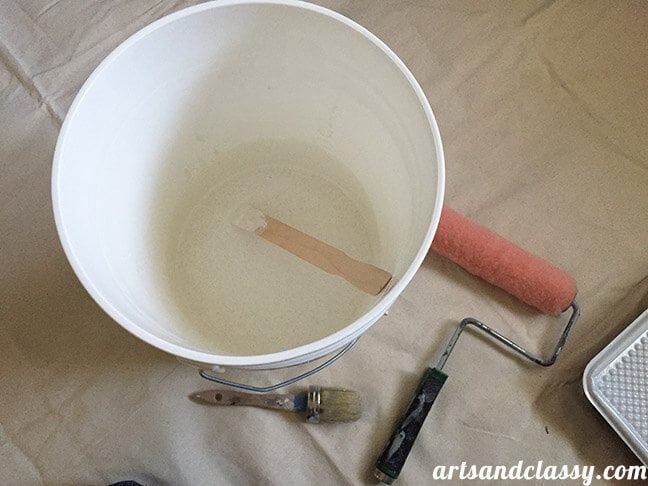
- White and Black Chalk or Milk Paint (I have a great DIY recipe) I mixed a flat white, & Behr paints color “Night Club.”
- Scissors
- Roller Frame
- Roller Frame Covers
- Paint Tray & Paint Tray Liners
- Paint Brush
- Artist brushes
- Clear Spray Paint
- Power Drill
- 2.5-inch wood screws
- Canvas Drop Cloth
- 2 buckets/containers (for the chalk paint)
- Frog Tape
- Ryobi Airstrike stapler
- Hand staple gun and staples
- Upholstery foam (I had some on hand, but it was needed for this project)
- Layer of batting
- Measuring tape
- Fabric Scissors
- Optional – Use a French cleat to attach to the wall if you don’t want to do it the way I do it.
Step 1
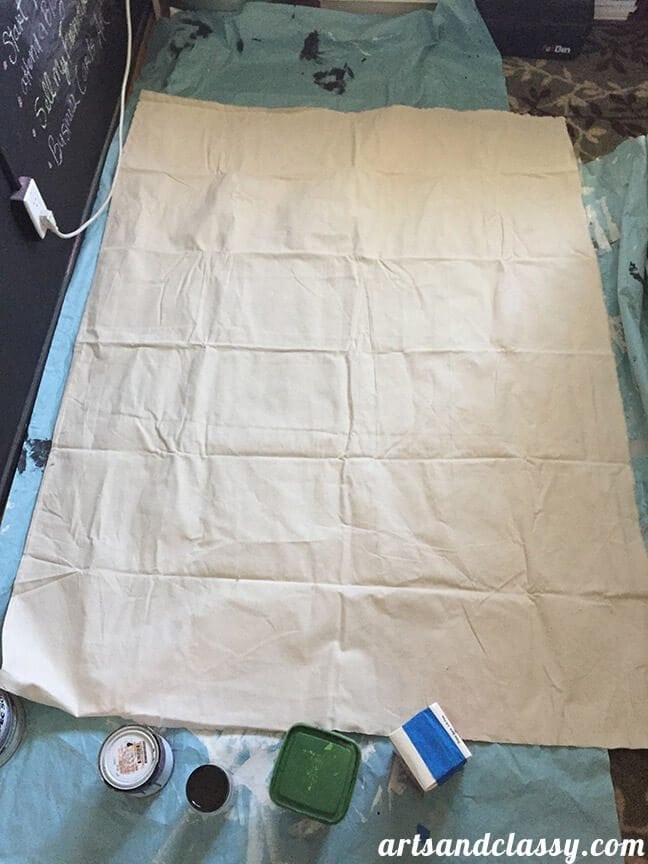
I began by measuring my current DIY upholstered headboard to figure out how much fabric I needed to completely wrap the padded plywood. My queen size bed needed to be measured about 60″ wide but I wanted to add some inches in case I needed it. I added about 4 inches on each size.
I measured out my fabric and cut it with scissors. This canvas also ripped easily in a straight line, like muslin fabric.
Step 2
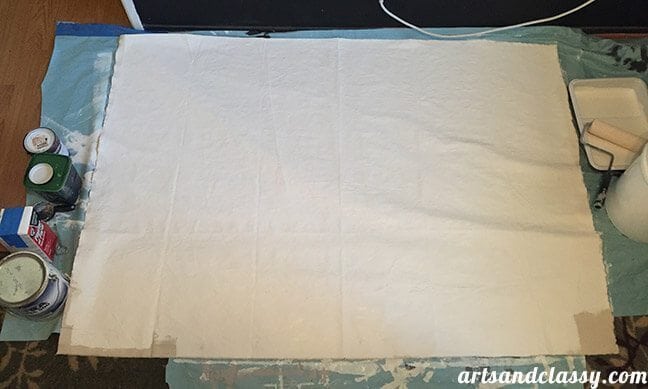
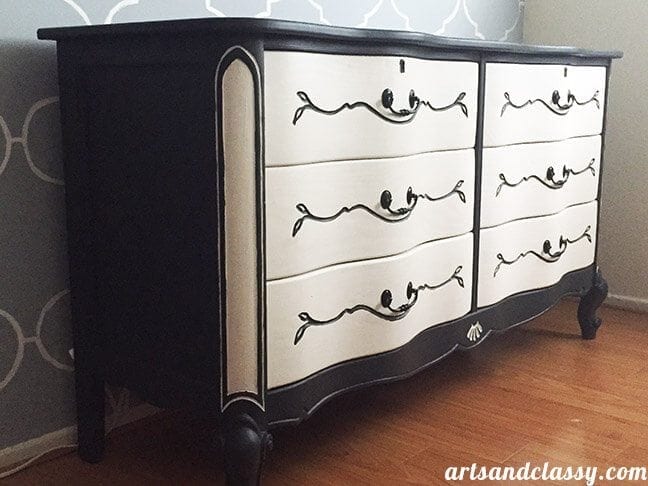
The second step was to paint the entire piece of canvas white! That is where my existing chalk paint that I used on my French Provincial dresser makeover came in handy.
Once the canvas was dry from about 2 coats of white paint (the paint roller was vital for this part of the process.)
Step 3
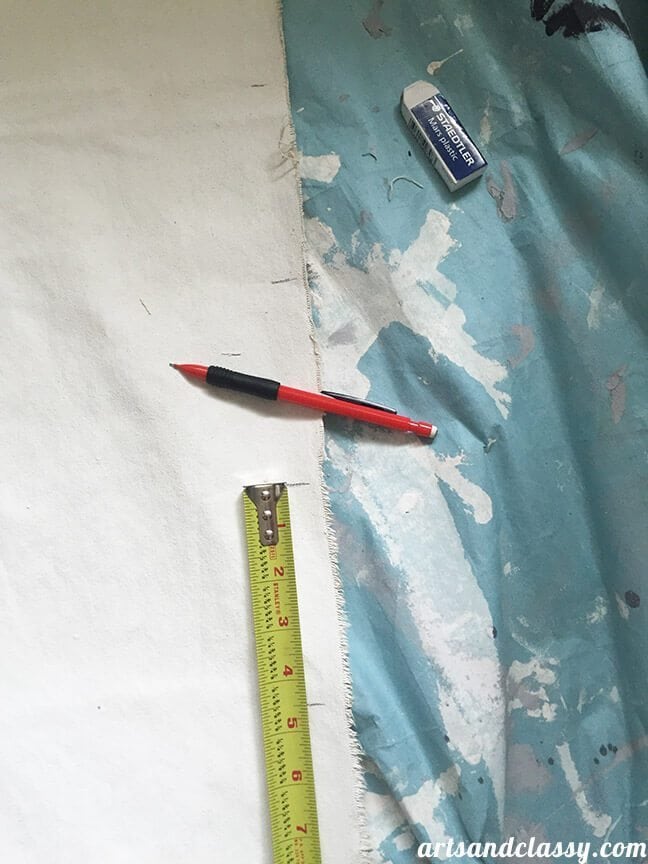
Then I measured the amount of **fabric I had and divided it by how many *stripes I wanted.
**68 inches divided by *15 stripes = Each stripe will be 4.53 inches wide which I went ahead and rounded to 4.5 inches.
Step 4
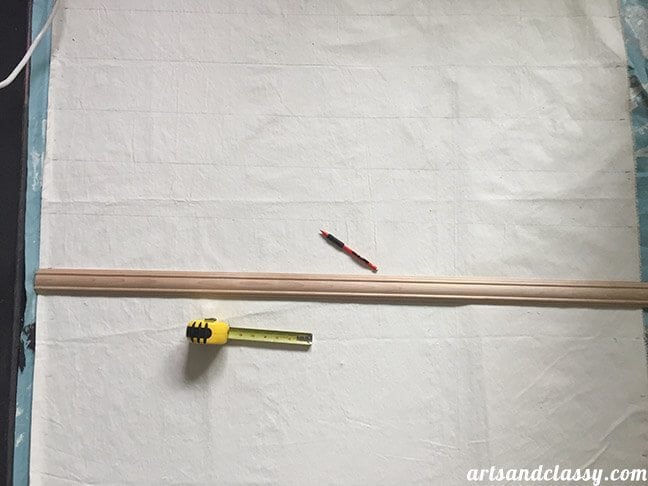
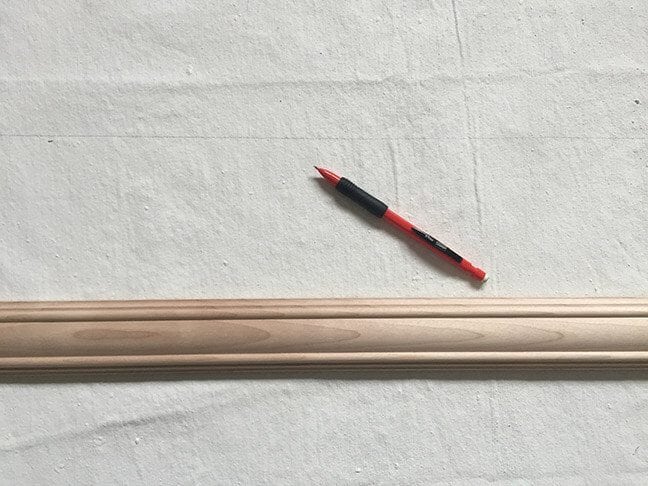
After marking two sides… I took a piece of chair rail (that I also had in my office) to act as a ruler to help me draw my lines straight with a pencil.
Step 5
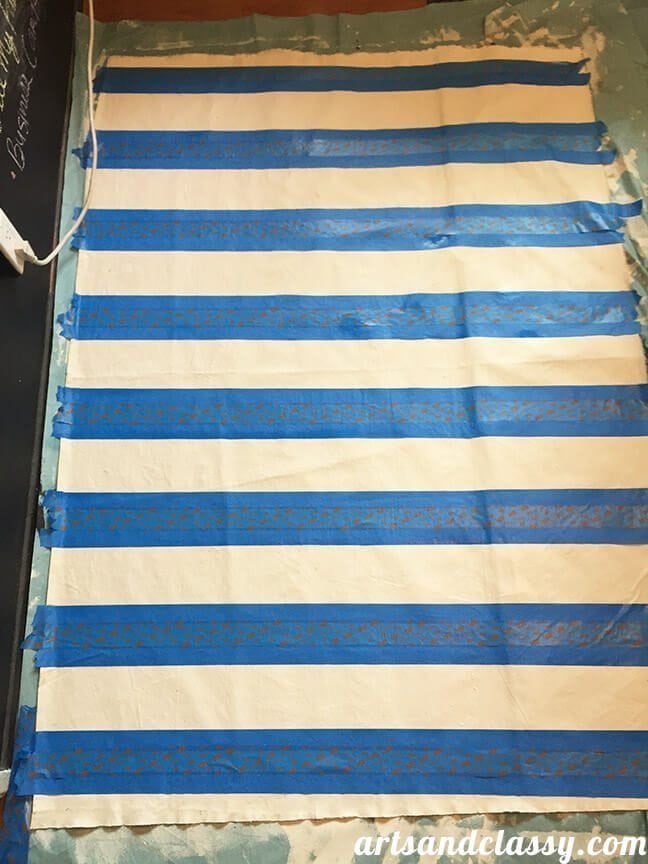
After drawing my lines, I pulled out my painter’s tape to mask the areas I wanted to keep white. I am not going to lie to you… this was easier said than done. I had a lot of difficulties getting the tape to stay stuck to the fabric.
To troubleshoot I pulled out my spray adhesive and lightly sprayed the fabric before sticking the tape. It helped keep the tape in place and from popping up on the sides.
Step 6
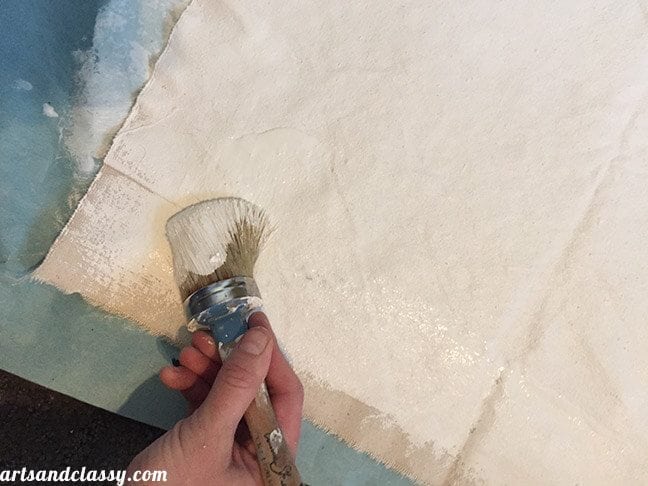
After the tape was secure, I pulled out my clear spray paint sprayed a layer over the drop, and let that dry for about 10 min.
Step 7
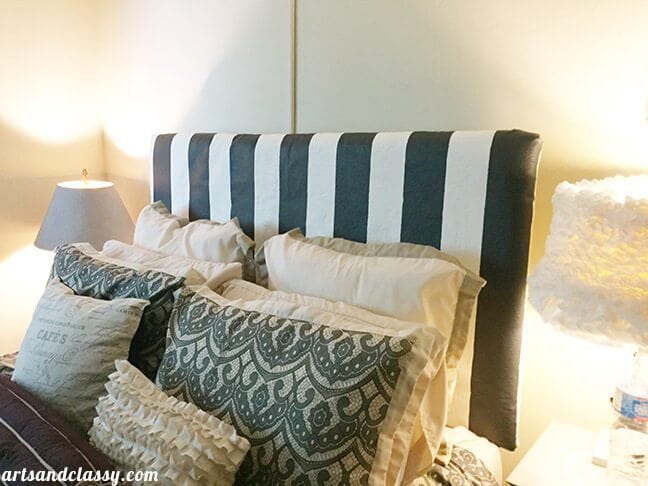
Once that clear layer was dry, I began painting the exposed area with the darker color chalk paint I made using Behr’s “Night Club.” I simply applied the paint with a brush.

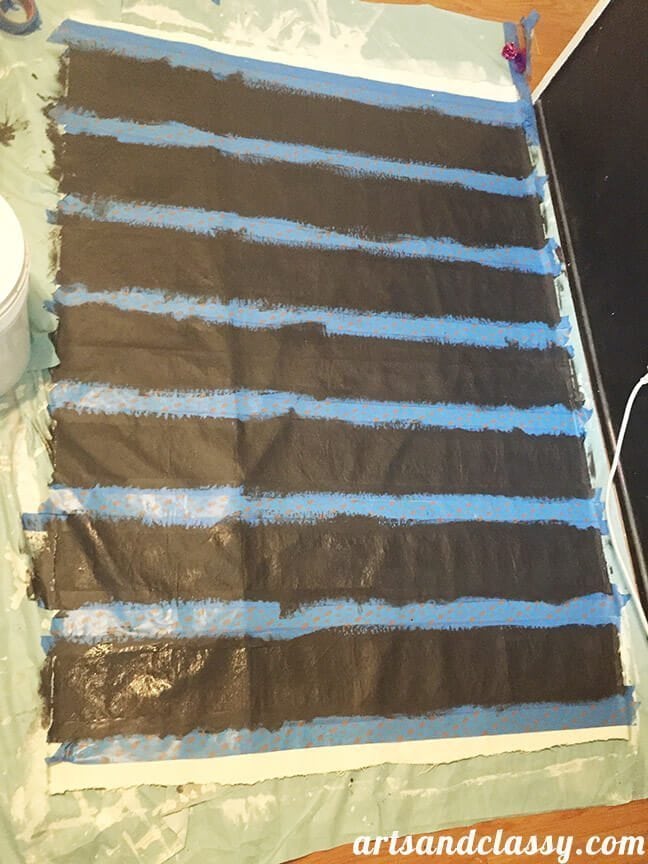
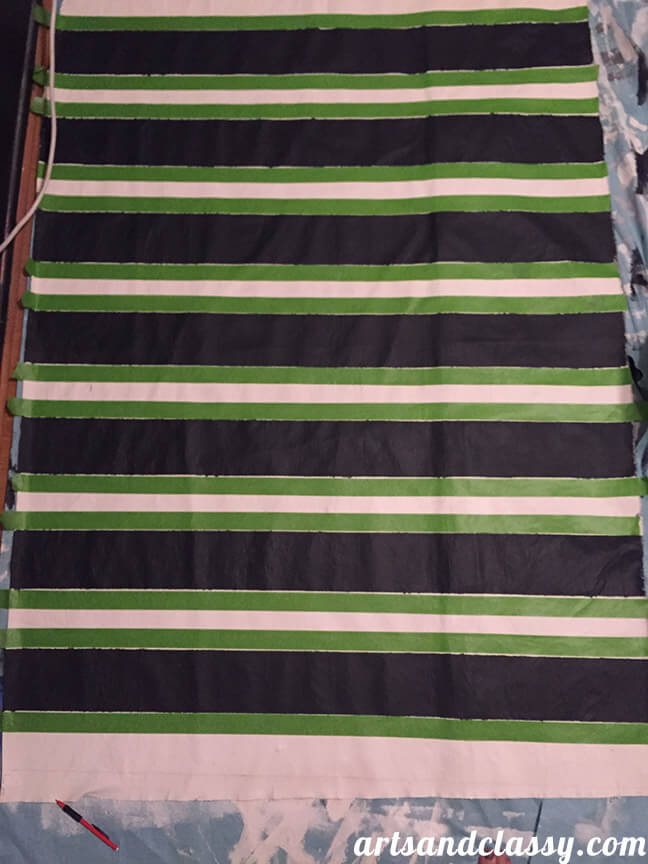
I was a little bummed to find that was still some bleeding of dark paint into the light paint. So I broke out the big guns, aka Frog Tape to see if their paint lock technology could help me out while I used a small artist paint brush to fill in to keep a straight black line.
Even after doing this and letting it dry completely, there was still a little bleed. So I put my metaphorical fine artist hat on and created straight lines by hand.

I am so happy to say that it worked!!
Step 7
To see how to assemble and wrap this DIY upholstered headboard. I used a combination of my Ryobi Airstrike stapler and a hand stapler. But first I use spray adhesive to attach the back of the fabric to the batting and upholstery foam.

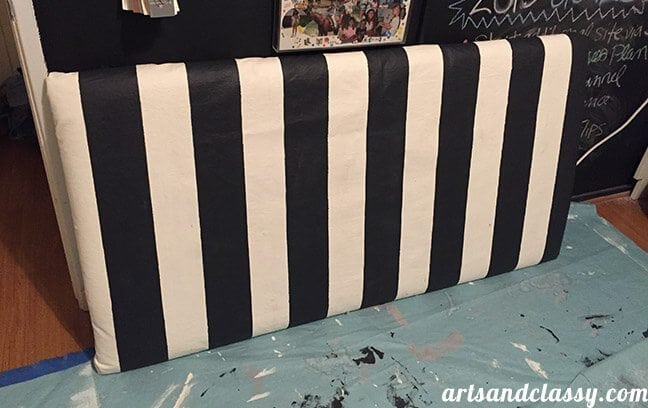
Once I finished wrapping this diy upholstered headboard, I went to assemble it to the back of the headboard 2 – 2×4 pieces of wood and they would be attached to my bed frame. I used the 2.5″ wood screws to screw through the wood cleats into the bottom of the headboard.
I am very pleased with how this came out! It was exactly what I wanted and I didn’t have to make a trip to downtown LA to go to multiple fabric stores which saves me time and money!
“When in doubt. Work with what you have.“
-Meredith Schneider
Every time I look at this headboard now, I am super proud of finishing it and not quitting when I hit a couple of speed bumps with the black lines.
Bonus: If you want to give a tufted look, then you can use buttons, an upholstery needle, and thread. You would need to drill holes into the plywood for where you want the tufts to be before attaching the foam side and excess fabric.
OR you can do it the fake way. Cut out cardboard circles, wrap them in a little piece of batting or foam, and secure to the back.
Take a hand stapler to staple 2 staples in an X formation where you would want the tufts to be on the upholstered headboard. Then hot glue the backs of the fake buttons over the X marks. There you have it a faux upholstered headboard.
- Makeover Edition: Easy No Sew Accent Pillow Room Decoration
- DIY Memo Board Ideas – An Inspiration Upcycle Project
- Makeover Edition: Bedroom with Vintage Glam Twist
- Easy DIY Metal Ottoman Glam Makeover
- Makeover Edition: Vintage Bedroom Dresser Makeover
- Makeover Edition: Window Dressing Install for My Bedroom
- Makeover Edition: DIY Vintage Glam Waterfall Chandelier
Let me know what you think of this project. Would you try it? Let me know in the comments below.
If you liked my little master bedroom makeover diy upholstered headboard project, then you might also like:


Looks great!! You have a lot more patience than I do. 🙂 I know you mentioned black lines…is the dark color black or navy?
Its this Behr color that Used on my dresser called Night Club. Kind of a charcoal grey/black.